Yokogawa Data Acquisition with PID Control CX2000 User Manual
Page 73
2-43
IM 04L31A01-17E
2
Ethernet Interface
Setting [Alarm], [Scheduled], [System], and [Report]
24.
Press the ESC key to return to the Web, E-mail setting menu.
Press the soft key corresponding to the item you wish to set.
The respective setting display appears.
Setting [Alarm E-Mail settings]: Proceed to step 25.
Setting [Scheduled E-Mail settings]: Proceed to step 42.
Setting [System E-Mail settings]: Proceed to step 54.
Setting [Report E-Mail settings]: Proceed to step 59.
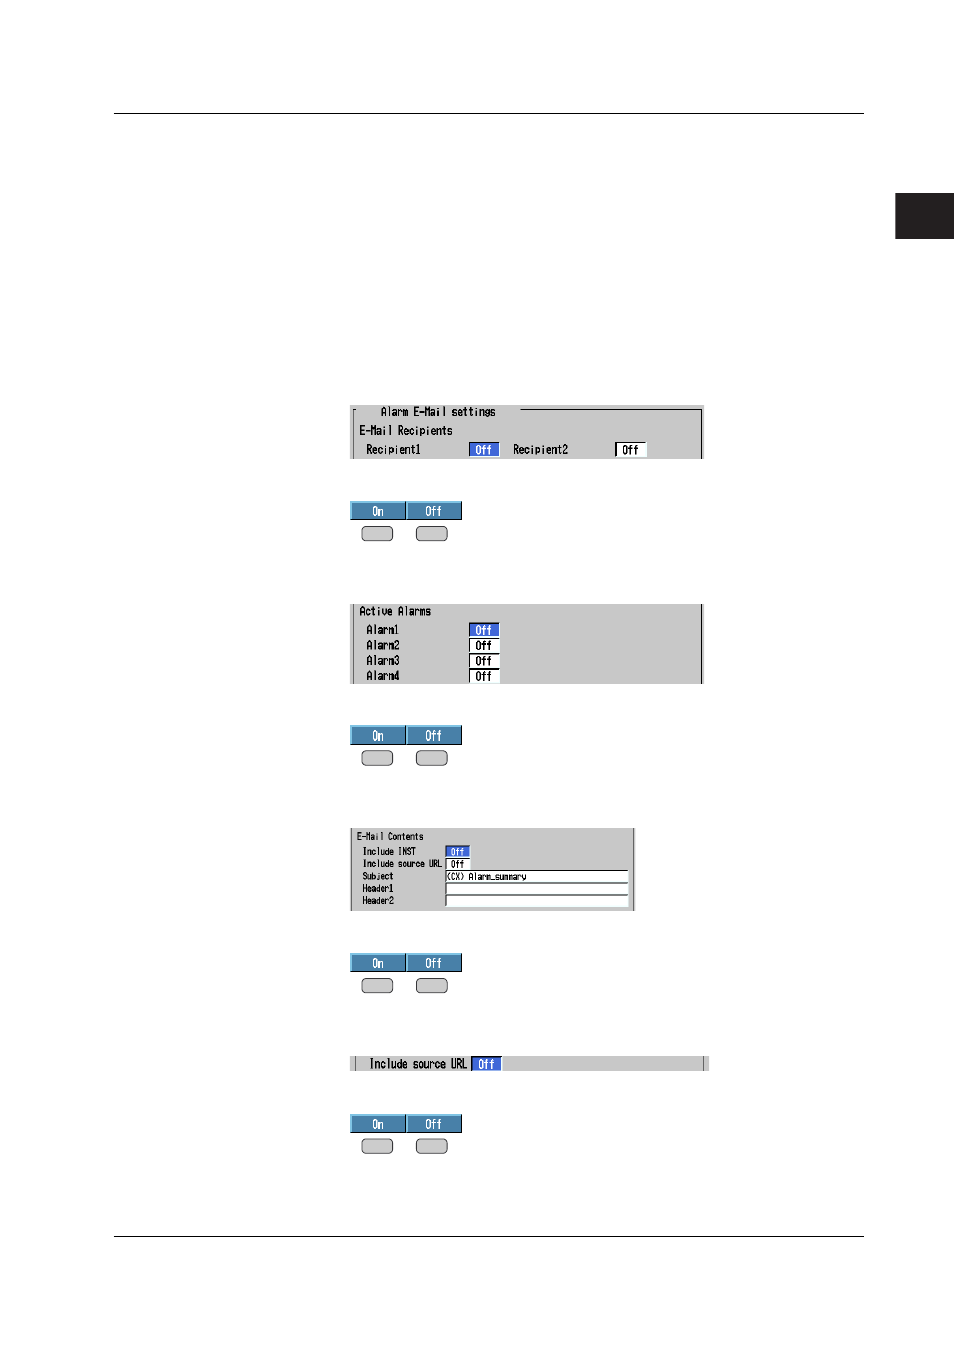
Setting [Alarm E-Mail settings]
• Setting the e-mail recipient
25.
Use the arrow keys to move the cursor to the [Recipient 1] or [Recipient 2] box.
The respective recipient address appears.
26.
Press the [On] or [Off] soft key.
• Specifying the alarm number for sending the alarm information using e-mail
27.
Use the arrow keys to move the cursor to one of the [Alarm1] to [Alarm4] boxes.
28.
Press the [On] or [Off] soft key.
• Selecting to include instantaneous values (contents of the transmitted e-mail)
29.
Use the arrow keys to move the cursor to the [Include INST] box.
30.
Press the [On] or [Off] soft key.
• Selecting to include the source URL (contents of the transmitted e-mail)
31.
Use the arrow keys to move the cursor to the [Include source URL] box.
32.
Press the [On] or [Off] soft key.
2.11 Setting the E-mail Transmission Function