Yokogawa Data Acquisition with PID Control CX2000 User Manual
Page 49
2-19
IM 04L31A01-17E
Ethernet Interface
2
Procedure
For the basic flow of operation, see “Setup Procedure Using Operation Keys” on page
ix. For the procedure of entering characters and numbers, see the user’s manual
IM04L31A01-01E
or IM04L31A01-03E.
1.
Press the MENU key.
The setting mode (control) display appears.
2.
Press the FUNC key for approximately 3 s.
The basic setting menu appears.
3.
Press the [#7] (Communication) soft key ([#9] (Communication) soft key on the
CX1000).
The communication function setting menu appears.
4.
Press the [#3] (Control (Login, Timeout)) soft key ([#5] (Control (Login,
Timeout)) soft key on the CX1000).
Communication setting display appears.
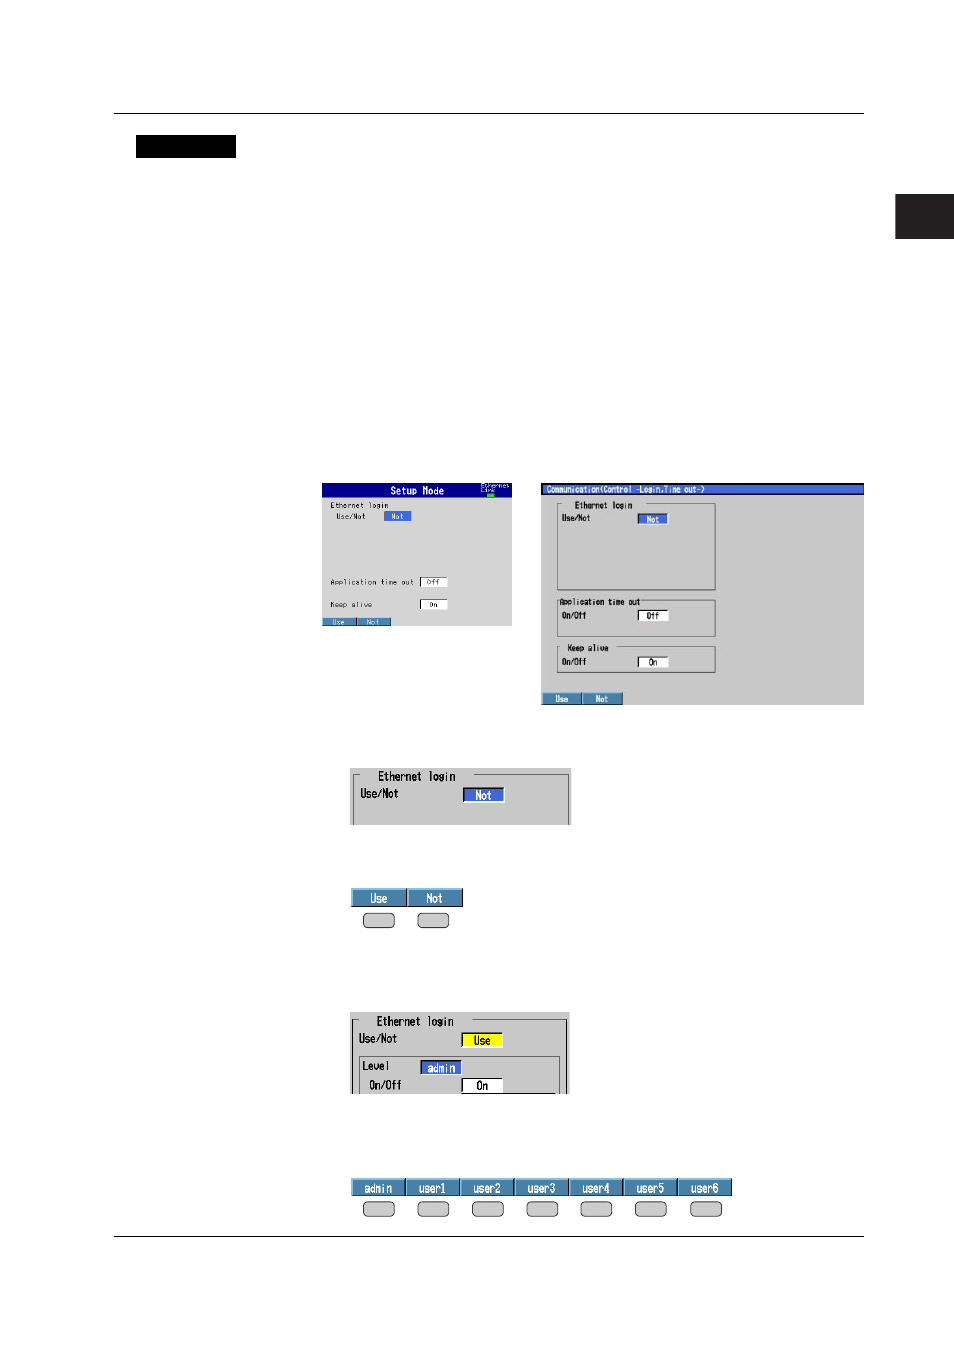
CX 2000 Communication (Control -Login,
Timeout-) setting display
CX 1000 Communication (Login,
Timeout-) setting display
Enabling/Disabling the Login Function of the CX (Use/Not)
5.
Use the arrow keys to move the cursor to the [Use/Not] box.
6.
Press the [Use] or [Not] soft key.
If you selected [Use] proceed to step 7; if you selected [Not] proceed to step 20.
Registering Users
• Selecting the user level
7.
Use the arrow keys to move the cursor to the [Level] box.
8.
Press one of the soft keys from [admin] to [user6] to select the user level.
To set the user level to ADMINISTRATOR, select [admin]; To set the user level
to USER, select [user1] to [user6].
2.7 Setting the Login and Timeout Functions of Ethernet Communications