5 measure hole (cycle 421, din/iso: g421), Cycle run, Please note while programming – HEIDENHAIN iTNC 530 (34049x-08) Cycle programming User Manual
Page 422: See "measure hole (cycle 421, Cycle run please note while programming

422
Touch probe cycles: automatic workpiece inspection
16.5 MEA
S
URE HOLE (Cy
cle
421, DIN/ISO:
G421)
16.5 MEASURE HOLE (Cycle 421,
DIN/ISO: G421)
Cycle run
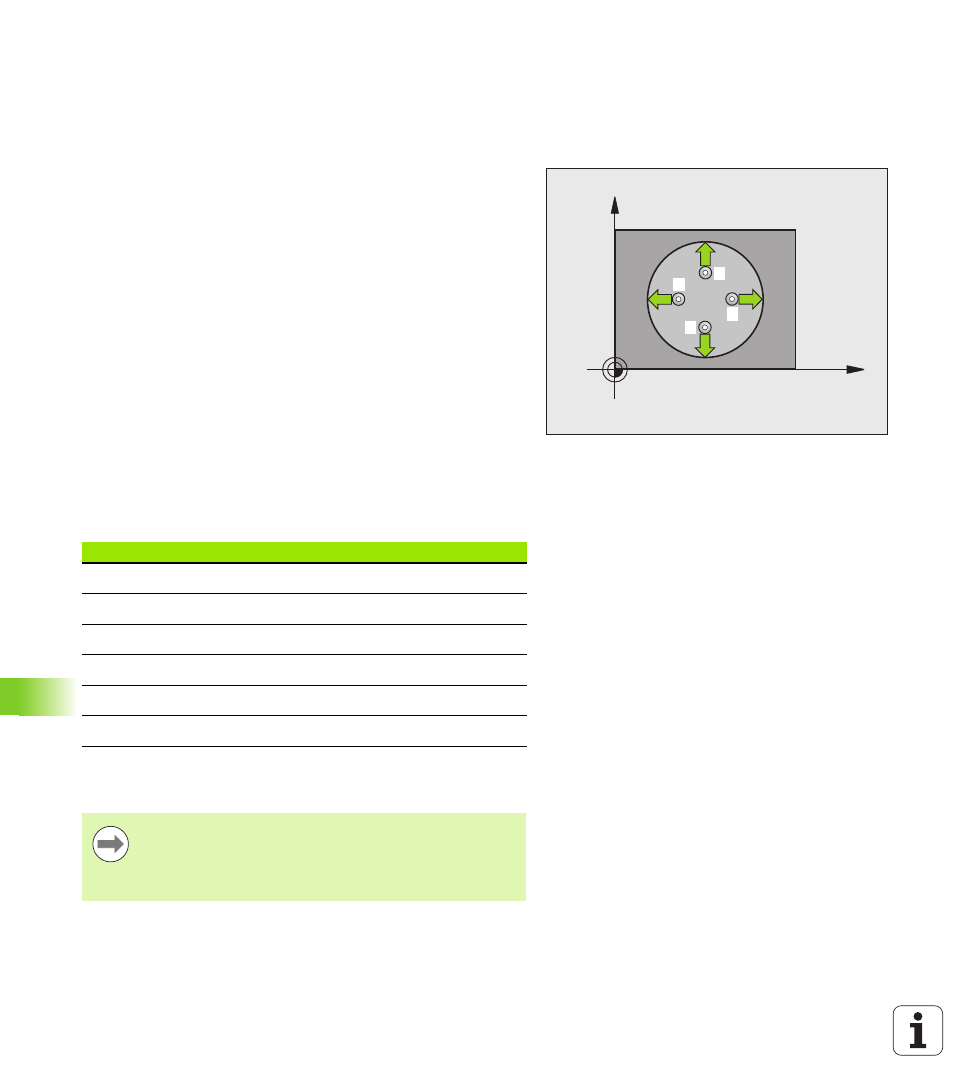
Touch Probe Cycle 421 measures the center and diameter of a hole (or
circular pocket). If you define the corresponding tolerance values in
the cycle, the TNC makes a nominal-to-actual value comparison and
saves the deviation value in system parameters.
1
Following the positioning logic (see "Executing touch probe cycles"
on page 332), the TNC positions the touch probe to the probe
starting point
1
at rapid traverse (value from MP6150). The TNC
calculates the probe starting points from the data in the cycle and
the safety clearance from MP6140.
2
Then the touch probe moves to the entered measuring height and
probes the first touch point at the probing feed rate (MP6120). The
TNC derives the probing direction automatically from the
programmed starting angle.
3
Then the touch probe moves in a circular arc either at measuring
height or at clearance height to the next starting point
2
and probes
the second touch point.
4
The TNC positions the probe to starting point
3
and then to starting
point
4
to probe the third and fourth touch points.
5
Finally the TNC returns the touch probe to the clearance height and
saves the actual values and the deviations in the following Q
parameters:
Please note while programming:
X
Y
1
2
3
4
Parameter number
Meaning
Q151
Actual value of center in reference axis
Q152
Actual value of center in minor axis
Q153
Actual value of diameter
Q161
Deviation at center of reference axis
Q162
Deviation at center of minor axis
Q163
Deviation from diameter
Before a cycle definition you must have programmed a
tool call to define the touch probe axis.
The smaller the angle, the less accurately the TNC can
calculate the hole dimensions. Minimum input value: 5°.
