7 sof tw ar e f or d ata t ransf er – HEIDENHAIN TNC 426B (280 472) ISO programming User Manual
Page 336
HEIDENHAIN TNC 410, TNC 426, TNC 430
321
Data transfer between the TNC 410 and TNCremo
Ensure that:
■
The TNC is connected to the correct serial port on your PC
■
The data transfer speed set on the TNC is the same as that set on
TNCremo
Once you have started TNCremo, you will see a list of all of the files
that are stored in the active directory on the left of the window
Using the menu items
active directory or select another directory. To start data transfer at
the TNC (see section 4.5 ”File Management TNC 410”), select
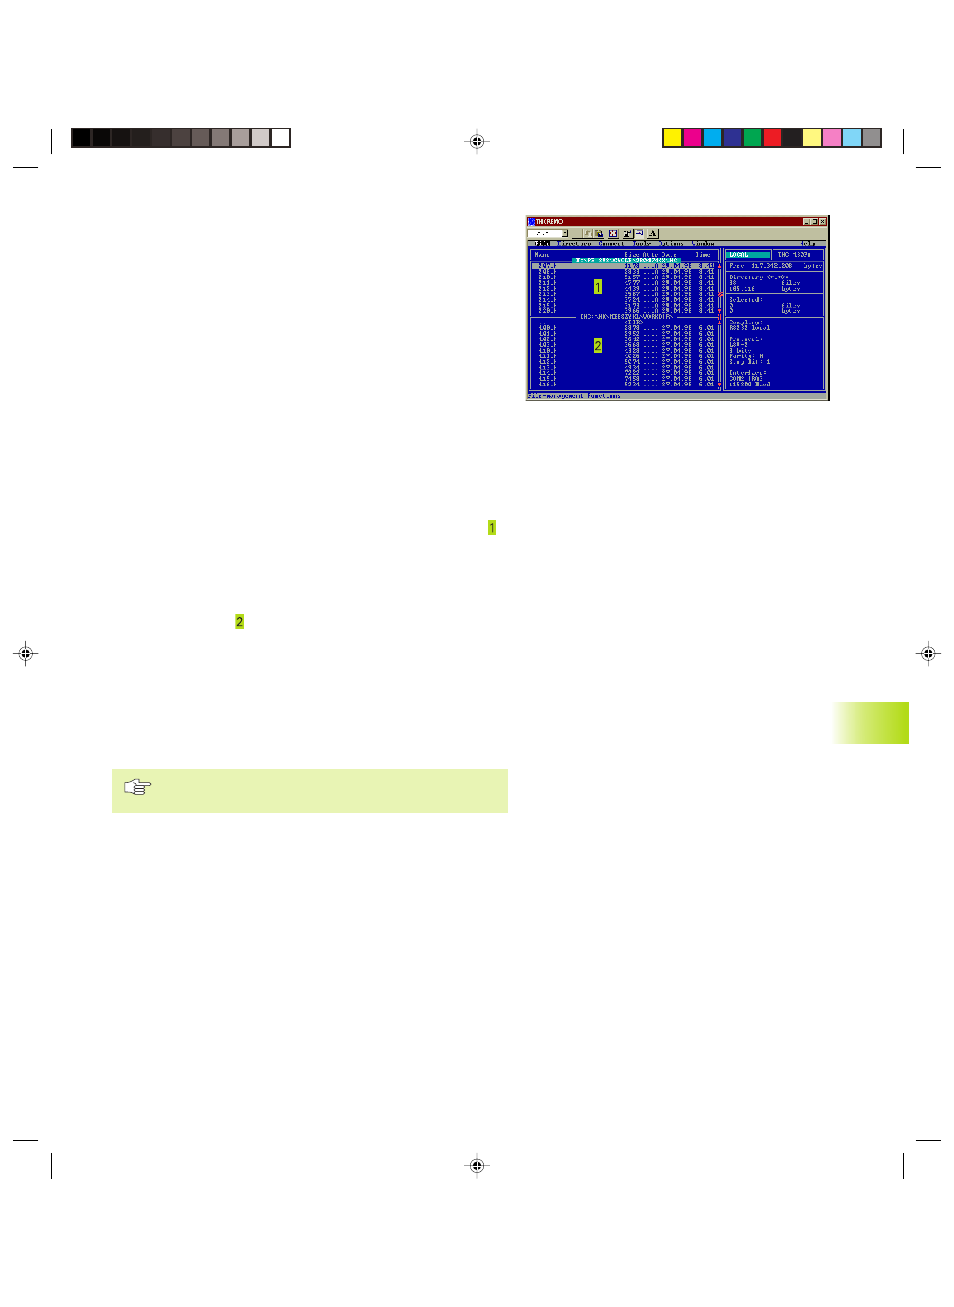
Data transfer between TNC 426, TNC 430 and TNCremo
Ensure that:
■
The TNC is connected to the correct serial port on your PC
■
The data transfer speed set on the TNC for LSV2 operation is the
same as that set on TNCremo.
Once you have started TNCremo, you will see a list of all of the files
that are stored in the active directory on the left of main window .
Using the menu items
active directory or select another directory on your PC.
To establish the connection with your TNC, select the items
directory structure from the TNC and displays this at the bottom left
of the main window ( ). To transfer a file from the TNC to the PC,
select the file in the TNC window (highlighted with a mouse click)
and activate the functions
To transfer a file from the PC to the TNC, select the file in the PC
window and activate the functions
End TNCremo
Select the menu items
combination ALT+X
Refer also to the TNCremo help texts where all of the
functions are explained in more detail.
13.7 Sof
tw
ar
e f
or D
ata T
ransf
er
Pkap13.pm6
29.06.2006, 08:06
321