2 setting the datum with a 3-d touch probe, 2 set ting the d at um with a 3-d touc h pr obe – HEIDENHAIN TNC 426B (280 472) ISO programming User Manual
Page 319
12 3-D Touch Probes
304
12.2 Setting the Datum with a 3-D Touch
Probe
The following functions are available for setting the datum on an
aligned workpiece:
■
Datum setting in any axis with PROBING POS
■
Defining a corner as datum with PROBING P
■
Setting the datum at a circle center with PROBING CC
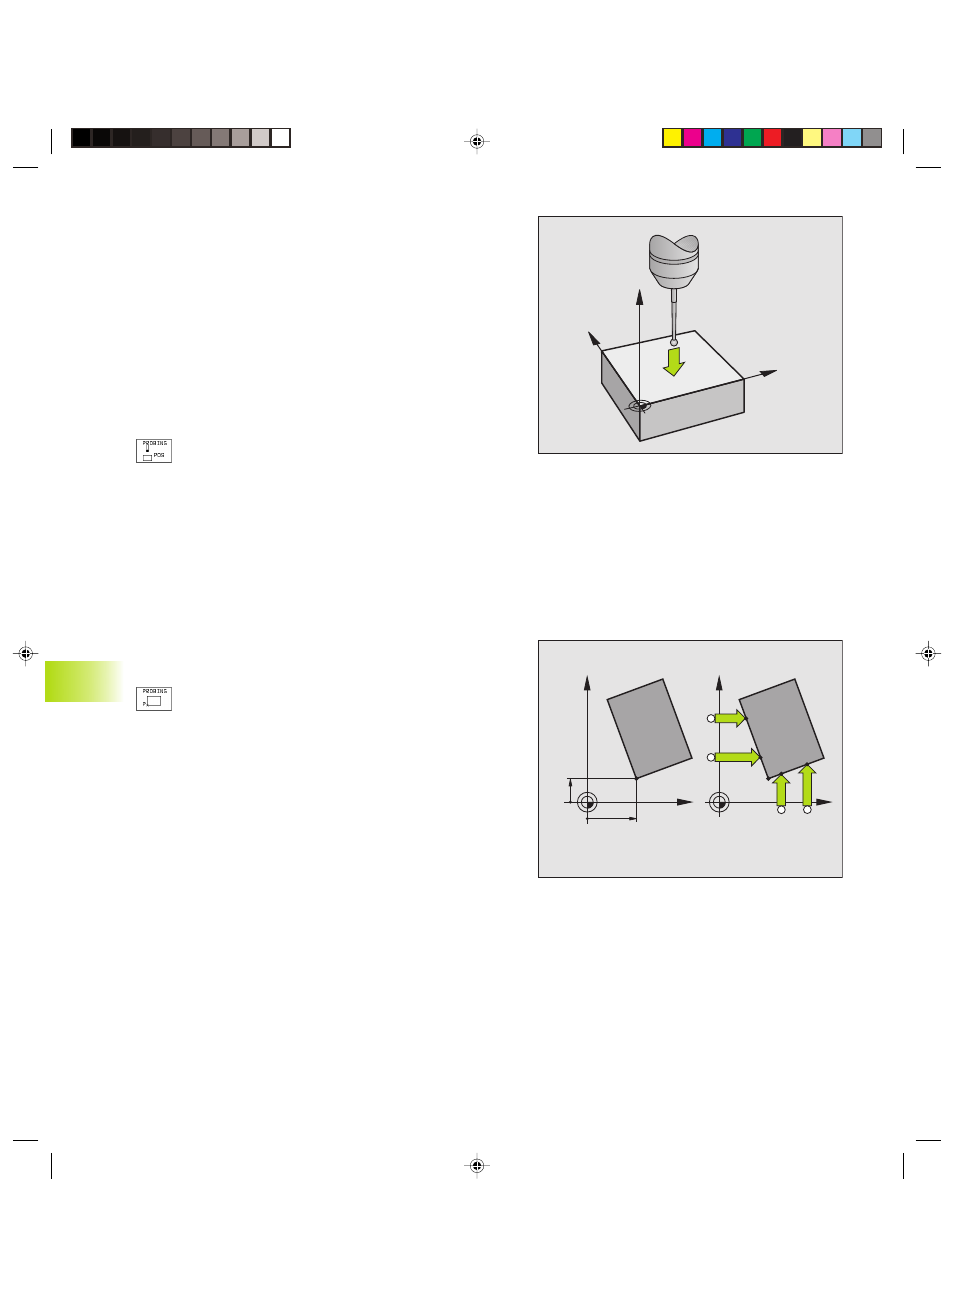
To set the datum in any axis (see figure at upper right)
ú
To select the touch probe function: Press the
PROBING POS soft key
ú
Move the touch probe to a starting position near the
touch point.
ú
Select the probe axis and direction in which you wish
to set the datum, such as Z in direction Z–. Selection is
made via soft keys.
ú
To probe the workpiece, press the machine START
button.
ú
Datum: Enter the nominal coordinate and confirm you
entry with ENT.
Corner as datum — using points that were already probed for a
basic rotation (see figure at right)
ú
Select the touch probe function: Press the PROBING P
soft key
ú
Touch points of basic rotation ?: Press ENT to transfer
the touch point coordinates to memory.
ú
Position the touch probe at a starting position near the
first touch point of the side that was not probed for
basic rotation.
ú
Select the probe direction with a soft key.
ú
To probe the workpiece, press the machine START
button.
ú
Position the touch probe near the second touch point
on the same side.
ú
To probe the workpiece, press the machine START
button.
ú
Datum: Enter both datum coordinates into the menu
window, and confirm your entry with the ENT key.
ú
To terminate the probe function, press the END key.
12.2 Set
ting the D
at
um with a 3-D
Touc
h
Pr
obe
Y
X
Z
P
X=?
Y=?
X
Y
P
X
Y
Okap12.pm6
29.06.2006, 08:06
304