B.2.4 cabinet leveling, I. locating the cabinet, Ii. leveling the cabinet – H3C Technologies H3C S9500 Series Switches User Manual
Page 157
Installation Manual
H3C S9500 Series Routing Switches
Appendix B Installation of B68 Cabinet
B-6
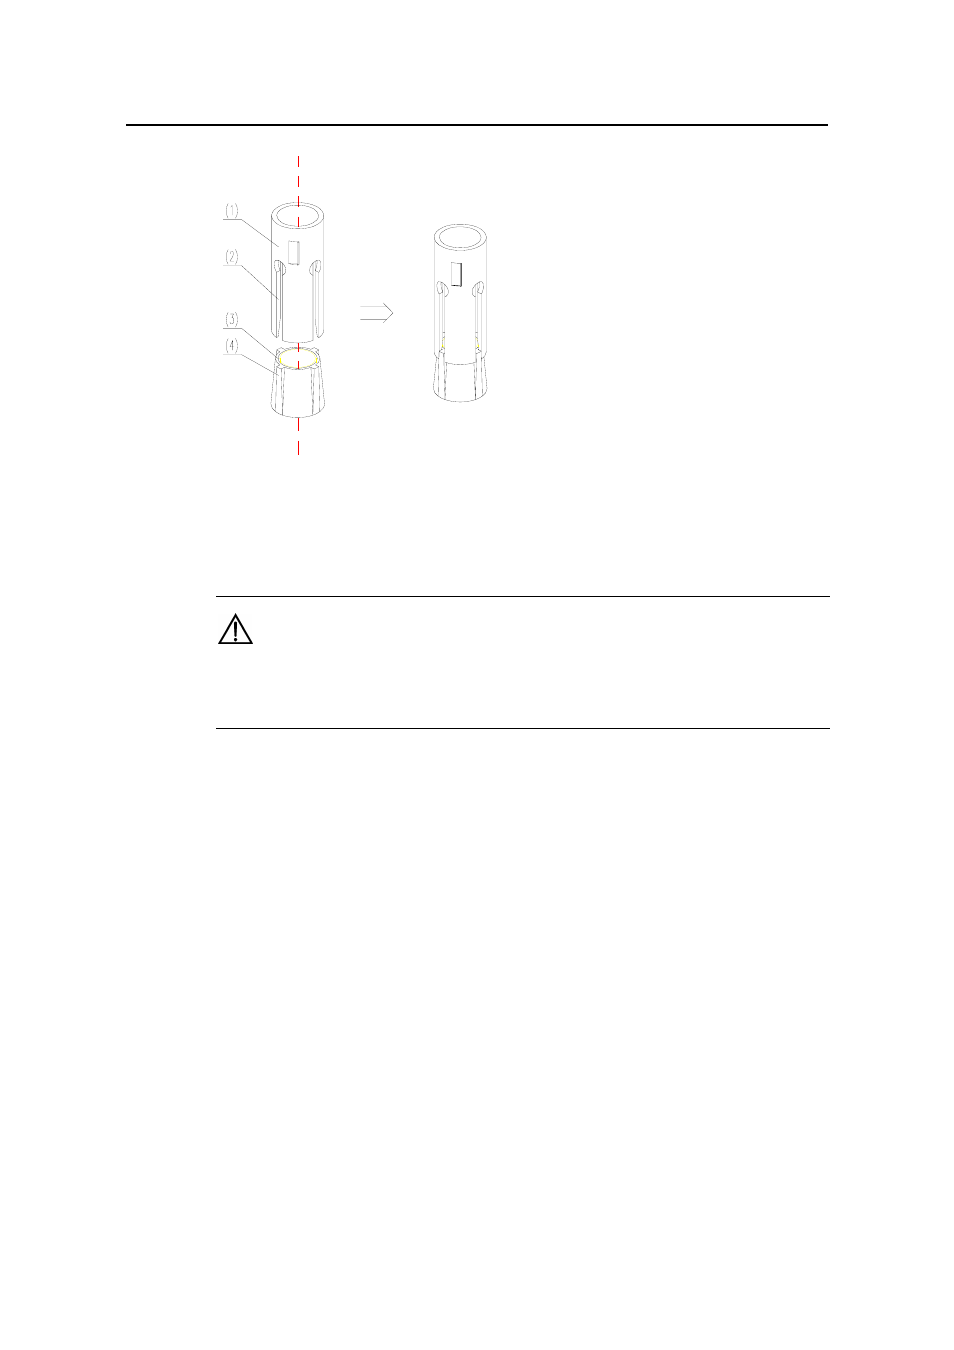
(1) Expansion tube
(2) Guide trough of expansion tube
(3) Expansion nut
(4) Guide rib of expansion nut
Figure B-6
Installation of expansion tube and expansion nut
Caution:
The guide rib of expansion nut must be inserted in advance into the guide trough of the
expansion tube, or the expansion bolt cannot be installed and fastened properly.
B.2.4 Cabinet Leveling
I. Locating the cabinet
Move the cabinet to the planned location with its feet aligned with the corresponding
foot location marks.
II. Leveling the cabinet
Place a horizontal ruler in two orthogonal directions on top of the cabinet to check the
cabinet levelness. If the cabinet is not leveled, loosen the retaining nuts on the cabinet
feet with a wrench and turn the cabinet foot finely to adjust the cabinet height to make it
leveled. Meanwhile, align all of the cabinets, and then lock the retaining nuts on the
cabinet feet until they are pressed tightly against the bottom plane of the cabinet.
Figure B-7 shows the cabinet feet fastening
- H3C S7500E Series Switches H3C S7500 Series Switches H3C S5800 Series Switches H3C S5820X Series Switches H3C S5500 Series Switches H3C S5120 Series Switches H3C S3610[S5510] Series Switches H3C S3600 Series Switches H3C S3100 Series Switches OAA For Routers H3C WX6000 Series Access Controllers H3C WX5000 Series Access Controllers H3C WX3000 Series Unified Switches H3C LSQM1WCMB0 Access Controller Module H3C LSBM1WCM2A0 Access Controller Module H3C WA2600 Series WLAN Access Points H3C WA2200 Series WLAN Access Points H3C SecPath F1000-E H3C SecPath F1000-A H3C SecPath F1000-S H3C SecPath F100-A H3C SecPath F100-C-EI H3C SecPath V100-E H3C SecCenter iTAS H3C Device Manager