4 replacing a card, I. required tools, Ii. removing a card – H3C Technologies H3C S9500 Series Switches User Manual
Page 118: Iii. installing a card, 4 replacing a card -9
Installation Manual
H3C S9500 Series Routing Switches
Chapter 6 Switch Monitoring and Maintenance
6-9
6.2.4 Replacing a Card
The SRPU, LPUs and service processor cards of the S9500 series are in similar
structure and can be installed and removed almost in the same way. This section
describes the general procedures for removing and installing these cards.
Cards of the S9500 series are hot-swappable.
I. Required tools
z
ESD-preventive wrist strap
z
Screwdriver
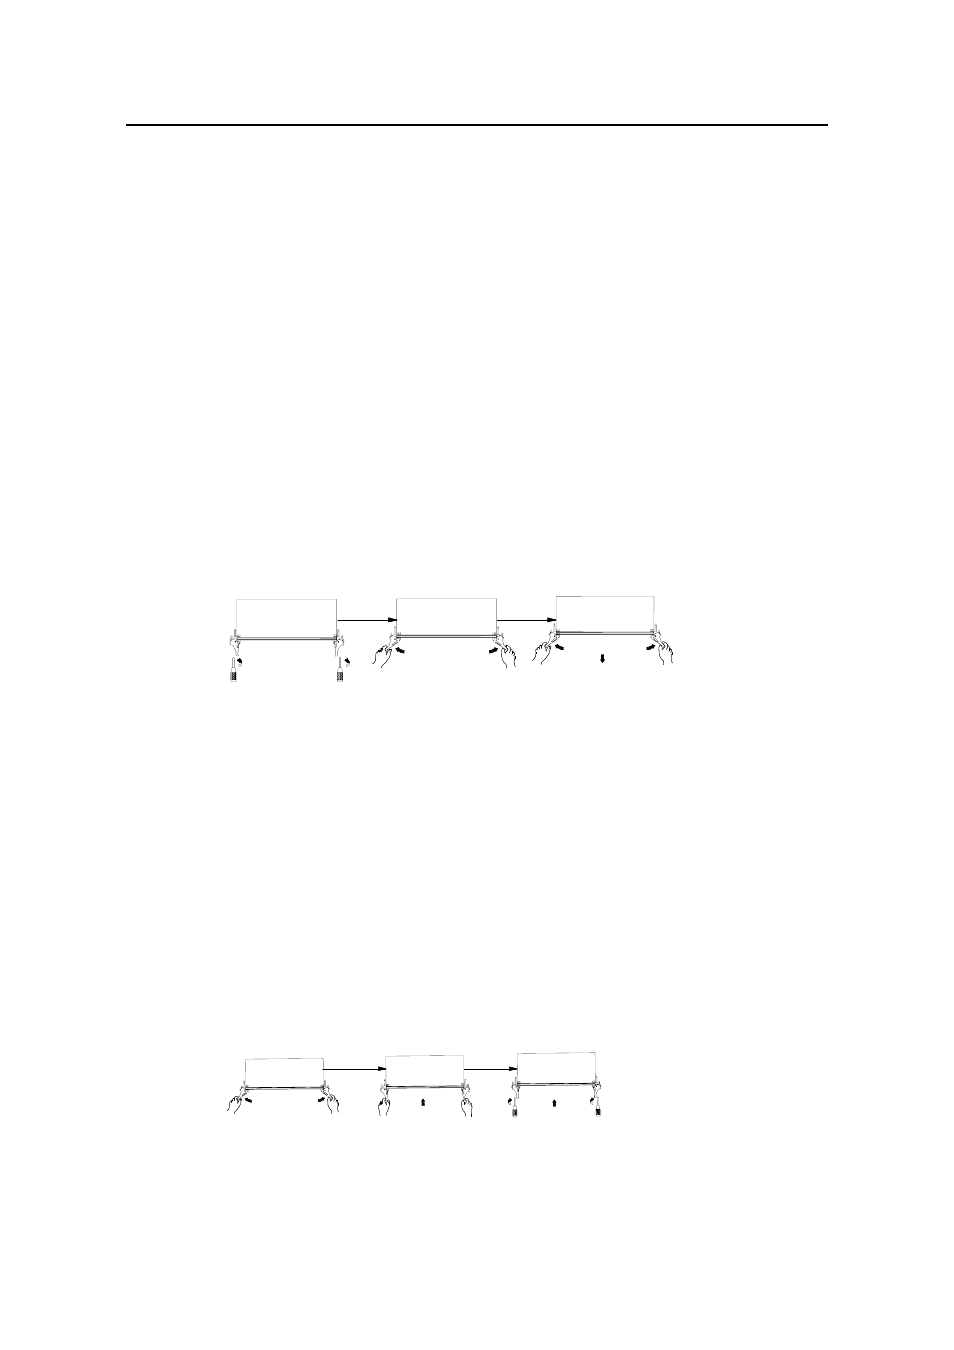
II. Removing a card
Step 1: Wear the ESD-preventive wrist strap and unscrew the captive screws on the
card with a flathead screwdriver.
Step 2: Hold the ejector levers on the card with both hands and press them outward to
separate the locking pin of the card from the motherboard.
Step 3: Gently pull the card out of the slot along the guides.
Figure 6-7 Remove a card
III. Installing a card
Step 1: Wear the ESD-preventive wrist strap and unscrew the mounting screws fixing
the blank filter panel in the slot where you want to install the card, and remove the blank
filler panel.
Step 2: Hold the ejector levers of the card with both hands and pull them outward, align
the card with the guides in the chassis, and slide it gently into the slot until its
positioning pin touches the positioning hole in the chassis.
Step 3: Pull the ejector levers inward to lock the positioning pin of the card into the
positioning hole in the chassis.
Step 4: Fasten the captive screws to fix the card.
Figure 6-8 Install a card
- H3C S7500E Series Switches H3C S7500 Series Switches H3C S5800 Series Switches H3C S5820X Series Switches H3C S5500 Series Switches H3C S5120 Series Switches H3C S3610[S5510] Series Switches H3C S3600 Series Switches H3C S3100 Series Switches OAA For Routers H3C WX6000 Series Access Controllers H3C WX5000 Series Access Controllers H3C WX3000 Series Unified Switches H3C LSQM1WCMB0 Access Controller Module H3C LSBM1WCM2A0 Access Controller Module H3C WA2600 Series WLAN Access Points H3C WA2200 Series WLAN Access Points H3C SecPath F1000-E H3C SecPath F1000-A H3C SecPath F1000-S H3C SecPath F100-A H3C SecPath F100-C-EI H3C SecPath V100-E H3C SecCenter iTAS H3C Device Manager