Installing the rm-200sa on a wall, Warning – Toa SX-2000 Series Installation User Manual
Page 82
82
2.5.10. Installing the RM-200SA on a wall
[Mounting hardware]
to mount the rm-200SA on the wall, the following parts are required.
Wall mounting bracket for the rm-210 (model WB-rm200) ...... 1 (optional)
m3.5 x 20 screw for electrical box .............................................. 2 (supplied with the WB-rm200)
4 x 25 tapping screw for wooden wall ........................................ 2 (supplied with the WB-rm200)
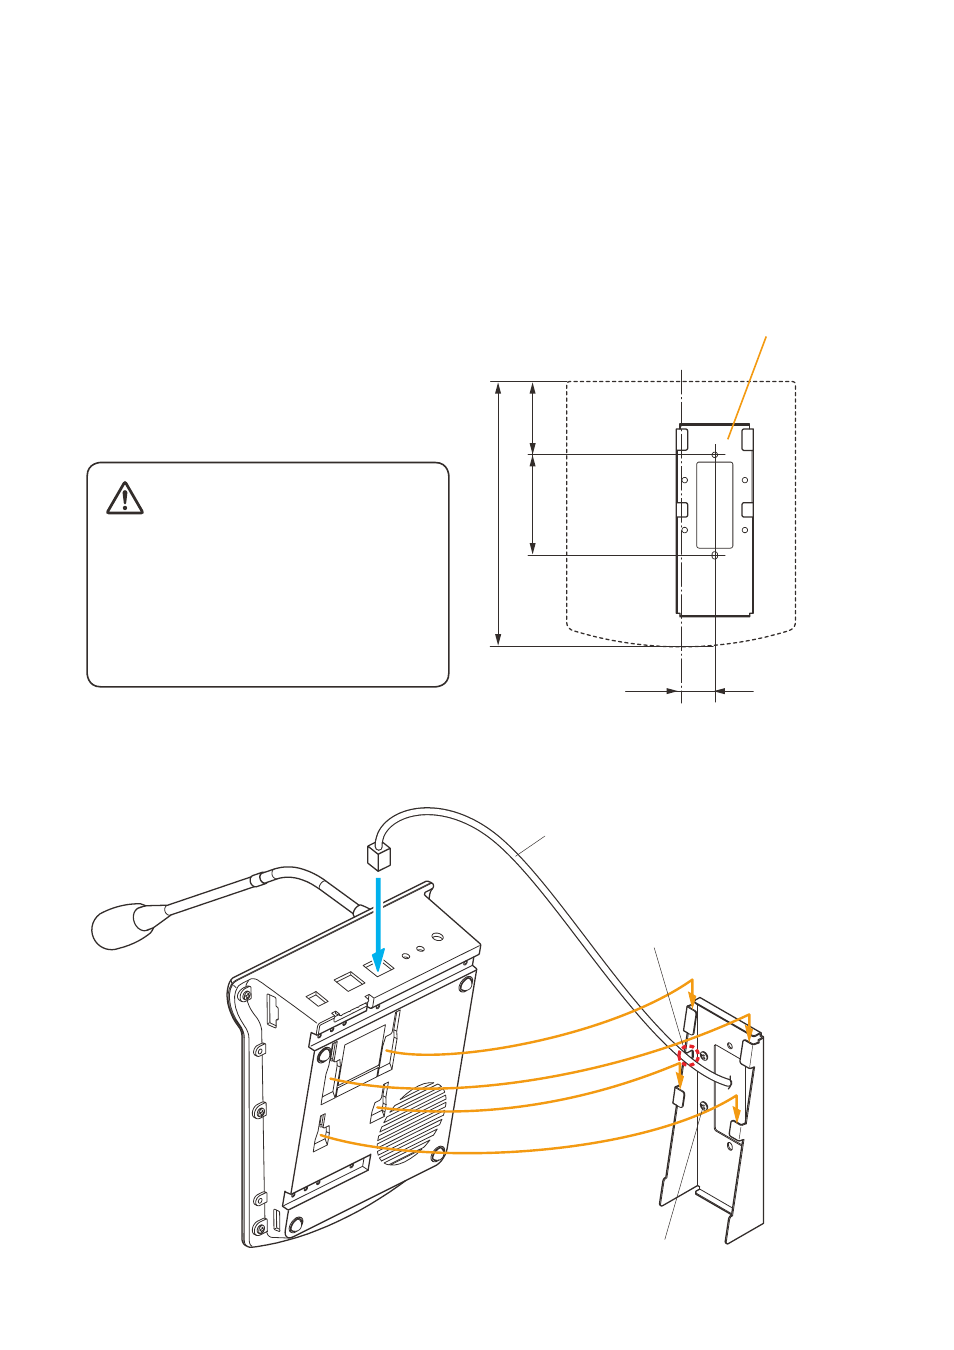
Step 1. Attach the WB-rm200 Wall-mounting
Bracket on the wall.
In this case, leave the lINK cable out of the
notch in the bracket.
Note
Since there are 2 types of mounting screws
for an electrical box and for wall. Select ones
according to the mounting method.
• Install the unit only in a location that can
structurally support the weight of the
unit and the mounting bracket. Doing
otherwise may result in the unit falling
down and causing personal injury and/or
property damage.
• Be sure to use 2 screws when mounting
the bracket to the wall.
Step 2. Hook the bottom surface of the rm-200SA onto the WB-rm200.
Step 3. Plug the lINK cable into the rm-200SA's lINK terminal (rm lINK).
RM-200SA
LINK
1
2
3
Wall mounting bracket
WB-RM200 (optional)
Wall mounting screw
(supplied with the WB-RM200)
LINK cable
Notch
60.
8
83.
5
220.
3
28
RM-200SA
WB-RM200
(optional)
[wB-RM200 mounting dimensions]
unit: mm
wARNINg