Warning – Toa SX-2000 Series Installation User Manual
Page 78
78
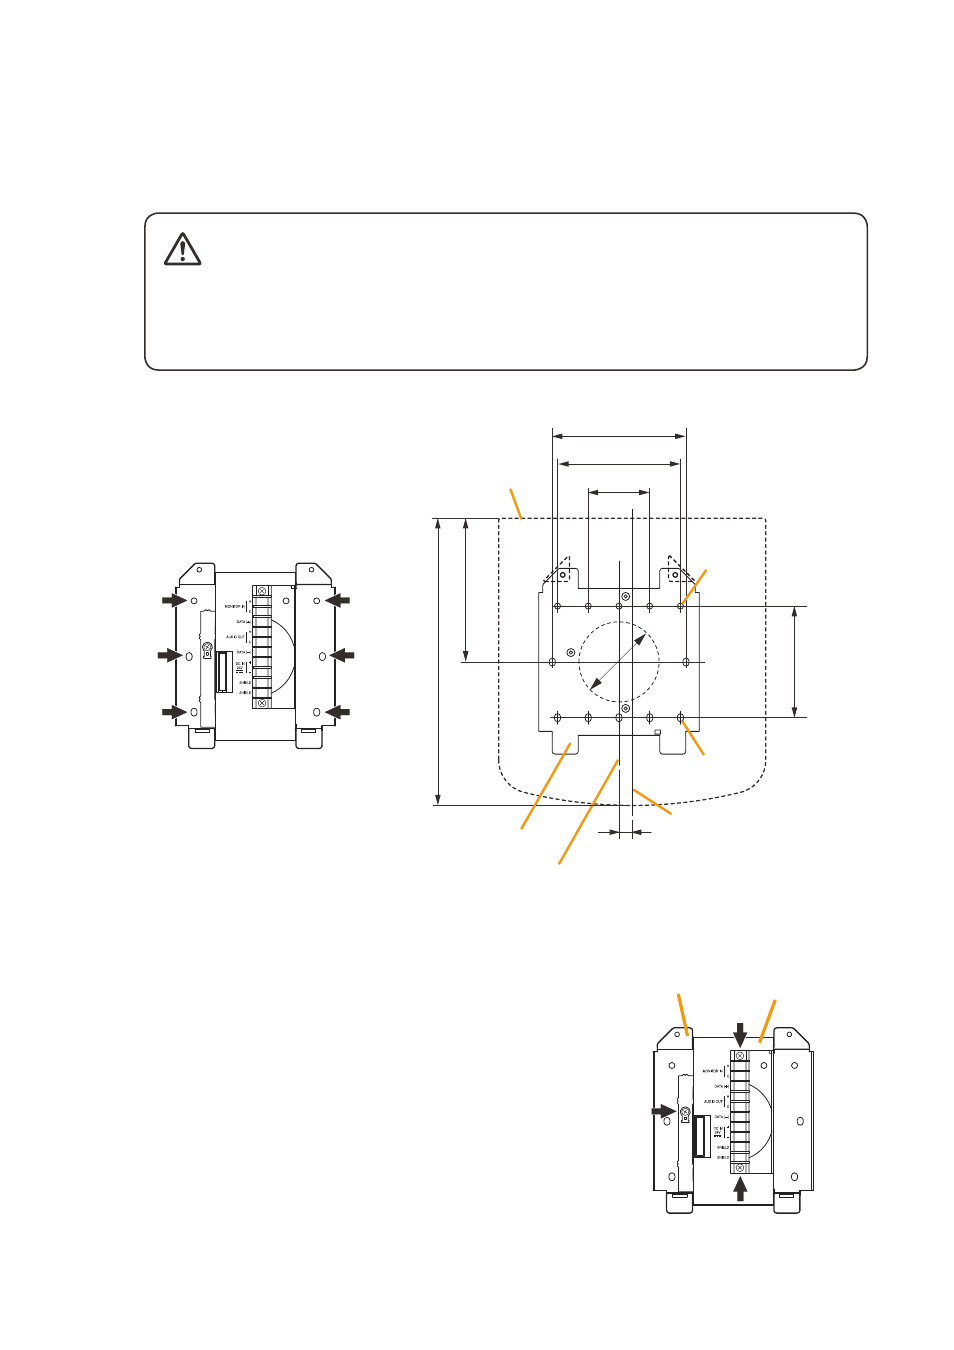
1-2. Installing to a 1-gang electrical box
(1) unscrew 3 screws (indicated by arrows in the figure at right)
that fix the Bracket A to the Bracket B of the wall mount bracket
unit.
Wall mount bracket unit
(supplied with the RM-200SF)
Bracket A
Bracket B
• Install the unit only in a location that can structurally support the weight of the unit and the
mounting bracket. Doing otherwise may result in the unit falling down and causing personal
injury and/or property damage.
• Be sure to install the bracket on the wall using 2 or more screws.
Wall mount bracket unit
for the RM-200SF
Wall mount bracket unit
(supplied with the RM-200SF)
RM-200SF
5-
ø
4.5
7-4.5 x 6.5
Wall mount bracket unit's center line
RM-200SF's center line
9.7
46
100
92
ø60
83.5
107.6
215
Notes
• Six mounting holes indicated by arrows
in the figure below can be used for
securing.
• When securing the unit with 2 screws,
be sure to use a pair of holes located in
the middle of the Bracket A.
unit: mm
Step 1. Install the wall mount bracket unit supplied with the rm-200Sf on the wall.
1-1. Installing directly on the wall
Install the unit on the wall using 2 screws or more depending on the installation location.
the rm-200Sf comes with 2 tapping screws 4 x 25 for direct wall mounting.
[Installation]
wARNINg