Outputting log data, Sx-2000sm: dip switches 1 and 2 operations), P. 154 – Toa SX-2000 Series Installation User Manual
Page 154
154
9. OUTpUTTINg LOg DATA
(SX-2000SM: DIp Switches 1 and 2 operations)
By writing the SX-2000 system's log data to a cf card in the ".s2l" file format and displaying this data on a Pc
installed with the SX-2000 Setting Software, the data can be output as an Excel cSV file. the log data includes
2 types of data: operation log data that contains all logs and failure log data that contains only failure logs.
Both data are saved to a cf card with a file name "Sx2kop**.s2l" for the operation log data and "Sx2kfa**.
s2l" for the failure log data automatically assigned. ("**" represents a number from 00 to 99 indicating the
order in which the logs have been saved. If more than 100 files are saved, the oldest files are overwritten in
chronological order.)
the newness or oldness of a file may be ascertained by checking its date. Shown below is the procedure for
writing the SX-2000Sm's log data to the cf card.
Notes
• When storing log data on a CF card, confirm in advance that it has at least 15 megabytes of free space.
• Do not operate the DIP switch while the CF card access indicator inside the protective cover is flashing.
• Reactivating the SX-2000SM erases the log data temporarily stored in SX-2000SM memory.
So, when storing log data on a cf card, be sure to perform that before reactivating the SX-2000Sm.
• The SX-2000SM operates on the current setting data until restarted even if the CF card has been removed
from the SX-2000Sm for reading log data.
• Operation log data is recorded every hour.
• Failure log data is recorded within 100 seconds after a failure has occurred.
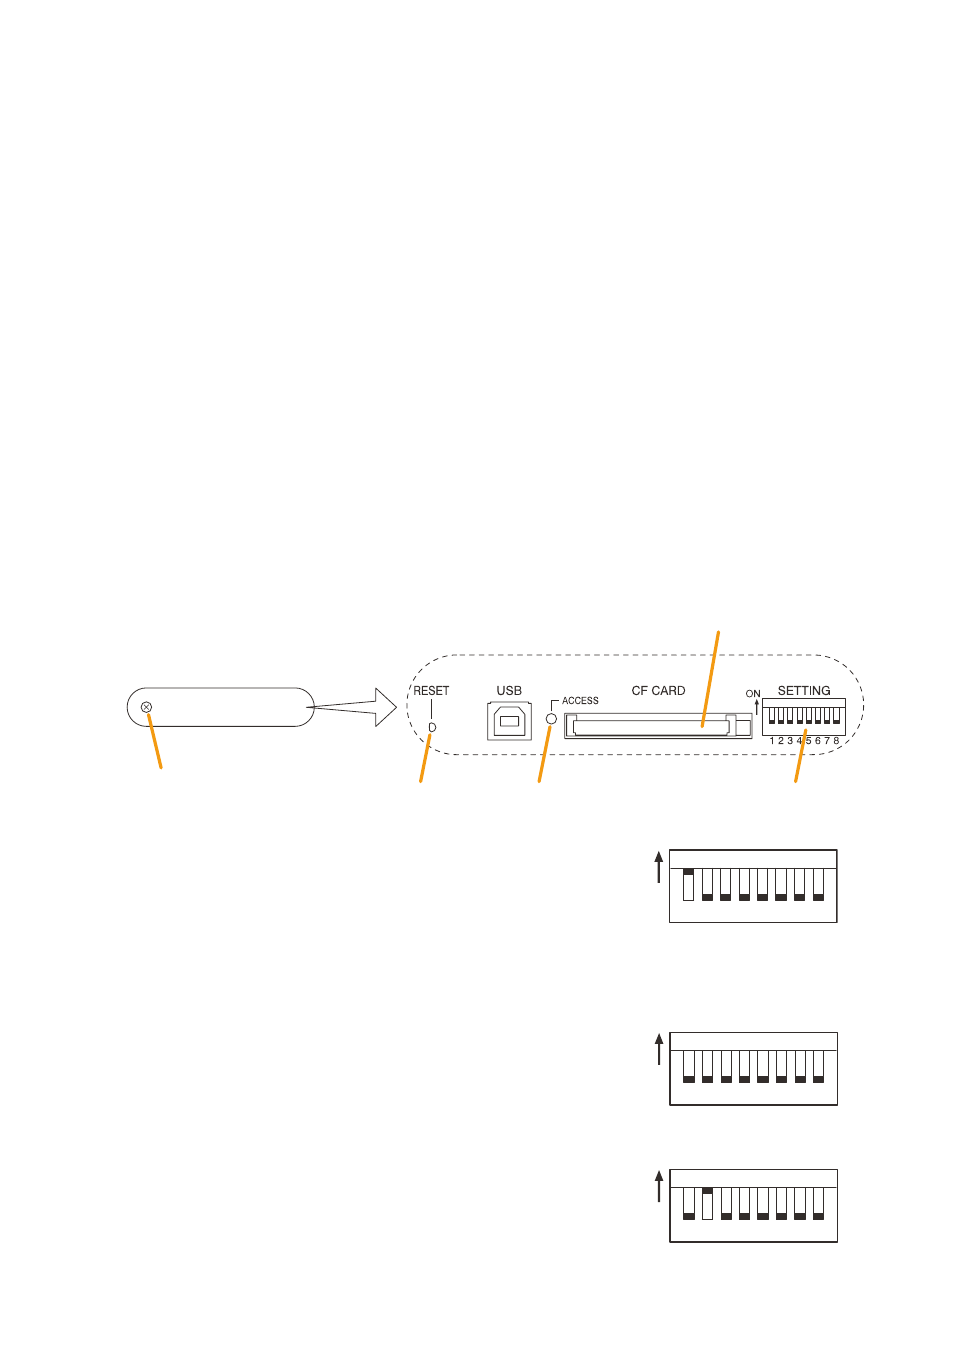
Step 1. remove the protective cover on the SX-2000Sm's front panel by removing the screws securing it using
a Phillips screwdriver.
CF card access indicator
Reset key
DIP switch
CF card slot
Screw
Protective cover
Inside of the protective cover
Step 2. Set DIP switch 1 to oN.
log data is saved to the cf card at this time.
Step 3. Confirm that the CF card access indicator has gone off, then
set DIP switch 1 to the off position.
Step 4. Set DIP switch 2 to oN.
Access to the cf card stops, allowing the card to be removed.
ON
1 2 3 4 5 6 7 8
Note: DIP switch 1 is set to off
by default.
ON
1 2 3 4 5 6 7 8
ON
1 2 3 4 5 6 7 8