Creating a sample application file chapter 5 – Rockwell Automation 2711 PANELBUILDER SOFTWARE USER MANUAL User Manual
Page 140
Creating a Sample Application File
Chapter 5
5-26
Indicate that the button is for the front conveyor. Since this label is an
identifier and not part of the button’s On/Off state, use Outer Text—it is
linked to the button, but not inside it.
1.
Choose Outer Text from the States & Text menu. The Outer Text
menu will appear.
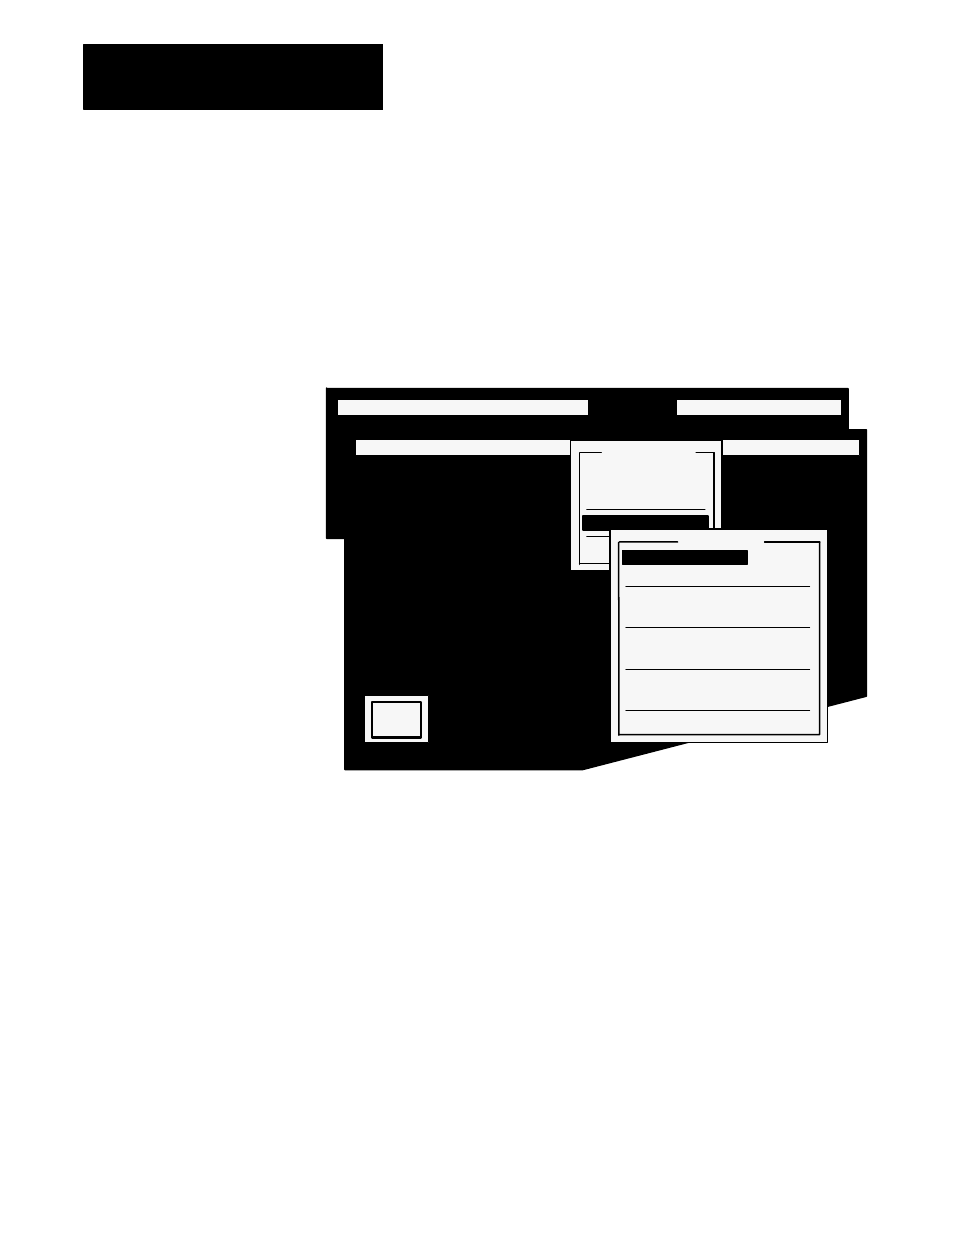
Figure 5.37
Outer Text Menu
20070
OBJECT MENU: Move & Size Look
States & Text
Screen Utility Exit
OBJECT MENU: Move & Size Look States & Text Screen Utility Exit
C
.
O
.
N
.
V
.
E
.
Y
.
O
.
R
.
G
.
C
.
O
.
N
.
T
.
R
.
O
.
L
.
S
. . . . . . . . . . . . . . . . . . . . . . . . . . . . . . . . . . . . . . . . . .
States & Text
State 0
State 1
Display States
Outer Text
Quit
Outer Text
Edit
Move
Foreground Color
Green
Background Color
Black
Underline
No
Blink
No
Character Height
Single
Character Width
Single
Quit
O
.
N
.
2.
Choose Edit and type FRONT, then press Enter.
3.
Choose Move and center the legend above the button.
4.
Choose Foreground Color and set it to White.
Once the parameters are set, define the PLC addresses for this push button.
1.
Open the Address menu.
2.
Choose Button Control Address.
The addresses for this push button are in the Object Address list shown in
Figure 4.14, Chapter 4, Planning Your Application.
Set the Button Control Address window as illustrated in
Figure 5.38
, then
choose Update Address.