5 working with mapped network cameras – EVS XT3 MulticamLSM Version 11.01 - November 2012 Operation Manual User Manual
Page 166
Issue
11.01.D
Multicam - Version 11.01 – Operating Manual
EVS Broadcast Equipment SA – November 2012
156
13.4.6 How to Create Local Clips with Remote
Record Trains
To create local clips with remote record trains, proceed as follows:
1. Select the
Records mode in the Network menu.
2. Select the Remote LSM in the list.
The LCD display returns to the normal mode
3. Press the RECORD key to select the Live mode.
A two to three-second delay to Live has been defined to ensure safe operations.
4. Use the JOG key to go in search mode.
5. Change camera angles if necessary. The changing camera angles on
network train will always switch in pause on the new camera.
Refer to the note below about the remote camera name.
6. Press the IN key to mark your Short IN point of the clip.
7. Search the Short OUT point and press the OUT key to mark it.
8. Select the clip location to store and press the corresponding F_ key.
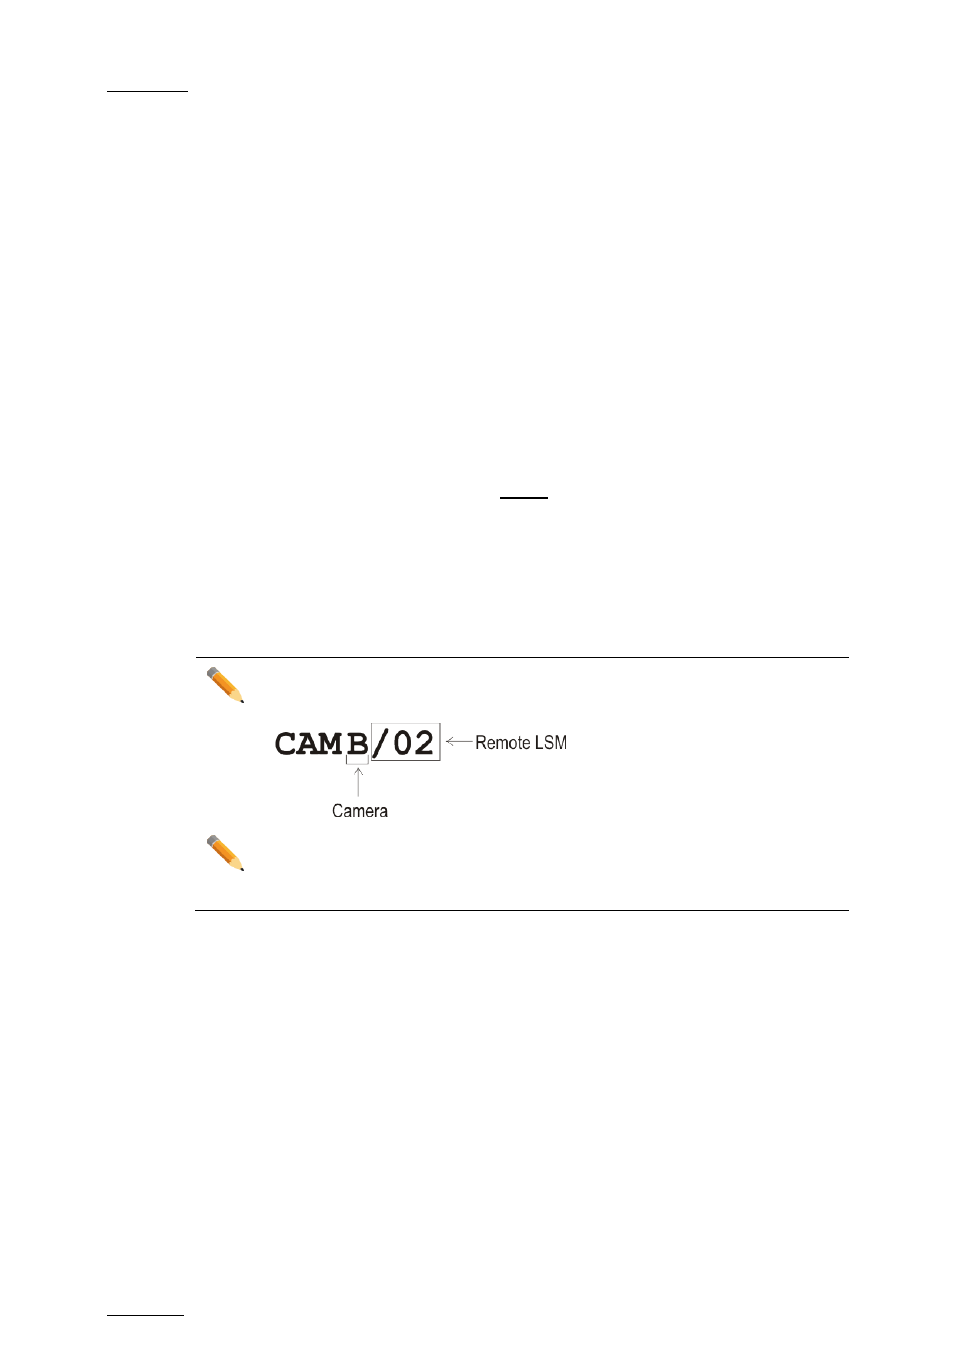
Note
The label of the remote camera is different in order to identify it easily
Note
The key flashes during transfer. When the key lights green, the transfer is
completed and the clip is available for playback from the local system.
13.5 Working with Mapped Network
Cameras
If you have activated the
Authorize cam mapping parameter (p.10.1 F1) and defined
mapped network cameras (p.10.1) in the
Operational Setup menu of the Remote Panel,
you can use other network cameras as if there were local cameras.
The clipping on mapped cameras follows the same rule as for local cameras. Clips
created will be copied as local clips in the corresponding positions.
Two limitations must be noted in the mapped camera mode: