Grass Valley M-Series iVDR User Manual v.2.0.10 User Manual
Page 259

20 April 2005
M-Series User Manual
259
Importing media from a file
2. Select the Clips pane context menu button
, then choose
Import
.
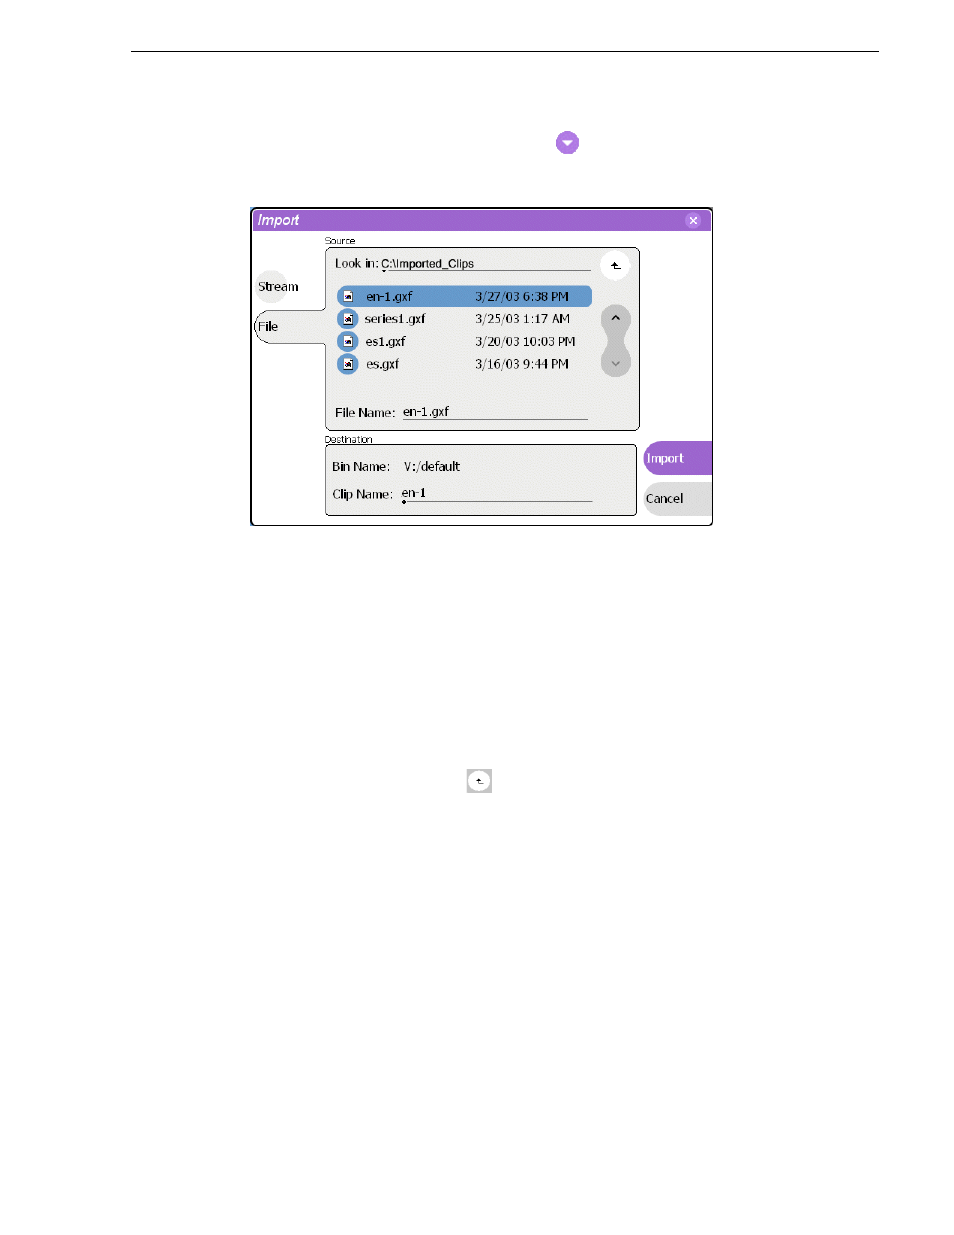
The Import dialog box opens.
3. Select
File
.
NOTE: The appearance of the asset list and file open dialog boxes is determined by
the Options setting. (
See “Modifying the asset list view” on page 227
4. In the Source section, browse to locate and select the source file, or enter the path
name using the
File Name
edit control.
About browsing in the Import dialog box
The
Look in
label shows the current location. The list under the
Look in
label
displays the contents of the current location. You can select items in the list (such
as a machine, disk drive, or folder) to explore its contents.
Clicking the up-arrow button
moves up one directory level in the storage
hierarchy.
The Look in drop-down list allows you to choose from one of the most recent
source locations visited (history).
5. In the Destination section,
Bin Name
displays the name of the current bin which is
where the imported file is placed.
6. Specify a clip name, if needed, by selecting the Clip Name edit control.
The system suggests a clip name based on a seed name specified in the iVDR
Configuration Manager application, for example Clipx_xxx. You can select the
Clip
Name
edit control to rename it, as you like.
7. Select
Import
to start the import.
NOTE: Import is a background task and can be monitored using the Transfer
Monitor.
See “Guide to using the Transfer Monitor” on page 267
to view the job
status.
