Configuring ac 1, Figure 99 – H3C Technologies H3C WX3000E Series Wireless Switches User Manual
Page 211
197
f.
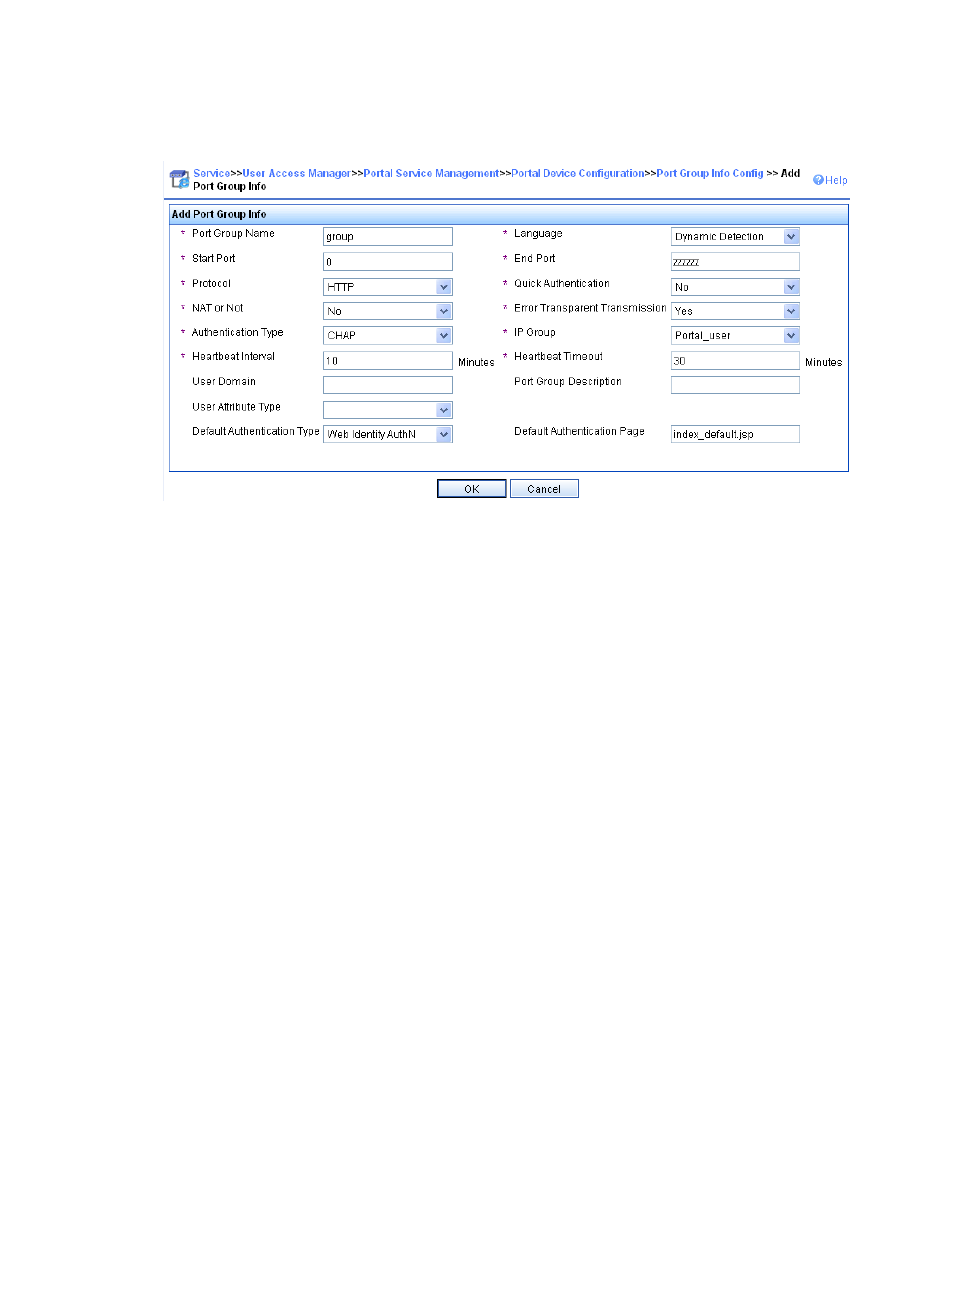
Click OK.
Figure 99 Adding a port group
5.
Select User Access Manager > User Access Manager > Service Parameters > Validate System
Configuration from the navigation tree to validate the configurations.
Configuring AC 1
1.
Configure VRRP:
# Create a VRRP group, and configure the virtual IP address of the VRRP group as 192.168.0.1.
[AC1] interface vlan-interface 20
[AC1–Vlan-interface20] vrrp vrid 1 virtual-ip 192.168.0.1
# Set the priority of VLAN-interface 20 in the VRRP group to 200.
[AC1–Vlan-interface20] vrrp vrid 1 priority 200
# On VLAN-interface 20, configure the interface to be tracked as VLAN-interface 10 and reduce
the priority of VLAN-interface 20 in the VRRP group by 150 when the interface state of
VLAN-interface 10 becomes Down or Removed.
[AC1–Vlan-interface20] vrrp vrid 1 track interface vlan-interface10 reduced 150
[AC1–Vlan-interface20] quit
2.
Configure a RADIUS scheme:
# Create RADIUS scheme rs1 and enter its view.
[AC1] radius scheme rs1
# Configure the server type for the RADIUS scheme. When using the IMC server, you must
configure the RADIUS server type as extended.
[AC1-radius-rs1] server-type extended
# Specify the primary authentication server and primary accounting server, and configure the keys
for communication with the servers.
[AC1-radius-rs1] primary authentication 192.168.0.111
[AC1-radius-rs1] primary accounting 192.168.0.111
[AC1-radius-rs1] key authentication expert
[AC1-radius-rs1] key accounting expert
- H3C WX5500E Series Access Controllers H3C WX3500E Series Access Controllers H3C WX2500E Series Access Controllers H3C WX6000 Series Access Controllers H3C WX5000 Series Access Controllers H3C LSWM1WCM10 Access Controller Module H3C LSUM3WCMD0 Access Controller Module H3C LSUM1WCME0 Access Controller Module H3C LSWM1WCM20 Access Controller Module H3C LSQM1WCMB0 Access Controller Module H3C LSRM1WCM2A1 Access Controller Module H3C LSBM1WCM2A0 Access Controller Module H3C WA3600 Series Access Points H3C WA2600 Series WLAN Access Points H3C S10500 Series Switches H3C S5800 Series Switches H3C S5820X Series Switches H3C S12500 Series Switches H3C S9500E Series Switches H3C MSR 5600 H3C MSR 50 H3C MSR 3600 H3C MSR 30 H3C MSR 2600 H3C MSR 20-2X[40] H3C MSR 20-1X H3C MSR 930 H3C MSR 900 H3C SR8800 H3C SR6600-X H3C SR6600 H3C SecPath F5020 H3C SecPath F5040 H3C VMSG VFW1000