The alarm enunciator, System administration, Naming your system – Verilink XEL XSP-100 SHARK IAP (9SA-USRS-9.0R1.02) Product Manual User Manual
Page 64: System administration -10, Igure, Larm, Nunciator, Typical module status report, Voice-1, Status report
Chapter 5: Graphical User Interface (GUI/WEB) Configuration Pages
Chapter 5-10
XEL P/N & Release: 9SA-USRS-9.0R1.02
SHARK™ IAD User's Guide
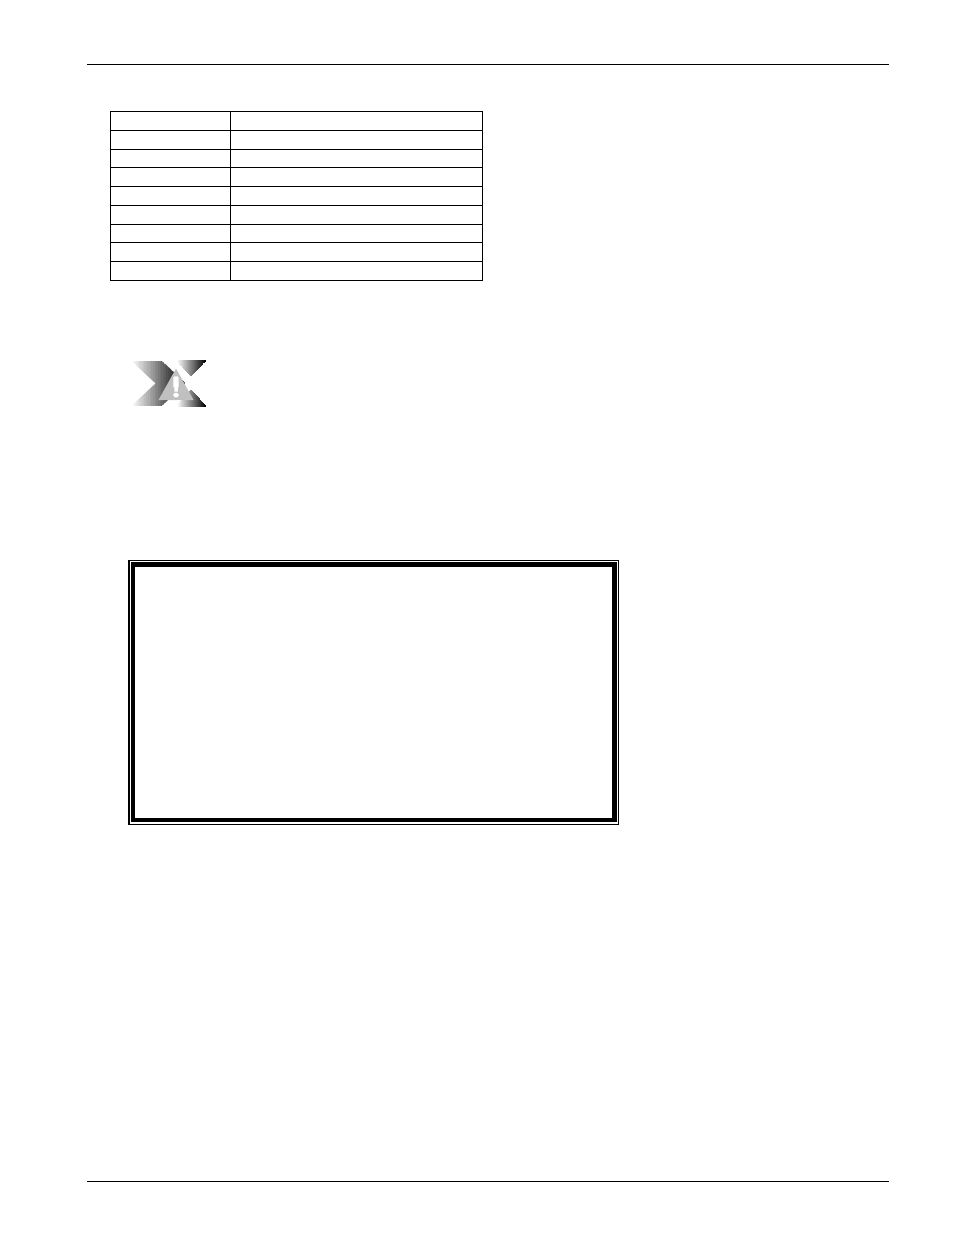
Table 3:
Status Code Definitions
Status Code
Definition
INS
In Service
OOS
Out Of Service
NPR
Un-provisioned
WCN
Wrong Card, Not Operational
WCO
Wrong Card, Operational
REM
Card Removed
EMP
Empty
MIS
Missing
The Alarm
Enunciator
Figure 5:
Alarm Enunciator
When an alarm occurs the module in alarm will indicate such by changing its
status indicator and presenting a visual alarm symbol in the "XEL" logo that is
in the upper left hand corner of the Home page as shown in Figure 5. Turn the
Enunciator off by either clearing the alarm or by selecting the module's not
operational button found on its configuration page. Click on the module's
config button to access its configuration page.
Module Status Page
Hot button
Each module represented on the home page has a status button. This button will
immediately display the status of the module. Figure 6 is an example of the
status page report for VOICE 1.
shark module voice1
Module: FXS
Module Information:
Hardware Rev: 1
Serial Number = 010102000048
Mfg.Date(M/D/Y): 6/2/2000
CurrentState: UP
Module SW: v2.0R1
Boot PROM: 1.0.R1
Module Mode: Not Operational
Module State: OUT-OF-SERVICE
Figure 6:
A typical module status report (VOICE-1 status report)
Module Config
Page Hot button
Clicking on this button displays the configuration page for the module. All
provisioning for each module can be done through these pages. Each
configuration page is discussed below.
S
YSTEM
ADMINISTRATION
The first task to perform once you have logged in is to configure the System
Administration page. This includes naming your SHARK™ IAD system,
setting up user passwords, and setting the diagnostic log level. Access the user
administration system page by:
1. Clicking the home page.
2. Then click on the config button for the Router module.
3. Then click on the System button. Figure 7 shows the User Administration
system page.