Creating a calibration table using the legacy 6000 – TeeJet Legacy 6000 Manual User Manual
Page 156
Legacy 6000
98-05053 R2
151
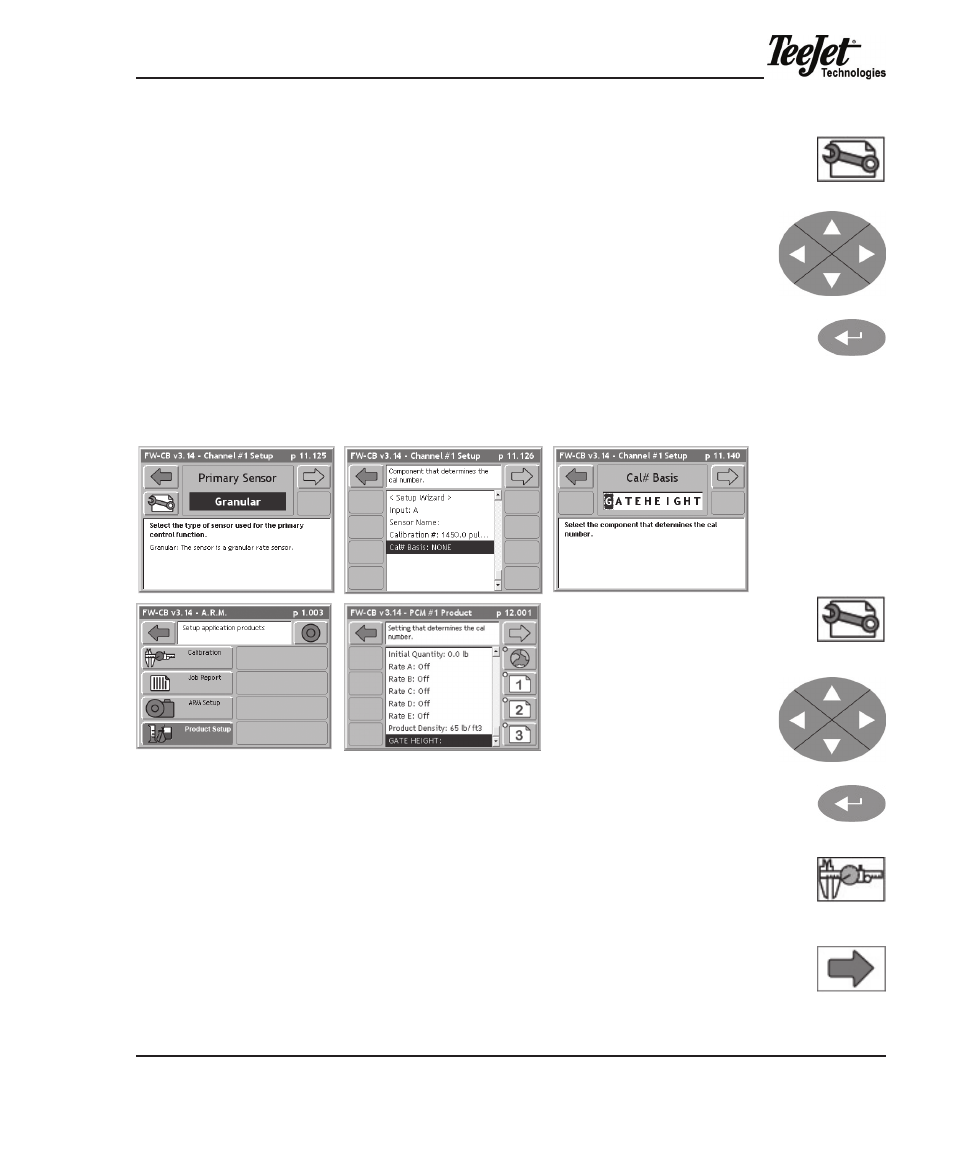
1. enter Channel Setup and navigate to Primary Sensor. Select the Settings
softkey.
2. use the Arrow keys to highlight Cal# Basis and press the Enter button.
3. Select the Cal table to be used. the Name of the Cal table is the Cal
Table Identifier (the first column in the brackets when creating the Cal
table). after the Cal# Basis has been selected, continue through Channel
Setup and save to
Apply the settings. the Cal table is now ready for
use.
4. to use the Cal table enter Product setup from the ARM Launcher page.
5. use the Arrow keys to highlight the Cal Table Identifier (e.g., GATE
height) and press the Enter button. Select the desired calibration de-
scription. this selection will automatically change the Cal# in the sys-
tem.
Creating a Calibration Table using the Legacy 6000
From Channel Setup, navigate to the
•
Primary Sensor page and press the
Settings softkey.
use the
•
Arrow keys highlight Cal# Basis and press the Enter button.
Name the Cal# Basis ( the name of the Cal table). once a name has
•
been established, continue through Channel Setup and apply settings.
advance to the
•
ARM Launcher page and select the Calibration softkey.
Choose the calibration procedure for the application and press the For-
ward Arrow softkey.
Enter button
Arrow keys
Settings softkey
Enter button
Arrow keys
Forward Arrow
softkey
Calibration
softkey
Settings softkey