Rockwell Automation 2094-EN02D-M01-Sx Kinetix 6200 and Kinetix 6500 Modular Multi-axis Servo Drives User Manual User Manual
Page 174
174
Rockwell Automation Publication 2094-UM002E-EN-P - May 2012
Chapter 7
Configure and Start the Kinetix 6500 Drive System
4. Configure the new module.
a. Type the module Name.
b. Enter the Logix EtherNet/IP module slot (leftmost slot = 0).
c. Select an Ethernet Address option.
In this example, the Private Network address is selected.
d. Enter the address of your EtherNet/IP module.
In this example, the last octet of the address is 100.
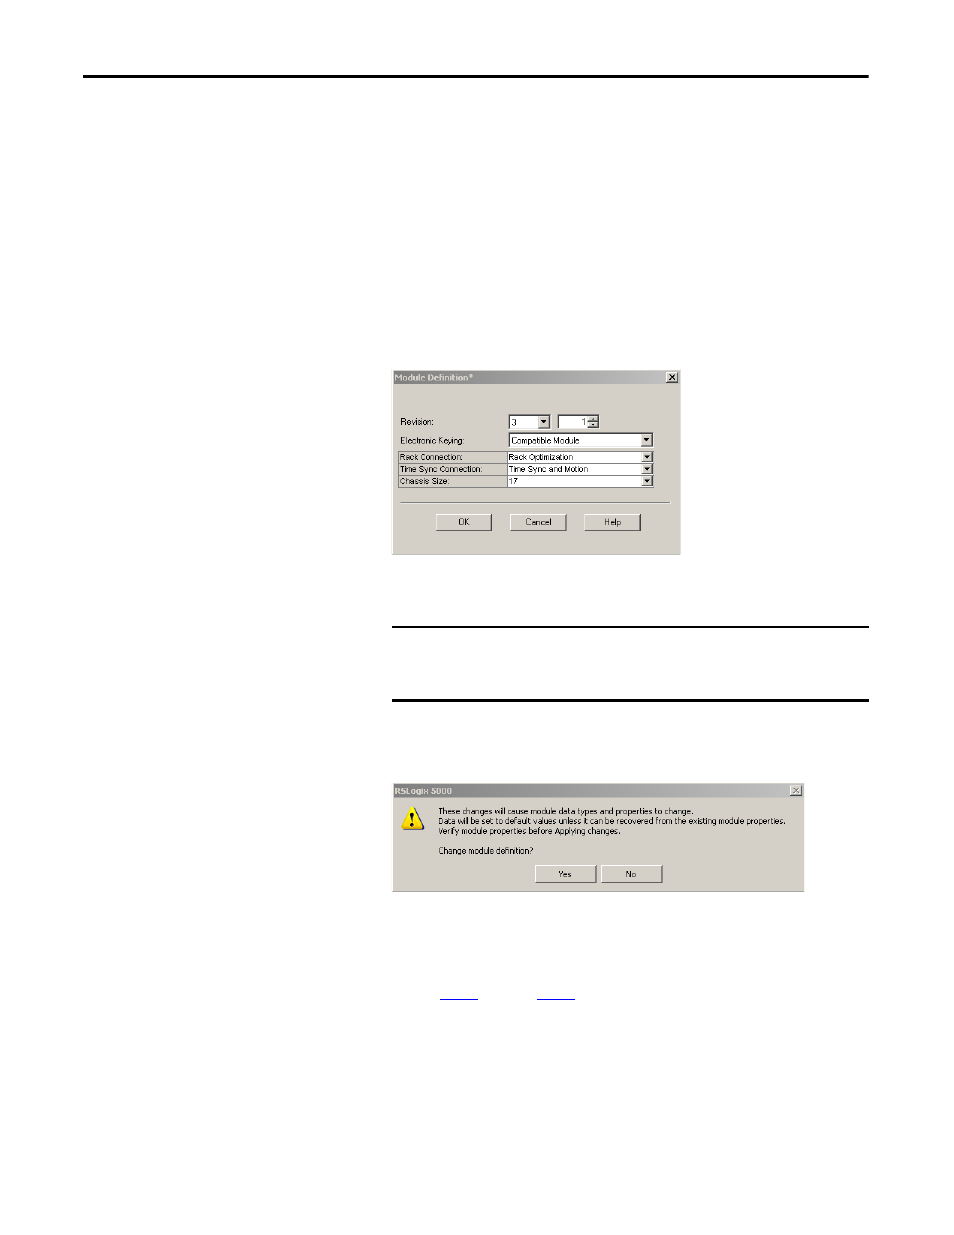
5. Click Change in the Module Definition area.
The Module Definition dialog box opens.
6. From the Time Sync Connection pull-down menu, choose Time Sync and
Motion.
7. Click OK to close the Module Definition dialog box.
8. Click Yes when prompted to confirm your module definition changes.
9. Click OK to close the New Module dialog box.
Your new module appears under the I/O Configuration folder in the
Controller Organizer.
10. Repeat
step 1
through
step 9
for each Logix module.
IMPORTANT
Time Sync functionality is what enables motion control on an Ethernet
network. Without this setting, you won’t be able to run your motion
application.