Using the events command or the – HP StoreEver ESL G3 Tape Libraries User Manual
Page 195
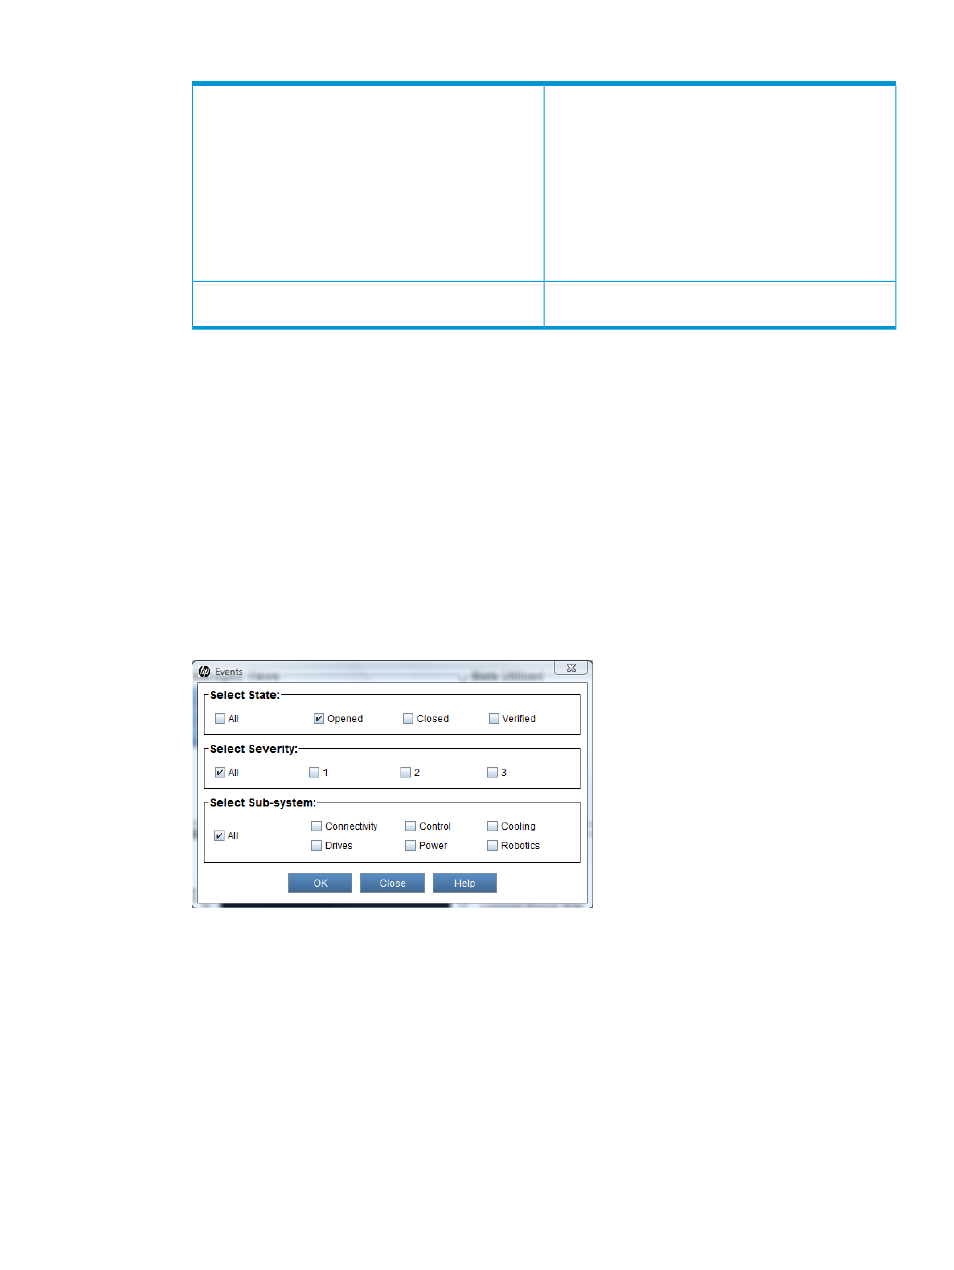
Table 37 Event List window (continued)
The subsystem that caused the event. Possible subsystems
are:
Sub-system
• Connectivity
• Drives
• Control
• Power
• Cooling
• Robotics
The date and time on which the library created the
event.
Posted Date
The Details button displays the Event Details window. For more information, see
2.
By default, the event list is sorted by event ID in ascending order, with the oldest event at the
top and the newest one at the bottom. To change the sorting (for example, by state or severity),
click the column heading by which you want to sort the events. Repeatedly clicking a column
heading toggles between ascending and descending order.
Using the Events command or the Events button to display event lists
To display event lists with the Events command or button:
1.
Ensure that you are viewing the physical library. From the View menu or in the Managed
Views area of the LMC, select the name of the physical library.
2.
Select Tools
→Event Viewer, or click the Events button on the toolbar.
The Events window appears.
This window enables you to specify the kinds of events that appear in the event list. For
example, you can do the following:
•
To display all events in the library, select All for state, severity, and subsystem.
•
To display all open events with a severity level 2 status for the drives and control
subsystems, select Opened for state, 2 for severity, and Drives and Control for subsystem.
•
To display all events that users have manually closed for the robotics subsystem, select
Closed for state, All for severity, and Robotics for subsystem.
•
To display all events that the library has automatically determined as having been resolved,
select Verified for state, All for severity, and All for subsystem.
If you select a combination that does not produce an event list, a No Events Found message
appears.
Working with events 195