E-mailing, saving, and printing status information, E-mailing, saving, and, E-mailing, saving – HP StoreEver ESL G3 Tape Libraries User Manual
Page 130
4.
In the Component Selection section of the dialog box, clear and check the boxes to indicate
which components will be included in the Support Ticket.
5.
Click Next.
6.
In the Components Selected area of the Confirmation dialog box, scroll through the list to
ensure you have selected the correct components. If any are incorrect, use the Back button
and make the appropriate changes.
7.
After the component selection is verified, read the Note in the dialog box, select the Continue
with Support Ticket generation box, and click Finish.
The Support Ticket is generated and sent to the specified email address or file location.
8.
Click OK in the Support Ticket complete dialog box.
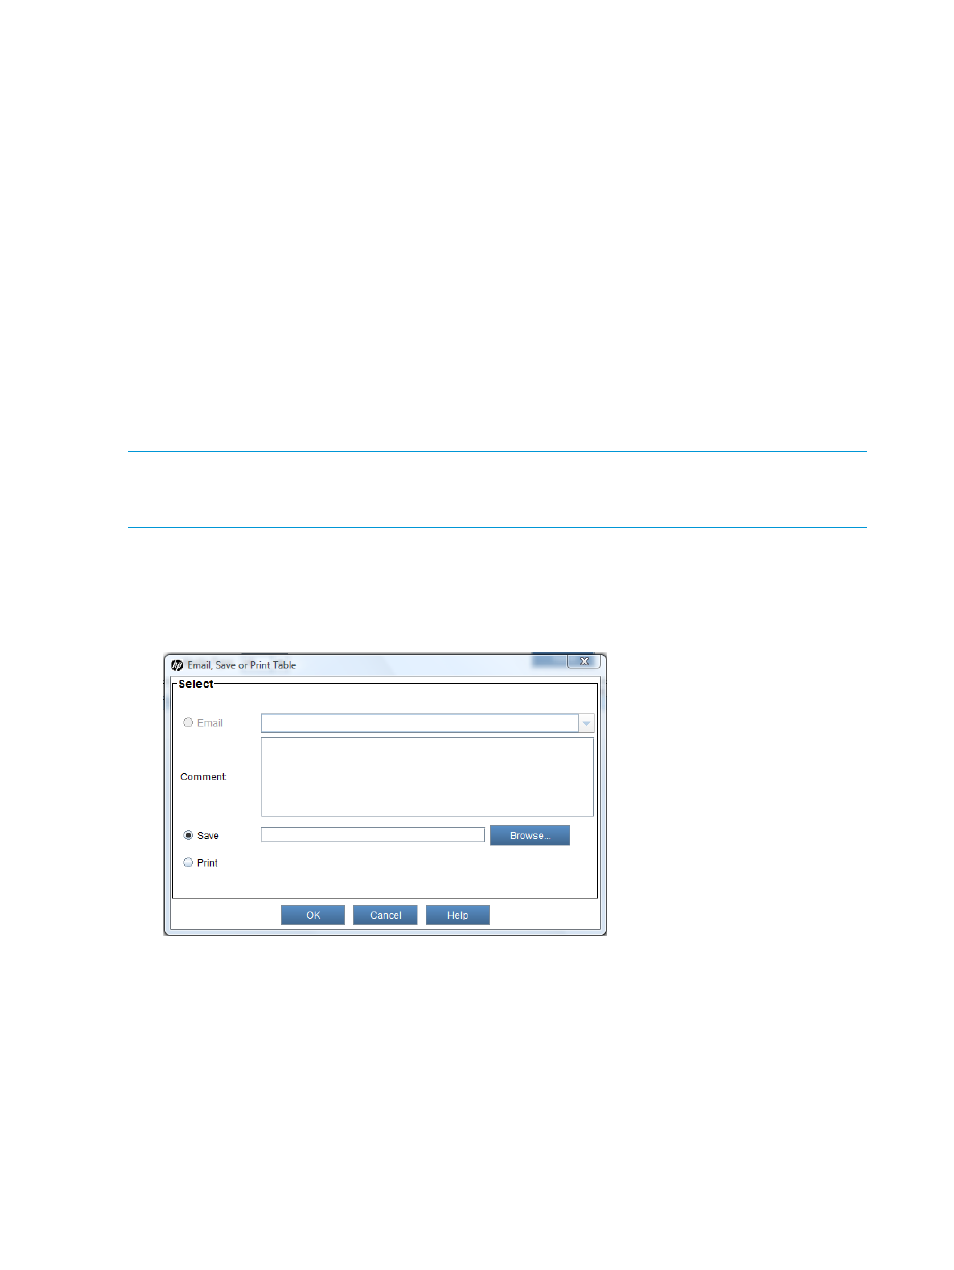
E-mailing, saving, and printing status information
The Send button on each status dialog box enables you to send status information to e-mail
addresses. If you are accessing the LMC from a remote client, Send also enables you to save the
information to a file or print it. You cannot save or print information from the library OCP. The
information that is sent will be the same as what displays in the status dialog box at the time you
click Send.
NOTE:
Before you perform the following procedure, make sure that e-mail is appropriately
configured in the LMC so that the library can send information to the recipient. See
To mail, save, and print status information:
1.
Make sure that the status dialog box displays the status information that you want to send.
2.
Click Send.
The Email, Save or Print Table dialog box appears.
3.
Perform one of the following tasks:
•
To indicate that you want to send the information as an e-mail message to a recipient,
select Email, and then either type an e-mail address in the Email text box or select an
existing address from the drop-down list. If appropriate, type a comment in the Comment
text box to send with the information.
•
To save the information, select Save, then either type in the Save text box a path and a
file name to which you want the information saved, or click Browse to specify a location
and a file name.
130 Monitoring the library