HP StoreEver ESL G3 Tape Libraries User Manual
Page 148
8.
On the Attention dialog box , select either Continue With Scratch Tapes or Continue Without
Scratch Tapes, and then click Next.
9.
If you selected Continue With Scratch Tapes:
a.
If there is no scratch cartridge in the I/E station, insert one now, then click Next.
NOTE:
Ensure that scratch tapes are formatted and contain no data that cannot be
overwritten. Scratch tapes must have barcode labels with valid volume serial numbers on
them. Also, you might find it useful to write down the serial number so that you can identify
your scratch tapes.
This procedure will not damage any cartridges that are already installed in the library.
If the scratch cartridge becomes lodged in a drive or magazine, it must be manually
removed from the library. If not removed, the cartridge will become part of the partition
the next time the accessor assembly is enabled.
The I/E station will be locked until the inventory is complete.
b.
To shorten the list of cartridges in Selected Tapes in I/E Stations, use the Media Barcode
Filter.
c.
Select a scratch cartridge of each media type listed in the Selected Tapes in I/E Stations
window, then click Next. Select one scratch cartridge per media type. Each test that
requires a scratch cartridge calls the media types as needed.
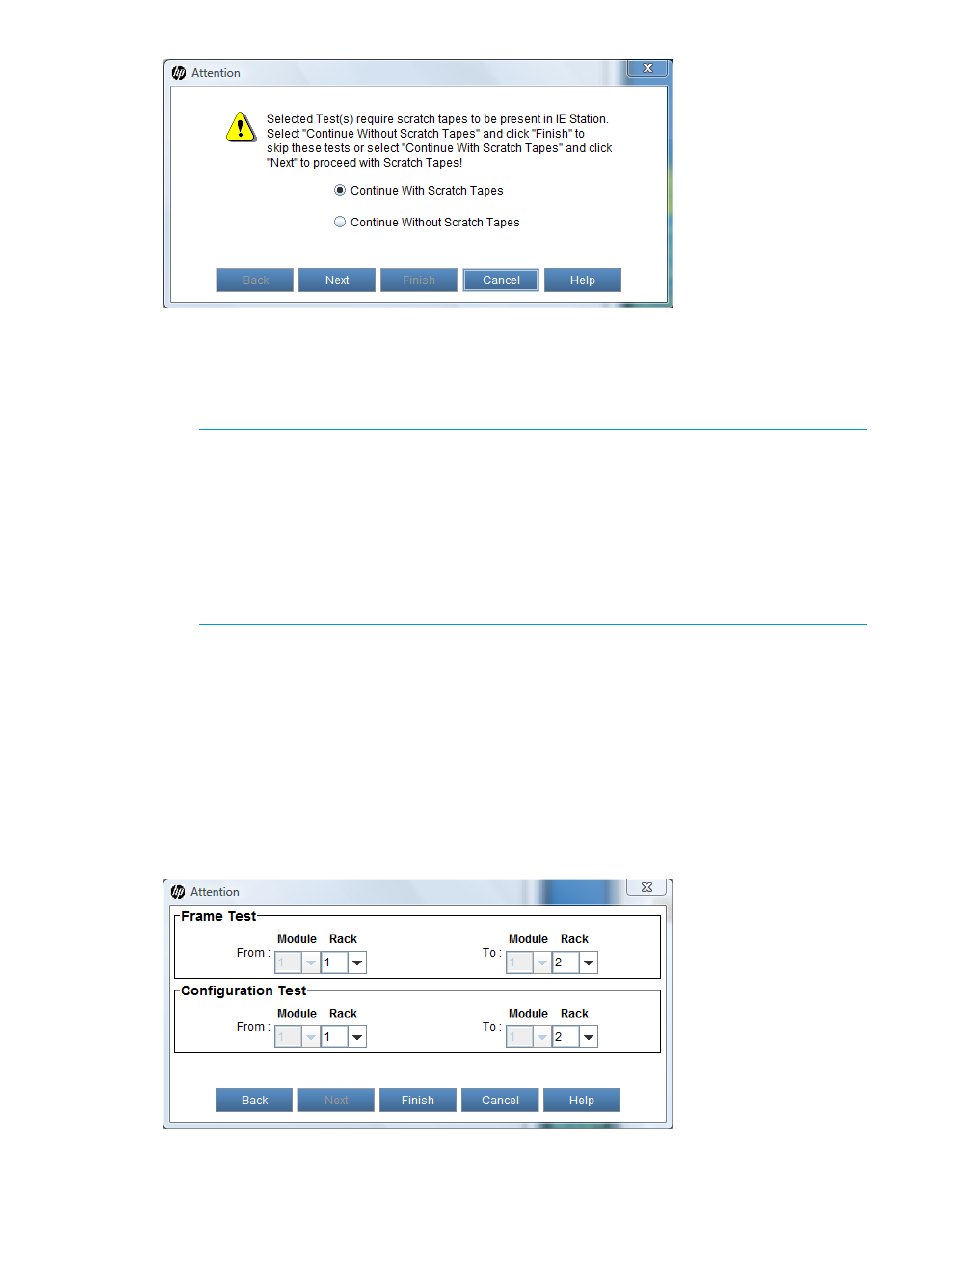
10.
Make the appropriate selections in the Frame Text and/or Configuration Test areas of the
Attention dialog box, then click Finish. (The areas appear based on what type of test you
selected earlier. The following example shows both the frame and configuration tests because
both were selected.)
148
Maintaining the library