Enet port setup, Chapter 12 enet port setup, Figure 41 basic setting > enet port setup – ZyXEL Communications IES-708-22A User Manual
Page 101: Table 17 basic setting > enet port setup, Enet port setup (101)
IES-708-22A User’s Guide
101
C
H A P T E R
12
ENET Port Setup
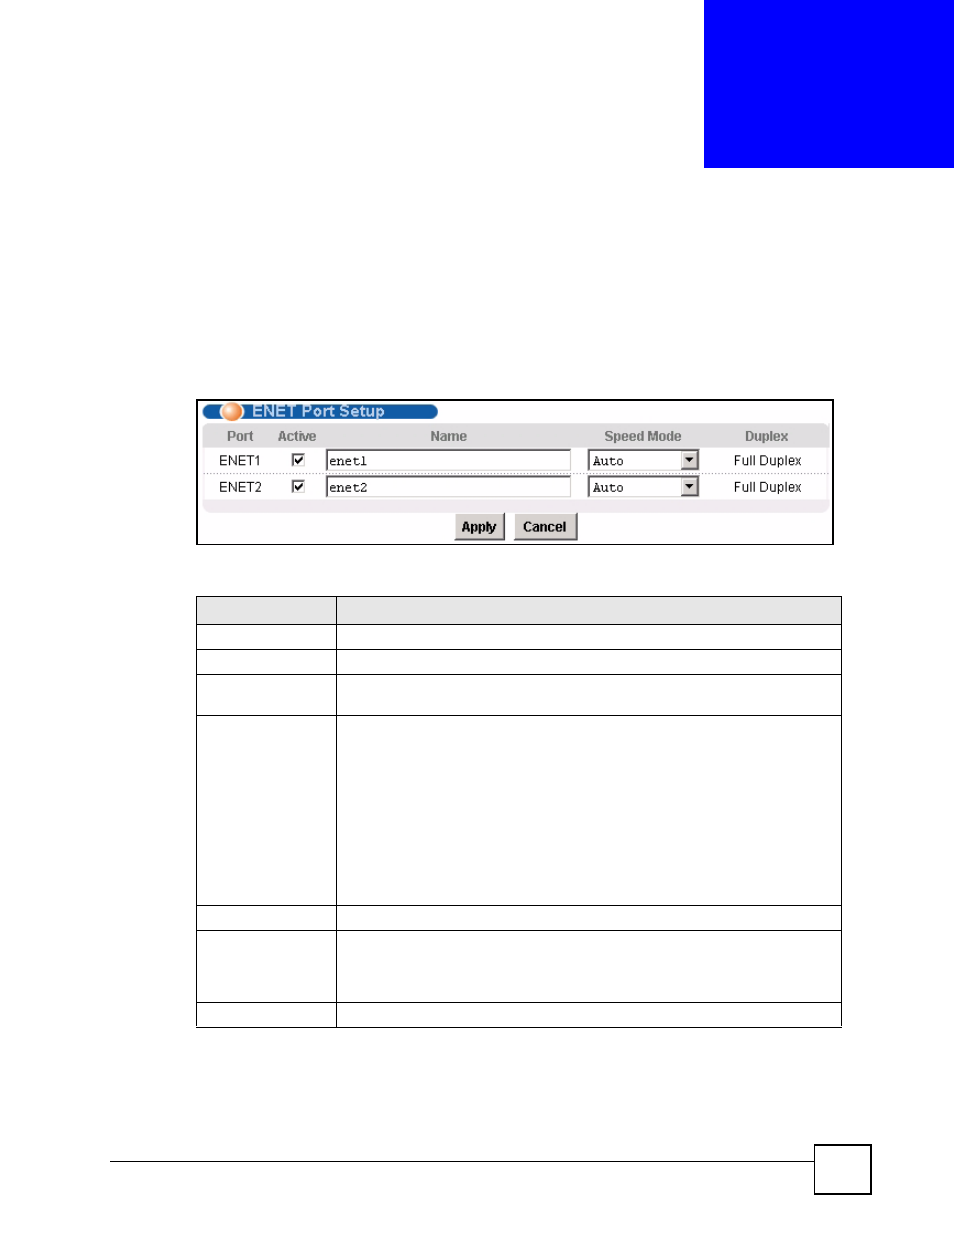
The ENET Port Setup screen allows you to configure settings for the Ethernet ports.
To open this screen, click Basic Setting > ENET Port Setup.
Figure 41 Basic Setting > ENET Port Setup
The following table describes the labels in this screen.
Table 17 Basic Setting > ENET Port Setup
LABEL
DESCRIPTION
Port
This is the port index number.
Active
Select the check box to turn on the port. Clear it to disable the port.
Name
Enter a descriptive name that identifies this port. You can use up to 31 English
keyboard characters; spaces are allowed.
Speed Mode
Select the type of Ethernet connection for this port. When you don’t use auto-
negotiation, you must make sure that the settings of the peer Ethernet port are
the same in order to connect.
Select Auto (auto-negotiation) to have the IES-708-22A automatically
determine the type of connection that the Ethernet port has. When the peer
Ethernet device has auto-negotiation turned on, the IES-708-22A negotiates
with the peer to determine the connection speed. If the peer Ethernet port does
not have auto-negotiation turned on, the IES-708-22A determines the
connection speed by detecting the signal on the cable and using full duplex.
Select 10 Copper if the Ethernet port has a 10 MB electrical connection.
Select 100 Copper if the Ethernet port has a 100 MB electrical connection.
Duplex
The IES-708-22A uses full duplex Ethernet connections by default.
Apply
Click Apply to save your changes to the IES-708-22A’s volatile memory. The
IES-708-22A loses these changes if it is turned off or loses power, so use the
Config Save link on the navigation panel to save your changes to the non-
volatile memory when you are done configuring.
Cancel
Click Cancel to begin configuring this screen afresh.