Mesh network deployment - quick setup, Mesh, Network deployment - quick setup – Brocade Mobility 5181 Access Point Product Reference Guide (Supporting software release 4.4.0.0) User Manual
Page 385: Configuring ap#1
Brocade Mobility 5181 Access Point Product Reference Guide
371
53-1002516-01
Mesh network deployment - quick setup
9
Mesh network deployment - quick setup
This section provides instructions on how to quickly setup and demonstrate mesh functionality
using three access points. Two following two deployment scenarios will be addressed:
•
Scenario 1 - Two base bridges (redundant) and one client bridge
•
Scenario 2 - A two hop mesh network with a base bridge, repeater (combined base bridge and
client bridge mode) and a client bridge.
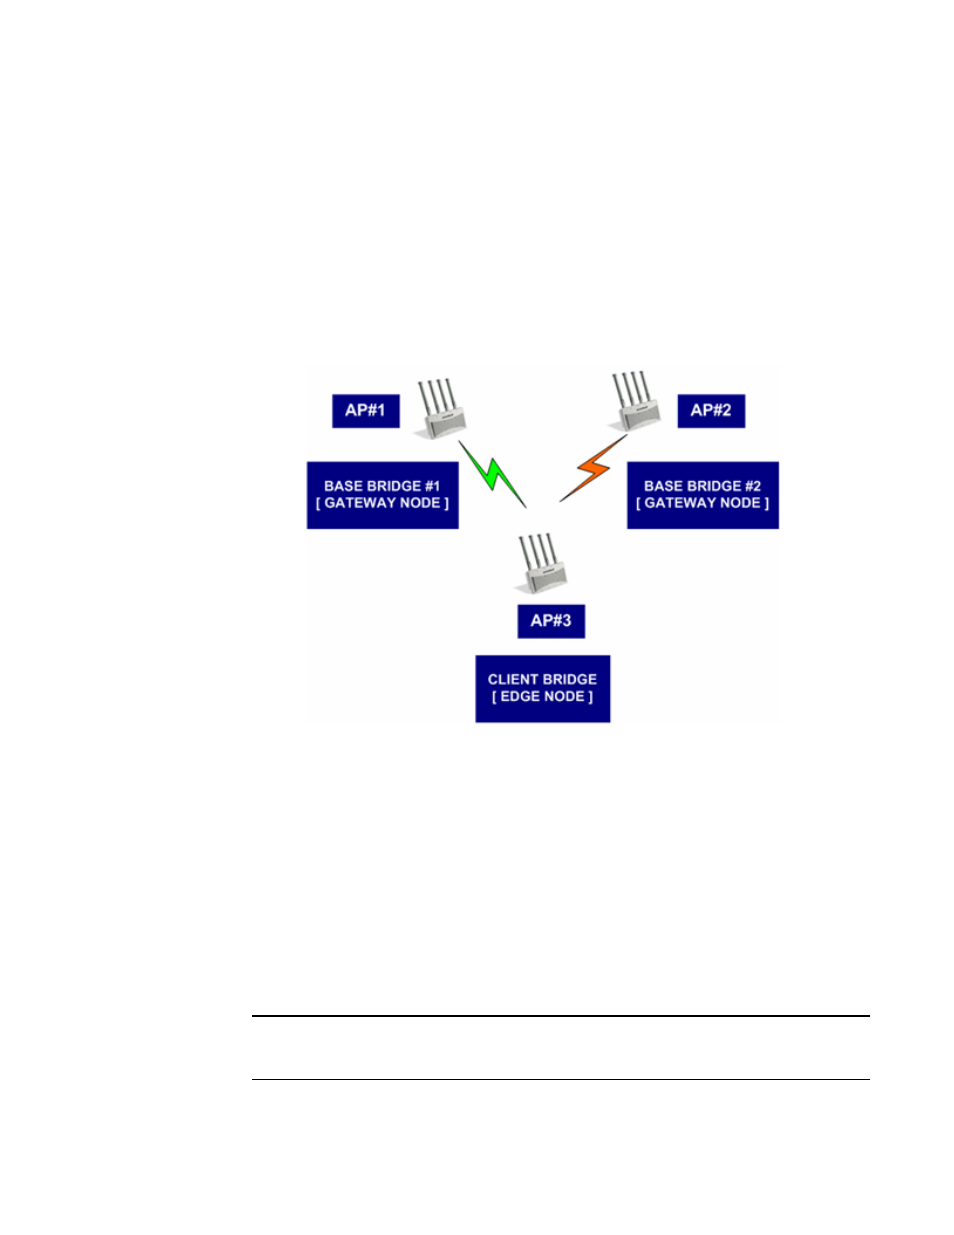
Scenario 1 - two base bridges and one client bridge
In scenario 1, the following three access point configurations will be deployed within the mesh
network:
•
AP#1 - An active base bridge
•
AP#2 - A redundant base bridge
•
AP#3 - A client bridge connecting to both AP#1 and AP#2 simultaneously.
AP#1 and AP#2 will be configured somewhat the same. However there are some important (yet
subtle) differences. Therefore, the configuration of each access point will be described separately.
Configuring AP#1
1. Provide a known IP address for the LAN1 interface.
NOTE
Enable the LAN1 Interface of AP#1 as a DHCP Server if you intend to associate Clients and
require them to obtain an IP address via DHCP.
2. Assign a Mesh STP Priority of 40000 to LAN1 Interface.