3 changing the eclipse hx-pico dip switches, Changing the eclipse hx-pico dip switches – Clear-Com HX System Frames User Manual
Page 52
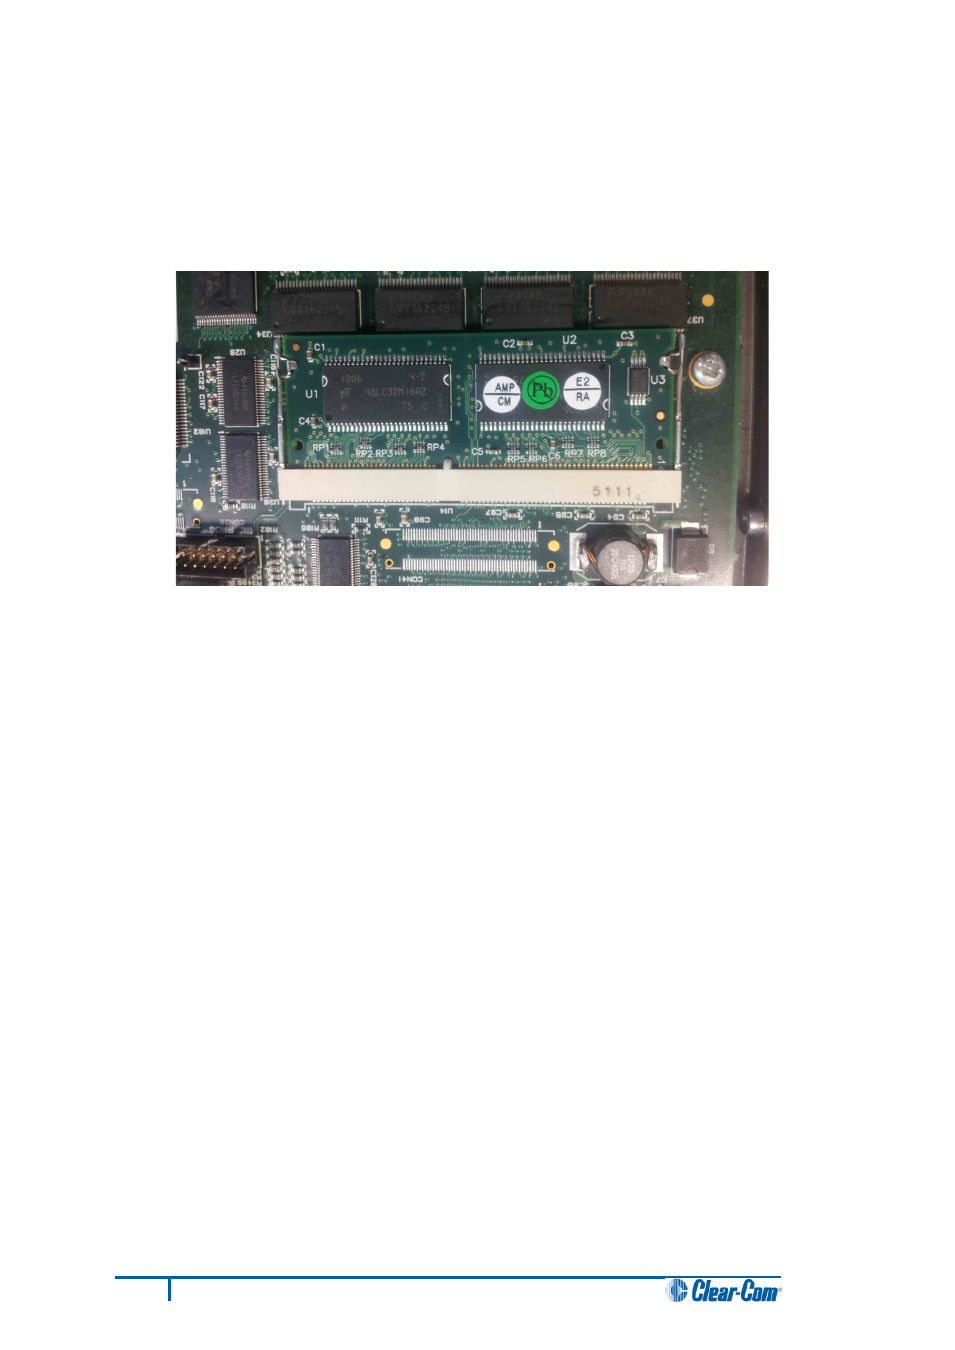
4. Fit the replacement 256Mb CPU card RAM daughter board to the cassette. The daughter
board is fitted chip-side up.
Ensure that the daughter board is securely fitted (only the top edge of the connectors along
the lower edge of the board should be visible).
Figure 29: Eclipse HX-PiCo 256Mb RAM daughter board
5. Secure the RAM daughter board by closing the levers to either side of the cassette.
6. Return the CPU card to the Eclipse HX-Median, Eclipse HX-Omega or Eclipse HX-Delta
matrix.
6.3 Changing the Eclipse HX-PiCo DIP switches
To change the Eclipse HX-PiCo DIP switches to the appropriate Eclipse HX v7.5 settings, see either:
• Appendix C:Eclipse HX-PiCo CPU DIP switches
• 6.4.3 Upgrading the Eclipse HX-PiCo application code using
45
Eclipse HX Upgrade Guide