Select directory – KORG Electronic Keyboard User Manual
Page 150
Program mode: HD-1
140
The Auto +12 dB On setting is made independently for
Program, Combination, Sequencer, and Sampling
modes.
4. “Convert to” specifies whether the sample will
automatically be converted into a program as soon
as it has been sampled. This is convenient when
you want to hear the sound immediately after
sampling.
If you check the “Program” check box, the sample will
automatically be converted into a program.
At the right, set “Program” and “MS” to specify the
program number and multisample number for the
converted program.
Set Original Key (Sampling 0–1b) to specify the
location of the original key. The multisample will
create an Index (Sampling 0–1b) with this key as the
Top Key (Sampling 0–1b). The Original Key will
increment by one after sampling, and the next higher
note will be assigned the next time you sample.
5. Press the OK button to apply the settings you
made, or press the Cancel button to return to the
state prior to accessing this dialog box.
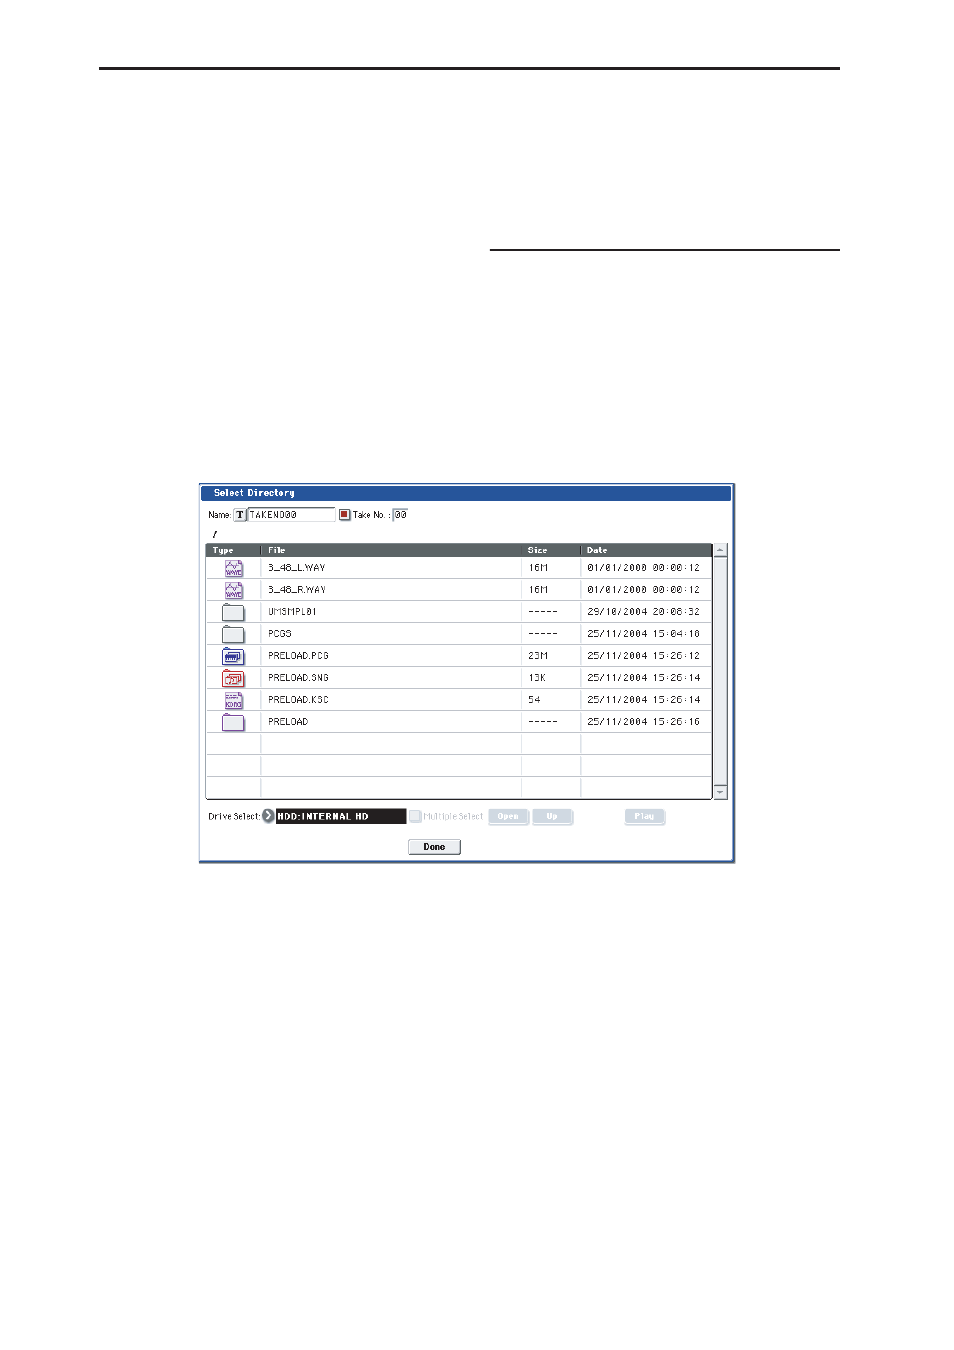
Select Directory
Select Directory is available on the Audio
In/Sampling tab of the Play page, when the sampling
Save To parameter is set to DISK.
When sampling to disk, this lets you set the disk,
directory, and file name for the resulting WAVE file.
This dialog also lets you audition WAVE files directly
from the disk; you can use this as a shortcut, instead of
using the similar function in DISK mode.
Specifying the save destination for a WAVE file
1. Select the “Select Directory” to open the dialog
box.
2. Use the popup button located at the left of “Drive
select” to select the writing-destination drive for
sampling.
3. Use the Open button and Up button to move to the
desired directory.
4. In Name, specify a name for the WAVE file that
will be written during sampling.
If you check Take No., the file will be saved with a
two-digit Take No. added to the end of the filename.
This number will automatically increment each time
you sample. This is convenient when you are sampling
repeatedly, since each sample will be saved with its
own filename.
If Take No. is not checked, you can input up to eight
characters in “Name.” If Take No. is checked, you can
input up to six characters.
5. Press the Done button to complete the settings.
Playing back a WAVE file
1. Select the “Select Directory” to open the dialog
box.
2. Use “Drive Select” and the Open and Up buttons
to select the drive and directory, and select the
WAVE file (48 kHz) that you want to play.
3. Press the SAMPLING START/STOP switch or
Play button.
The selected WAVE file will be played.
4. Press the SAMPLING START/STOP switch or
Stop button once again to stop playback.
If the WAVE file is mono, the same sound will be
output to L/R.
Select Directory