Switching characteristics, Store and forward, Multi-address function – Wavetronix Click 400 (900 MHz radio) (CLK-400) - User Guide User Manual
Page 223

222
CHAPTER 26 • CLICK 330/331
Follow the steps below to install and wire a Click 330/331:
1 Attach the device to a location on the DIN rail that is not over a T-bus.
2 Attach a wire for +DC (red is standard) to the screw terminal marked US1.
3 Attach a wire for -DC (black is standard) to the screw terminal marked GND.
4 Attach the other end of these two wires to a DC power source.
5 Optional: repeat steps 2–4 with the second set of screw terminals to wire in a redun-
dant power supply.
6 Optional: wire into the screw terminals marked R1 and R2 for an alarm.
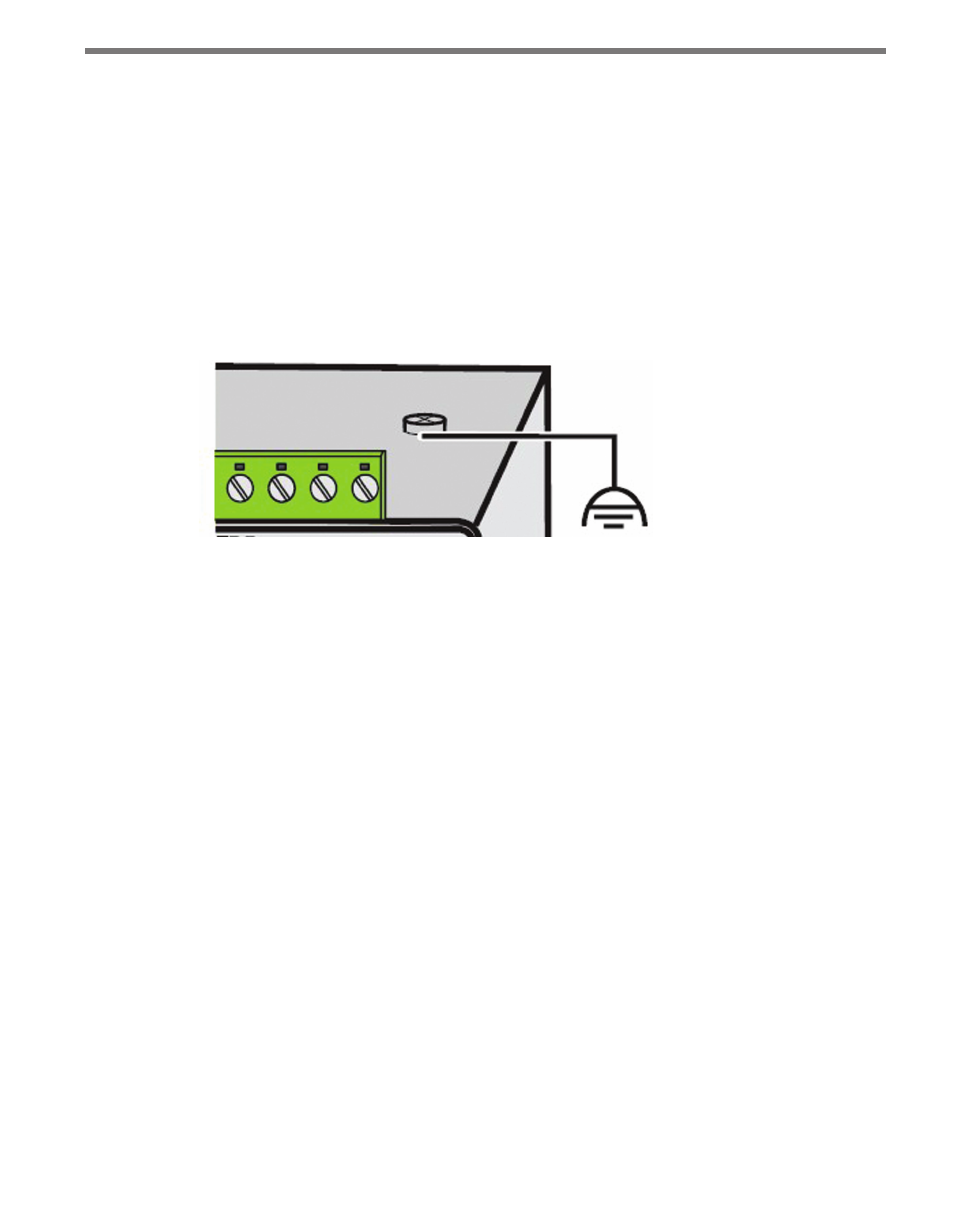
7 Make sure the DIN rail is properly grounded (see Figure 25.4). The switch can be
grounded via an eyelet ring on the top of the device.
Figure 25.4 – Grounding the Click 330/331
8 Plug the Ethernet cables into any Ethernet port on the Click 330/331.
9 If they’re going to be used, plug fiber optic cables into the ports on the Click 331.
Switching Characteristics
Store and Forward
All data telegrams that are received by the switch are saved and their validity checked. In-
valid or faulty data packets (> 1522 bytes or CRC errors) and fragments (< 64 bytes) are
rejected. Valid data telegrams are forwarded by the switch. The switch always forwards the
data using the data transmission speed that is used in the destination network segment.
Multi-address Function
The switch independently learns the addresses for termination devices, which are connect-
ed via a port, by evaluating the source addresses in the data telegrams. Only packets with
unknown addresses, with a source address of this port or with a multicast/broadcast ad-
dress in the destination address field are forwarded via the corresponding port. The switch
can store addresses in its address table with an aging time of 5 minutes. This is important
when more than one termination device is connected to one or more ports. In this way,
several independent subnetworks can be connected to one switch.
- Click 421 (bluetooth to serial converter) (CLK-421) - User Guide Click 342 (lean managed ethernet switch) (CLK-342) - User Guide Click 341 (lean managed ethernet switch) (CLK-341) - User Guide Click 340 (lean managed ethernet switch) (CLK-340) - User Guide Click 331 (unmanaged ethernet switch) (CLK-331) - User Guide Click 330 (unmanaged ethernet switch) (CLK-330) - User Guide Click 304 (RS-232 to RS-485 converter) (CLK-304) - User Guide Click 305 (RS-232 to RS-485 converter) (CLK-305) - User Guide Click 301 (serial to ethernet converter) (CLK-301) - User Guide Click 100 (16 output contact closure) (CLK-100) - User Guide Click 104 (4-channel DIN rail contact closure) (CLK-104) - User Guide Click 110 (4-channel contact closure eurocard) (CLK-110) - User Guide Click 112 (detector rack card) (CLK-112) - User Guide Click 114 (detector rack card) (CLK-114) - User Guide Click 120 (screw terminal relay) (CLK-120) - User Guide Click 121 (spring cage relay) (CLK-121) - User Guide Click 200 (surge suppression) (CLK-200) - User Guide Click 201 (1 amp AC to DC converter) (CLK-201) - User Guide Click 202 (2 amp AC to DC converter) (CLK-202) - User Guide Click 203 (UPS and battery) (CLK-203) - User Guide Click 204 (4 amp AC to DC converter) (CLK-204) - User Guide Click 210 (AC circuit breaker) (CLK-210) - User Guide Click 211 (AC outlet) (CLK-211) - User Guide Click 221 (DC surge protector) (CLK-221) - User Guide Click 222 (system surge protector) (CLK-222) - User Guide Click 223 (dual-485 surge protector) (CLK-223) - User Guide Click 230 (AC surge protector) (CLK-230) - User Guide Click 250 (wireless surge protector) (CLK-250) - User Guide
