Set up a color correction workspace – Adobe Premiere Pro CS3 User Manual
Page 265
ADOBE PREMIERE PRO CS3
User Guide
259
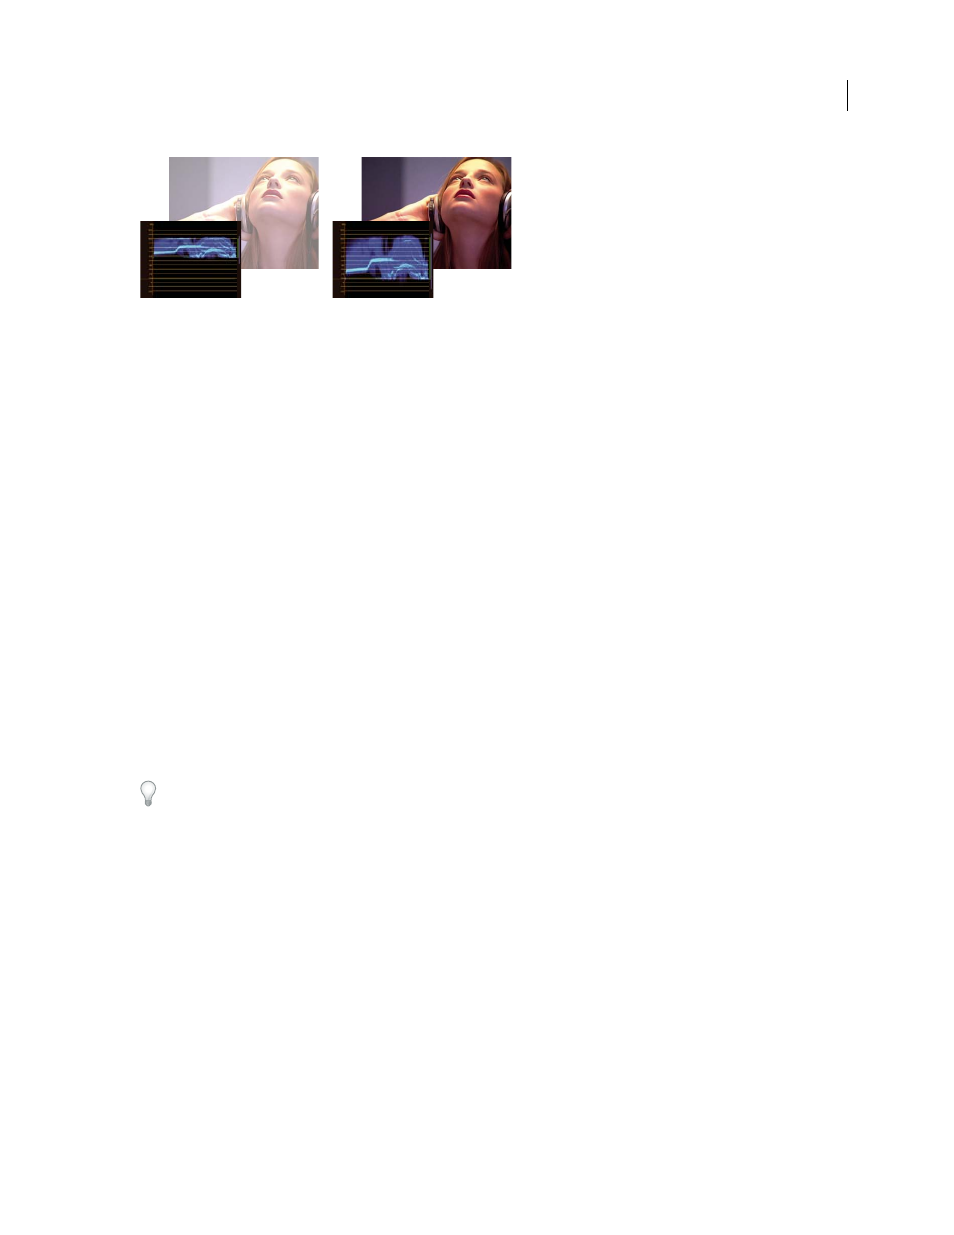
Correcting exposure: Overexposed image with the waveform in the upper limits of the IRE scale (left) and corrected image with the waveform
within 7.5 to 100 IRE (right)
See also
Correct video color, easily
Three-Way Color Corrector effect
Set up a Color Correction workspace
The following is a suggested procedure for setting up your color correction workspace. It’s meant only as a starting
point so you can configure the workspace to suit your style of working.
1
(Optional) Connect a calibrated NTSC or PAL monitor to your computer. If you’re creating video for broadcast,
viewing the video on an NTSC or PAL monitor is essential for the most accurate preview.
2
Choose Window
>
Workspace
> Color Correction.
To see a before and after comparison of your color correction, you can either display the master clip in the Source
Monitor for comparison with the Program Monitor, or you can select the Split Screen Preview option in the Color
Correction effects.
3
Make sure that the Draft Quality is not chosen in the Program Monitor menu. If possible, choose Highest Quality.
If your computer performance suffers, then choose Automatic Quality instead.
4
(Optional) Choose Reference Monitor from the Window menu. Move the Reference Monitor where you can see
it and the Program Monitor easily.
Note: By default, the Gang To Program Monitor option is enabled in the Reference Monitor menu.
5
Choose any of the following scopes from the Reference Monitor menu:
Note: You can also display a scope in the Program Monitor instead of the Reference Monitor.
Vectorscope
Displays a circular chart, similar to a color wheel, that shows the video’s chrominance information.
The Vectorscope is very useful when making color adjustments.
YC Waveform
Displays the luminance (represented as green in the waveform) and chrominance (represented as
blue) values in your clip.
April 1, 2008