Perform rolling and ripple edits – Adobe Premiere Pro CS3 User Manual
Page 117
ADOBE PREMIERE PRO CS3
User Guide
111
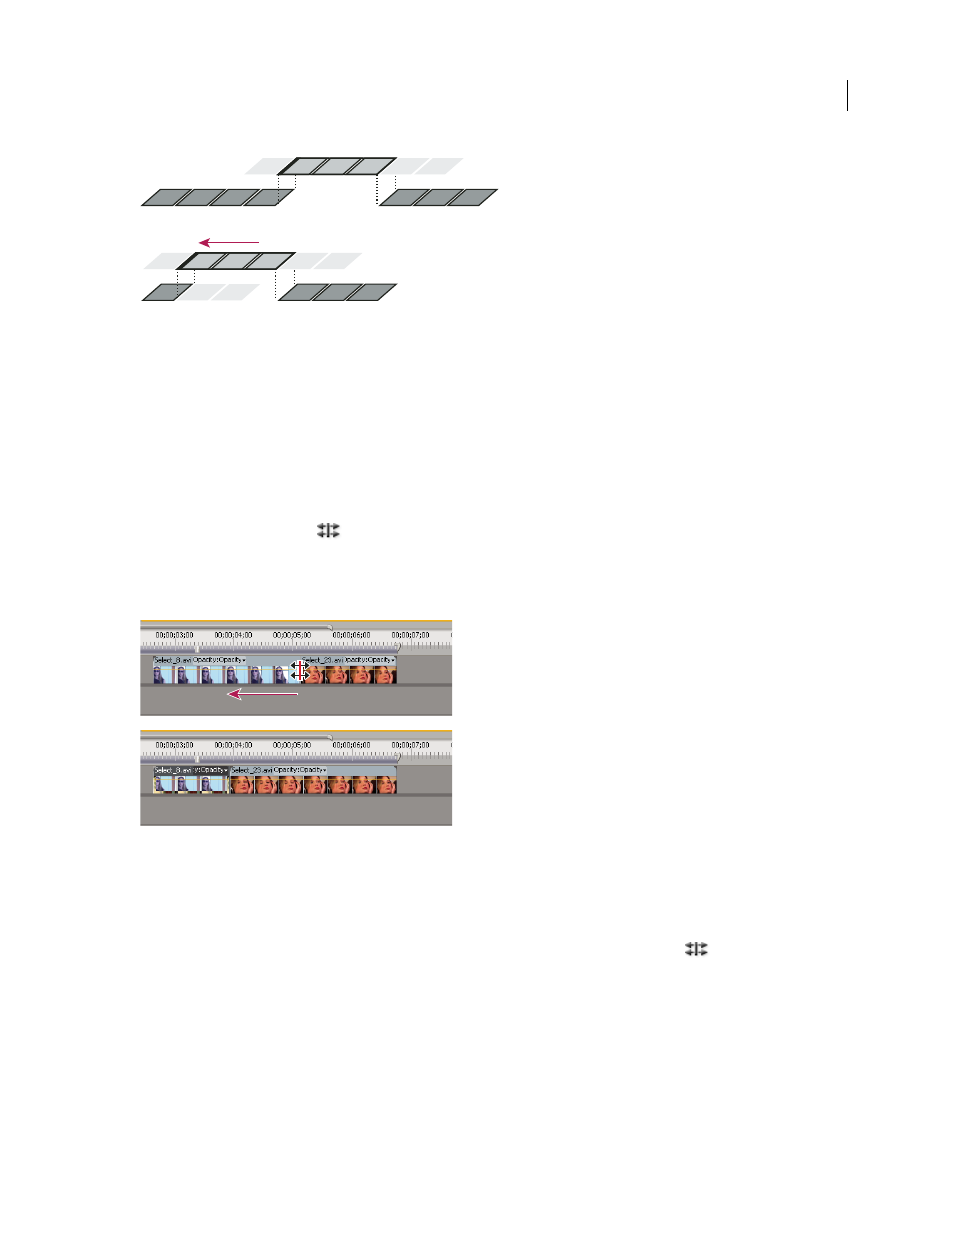
In this ripple edit, the edit point is dragged earlier in time—shortening the preceding clip and the total program duration.
Perform rolling and ripple edits
You can perform a rolling or ripple edit either directly on the tracks in the Timeline panel or using the Trim
Monitor.
See also
Perform a rolling edit using the Rolling Edit tool
1
Select the Rolling Edit tool
.
2
In the Timeline panel, drag left or right from the edge of the clip you want to change. The same number of frames
added to the clip are trimmed from the adjacent clip. Alt-drag (Windows) or Option-drag (Mac OS) to affect only
the video or audio portion of a linked clip.
Timeline panel during (above) and after (below) a rolling edit
Perform a rolling edit using the Trim Monitor
1
Display the edit point in the Trim Monitor.
2
Do any of the following:
•
Position the pointer between the video images so that it changes into the Rolling Edit tool
; then drag left or
right.
•
Drag the center timecode display left or right.
•
Drag the center jog disk left or right.
•
Click the timecode display between the views, type a valid timecode number to trim the edges of both clips to that
frame, and press Enter (Windows) or Return (Mac OS).
April 1, 2008