Display the multi-camera monitor, Add clips for multi-camera editing, Synchronize clips – Adobe Premiere Pro CS3 User Manual
Page 165: Command. (see
ADOBE PREMIERE PRO CS3
User Guide
159
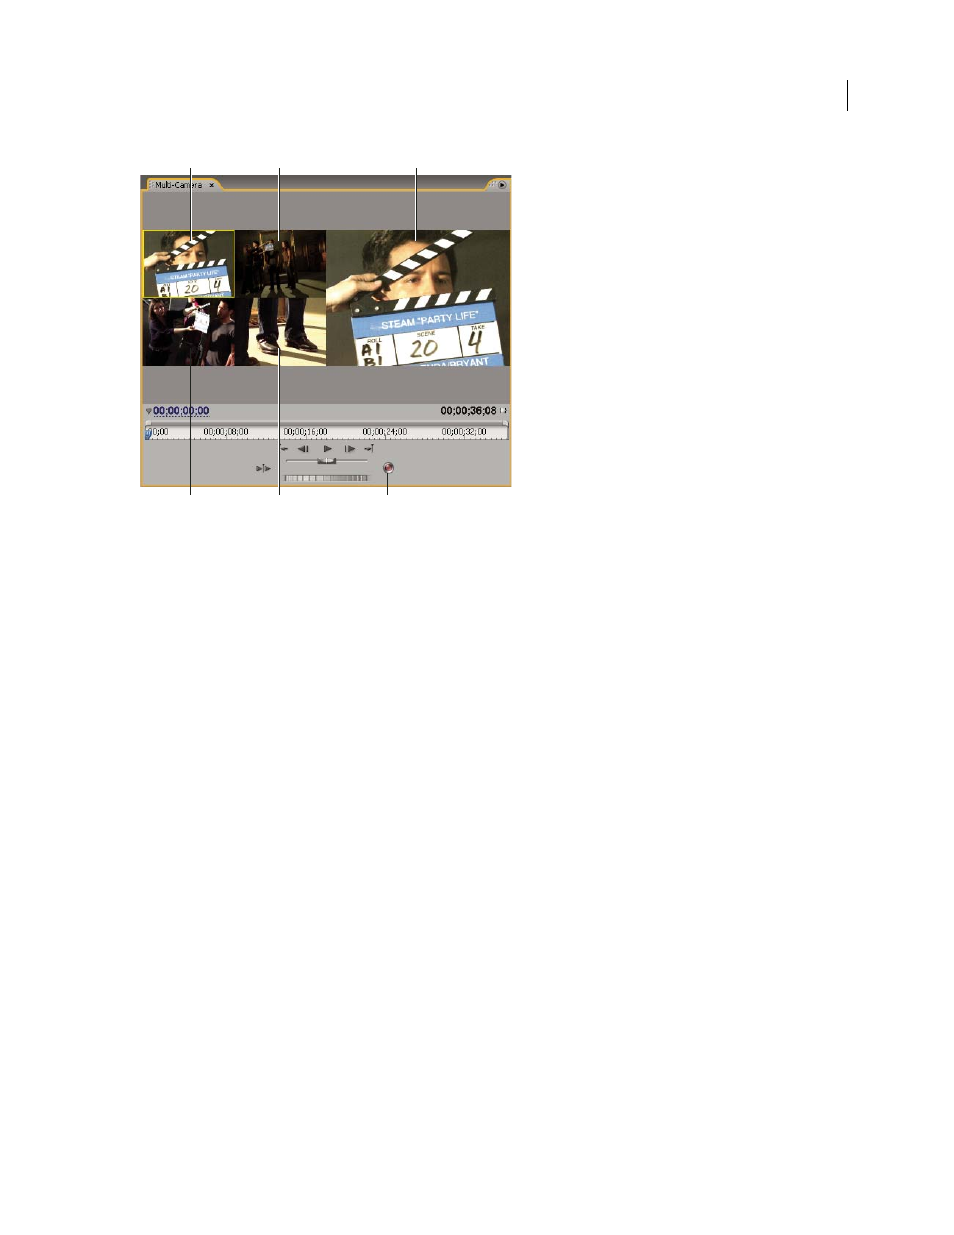
Multi-Camera Monitor
A. Camera 1 B. Camera 2 C. Recorded sequence preview D. Camera 3 E. Camera 4 F. Record button
Display the Multi-Camera Monitor
❖
Select the multi-camera target sequence in the Timeline panel, and then choose Multi-Camera Monitor from the
Window menu.
•
To hide the recorded sequence preview and display only the camera previews, deselect Show Preview Monitor
from the Multi-Camera Monitor panel menu.
•
To resize the Multi-Camera Monitor, drag an edge or corner.
Add clips for multi-camera editing
You can use any type of media in a multi-camera editing session, including footage from various cameras and from
still images. You assemble the media into a sequence of up to four video and four audio tracks. You can add more
than one clip to a track to accommodate the use of multiple tapes in a camera.
After the clips are assembled, you synchronize them and then create and enable the target sequence.
1
Choose File
>
New
>
Sequence.
2
Place clips from each camera on a separate track. Use video and audio tracks 1–4. You can edit the clips as
necessary.
Note: Video and audio clips placed above track 4 will not be available for multi-camera editing.
Synchronize clips
Make sure that you’ve marked the sync points for each camera’s footage before you attempt to synchronize them.
You can mark the sync points by setting similarly numbered markers for each clip or by reassigning each clip’s
timecode. (See “
Set timecode manually for a clip
A
B
C
F
D
E
April 1, 2008