Clip handles and transitions – Adobe Premiere Pro CS3 User Manual
Page 179
ADOBE PREMIERE PRO CS3
User Guide
173
You can add several clips to a sequence at once, and automatically add a default transition between them. (See
“
Add clips to a sequence automatically
2.
Change transition options.
Click the transition in the Timeline panel to display its properties in the Effect Controls panel. You can change its
duration, alignment, and other properties.
3.
Preview the transition.
Play back the sequence, or drag the current-time indicator through the transition to see the effect. If the playback is
not smooth, press Enter (Windows) or Return (Mac OS) to render the sequence.
Clip handles and transitions
In most cases, you don’t want a transition to occur during the essential action in a scene. For this reason, transitions
work best with handles—the extra frames beyond the In and Out points set for the clip.
The handle between a clip’s Media Start time and In point is sometimes called head material, and the handle
between a clip’s Out point and Media End time is sometimes called tail material.
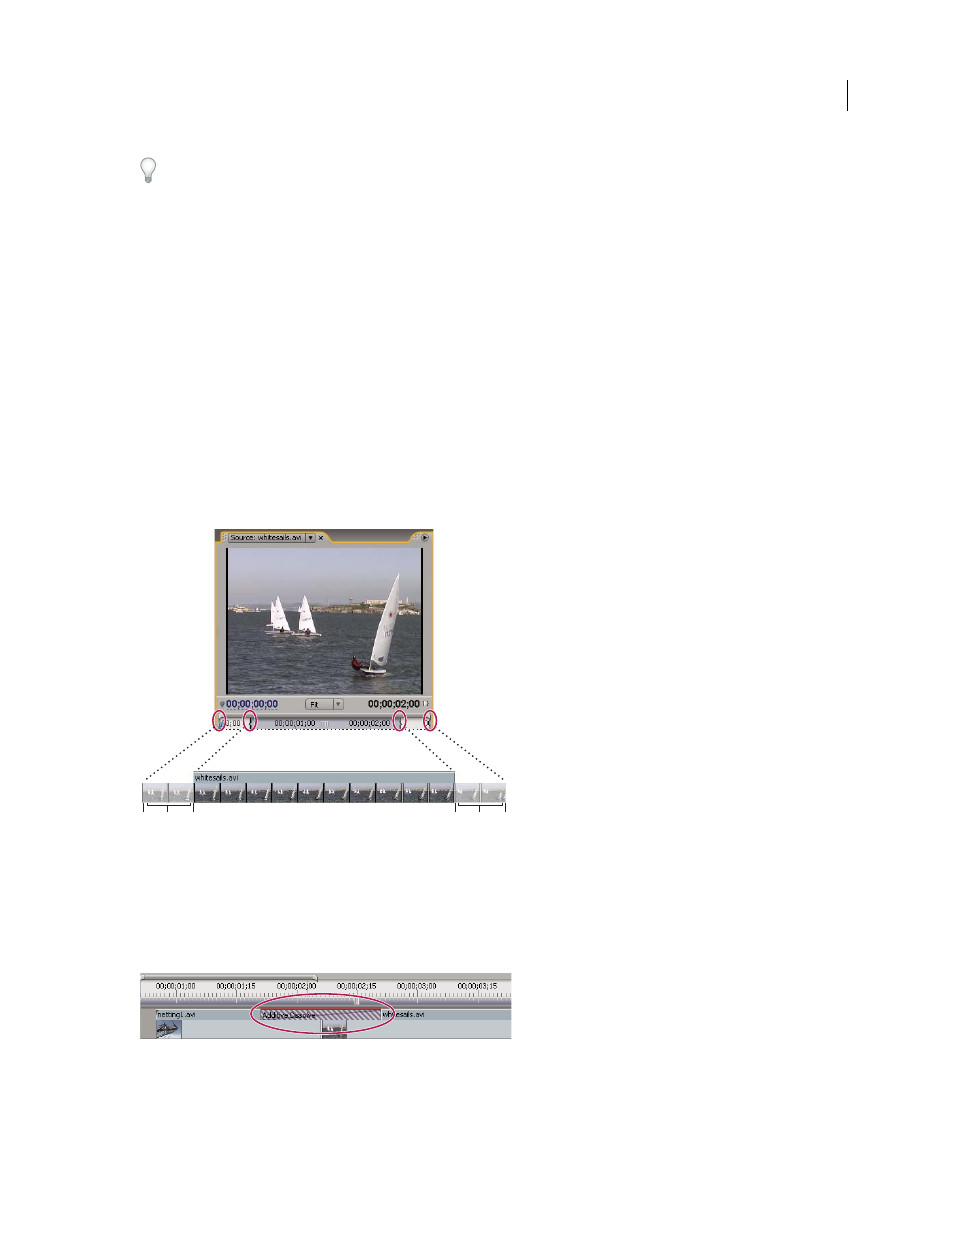
A clip with handles
A. Media Start B. Handle C. In point D. Out point E. Handle F. Media End
In some cases, the source media may not contain enough frames for clip handles. If you apply a transition, and the
handle duration is too short to cover the transition duration, an alert appears to warn you that frames will be
repeated to cover the duration. If you decide to proceed, the transition appears in the Timeline panel with diagonal
warning bars through it.
Transition using duplicate frames
A
C
B
D
F
E
April 1, 2008