Overview of storage utility – Grass Valley K2 Storage System Instruction Manual v.3.3 User Manual
Page 515
June 25, 2009
K2 Storage System Instruction Manual
515
Overview of Storage Utility
You open the Storage Utility from within the K2 System Configuration application in
the following ways:
• In the K2 System Configuration application tree view, select the name of the K2
Storage System, which is the top node of the storage system tree. Then click the
Storage Utility
button. Storage Utility opens. In this case the connection to the
RAID storage devices is via the K2 Media Server first configured, which is
designated as server 1, server A, or server 1A, depending on the level of the storage
system.
• In the K2 System Configuration application tree view, open the node for a K2
Media Server and select the
File System Server
node to open its property page. On
the property page click
Launch Storage Utility
. Storage Utility opens. In this case
the connection to the RAID storage devices is via the selected K2 Media Server.
NOTE: Do not run Storage Utility on a shared storage K2 Media Client.
NOTE: Do not run Storage Utility as a stand-alone application, separate from the
K2 System Configuration application. To maintain a valid K2 Storage System all
configuration must be controlled and tracked through the K2 System Configuration
application.
Overview of Storage Utility
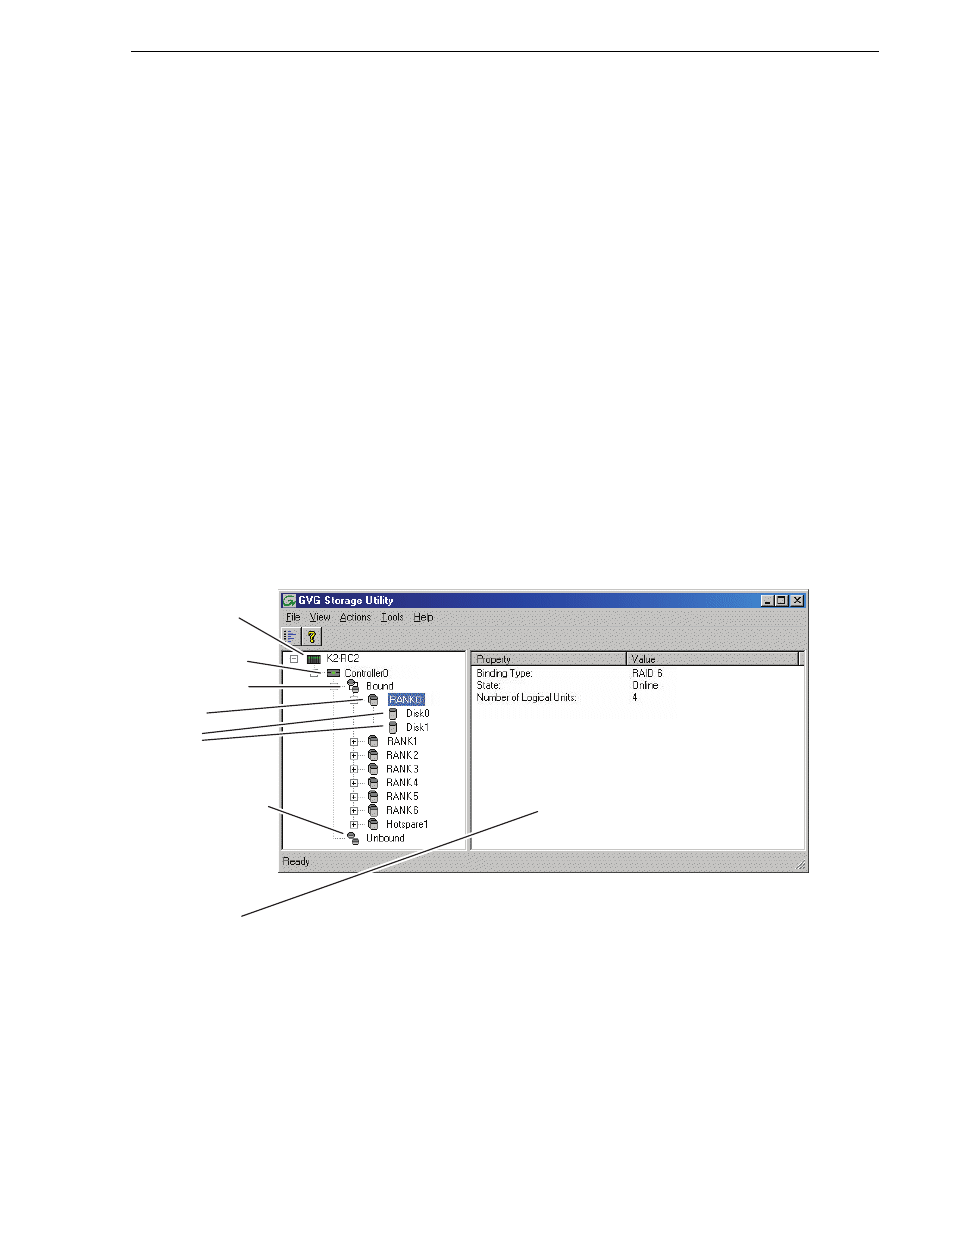
The Storage Utility user interface includes a tree view in the left-hand pane, and a
status information area displayed in the right-hand pane. The tree view displays the
hardware that make up the RAID storage system connected. The context menus in the
tree view are used to configure storage. The right-hand status pane displays
information about the item selected in the tree view. The tree view hierarchy is as
follows:
Controllers in device
- Provides a logical grouping of the RAID Controllers in a
Controllers
in device
Controller(s)
Bound Disks
RANK
Unbound Disks
Disks
Status area
(displays status of
the selected item)