Rockwell Automation 1783-WAPxxx Stratix 5100 Wireless Access Point User Manual User Manual
Page 45
Rockwell Automation Publication 1783-UM006A-EN-P - May 2014
45
Install the Stratix 5100 Wireless Access Point/Workgroup Bridge
Chapter 2
Follow these steps to mount the access point on a solid ceiling or wall.
1. Use the mounting bracket as a template to mark the locations of the
mounting holes on the bracket.
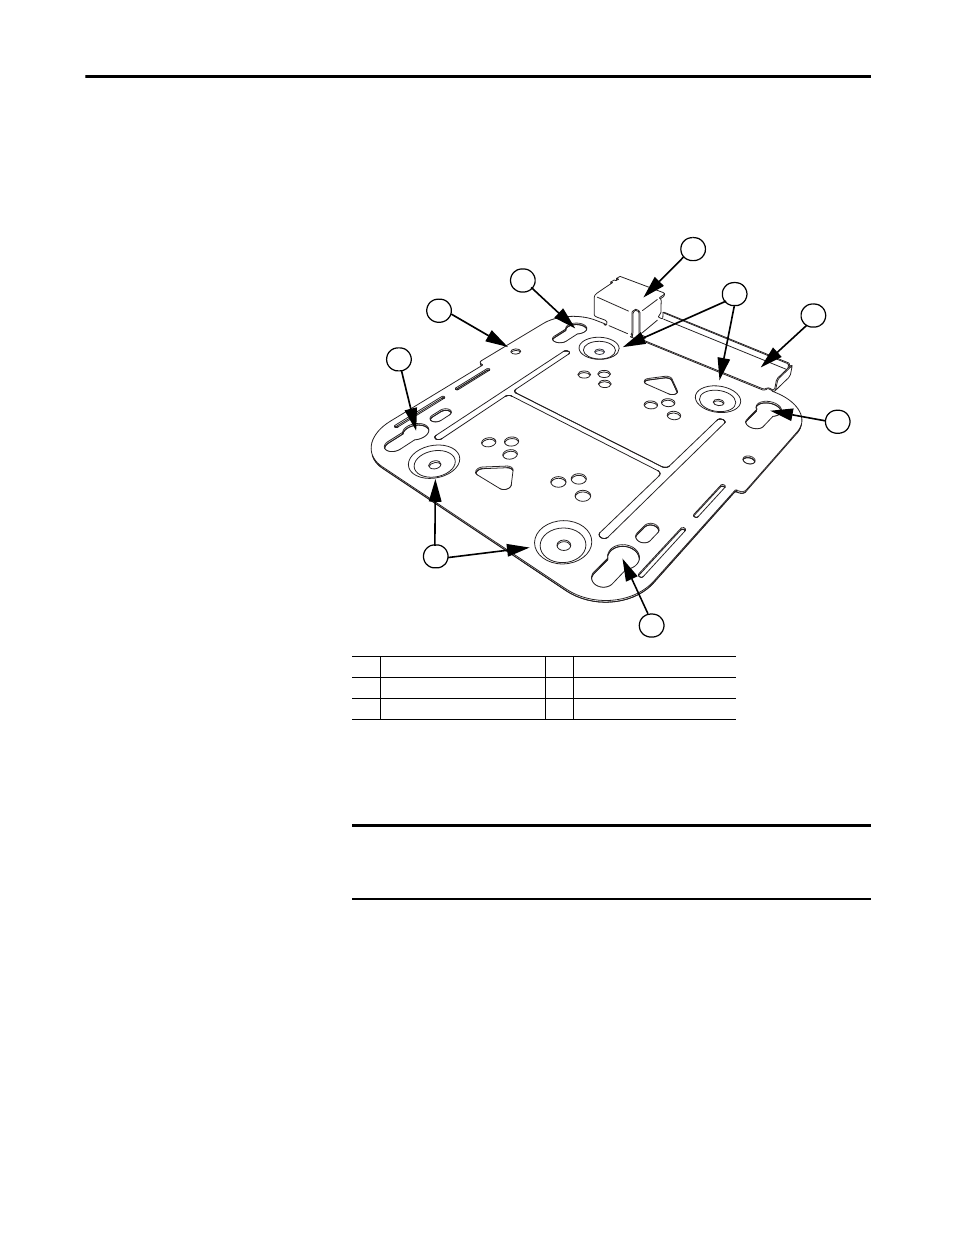
Figure 15 - Details of the Mounting Bracket
2. Use a #29 drill (0.1360 in. [3.4772 mm]) bit to drill a pilot hole at the
mounting hole locations (1) you marked.
3. (Optional) Drill or cut a cable access hole near and below the location of
the mounting bracket cable access cover large enough for the Ethernet
cable, building ground wire, and power cables.
1
Wall mount locations
4
Cable access cover
2
Grounding post
5
Security hasp
3
Access point attachment slots
TIP
Mark all four locations of the wall mounts. Make sure you have a secure
installation. Use adequate fasteners to mount the access point and use no less
than four fasteners.
IMPORTANT
Do not use plastic wall anchors or the keyhole slots on the mounting bracket
for ceiling installations. When mounting the access point on a hard ceiling, use
four fasteners capable of maintaining a minimum pullout force of 9 kg (20 lb).
TIP
The pilot hole size varies according to the material and thickness you
are fastening. Cisco recommends that you test the material to
determine the ideal hole size for your mounting application.
32473-M
1
1
2
3
3
3
3
4
5