Securing the access point, Securing the access point to the mounting plate – Rockwell Automation 1783-WAPxxx Stratix 5100 Wireless Access Point User Manual User Manual
Page 40
40
Rockwell Automation Publication 1783-UM006A-EN-P - May 2014
Chapter 2
Install the Stratix 5100 Wireless Access Point/Workgroup Bridge
Securing the Access Point
There are two ways to secure your access point:
• Attach it to an immovable object with a security cable.
• Lock it to the mounting plate with a padlock.
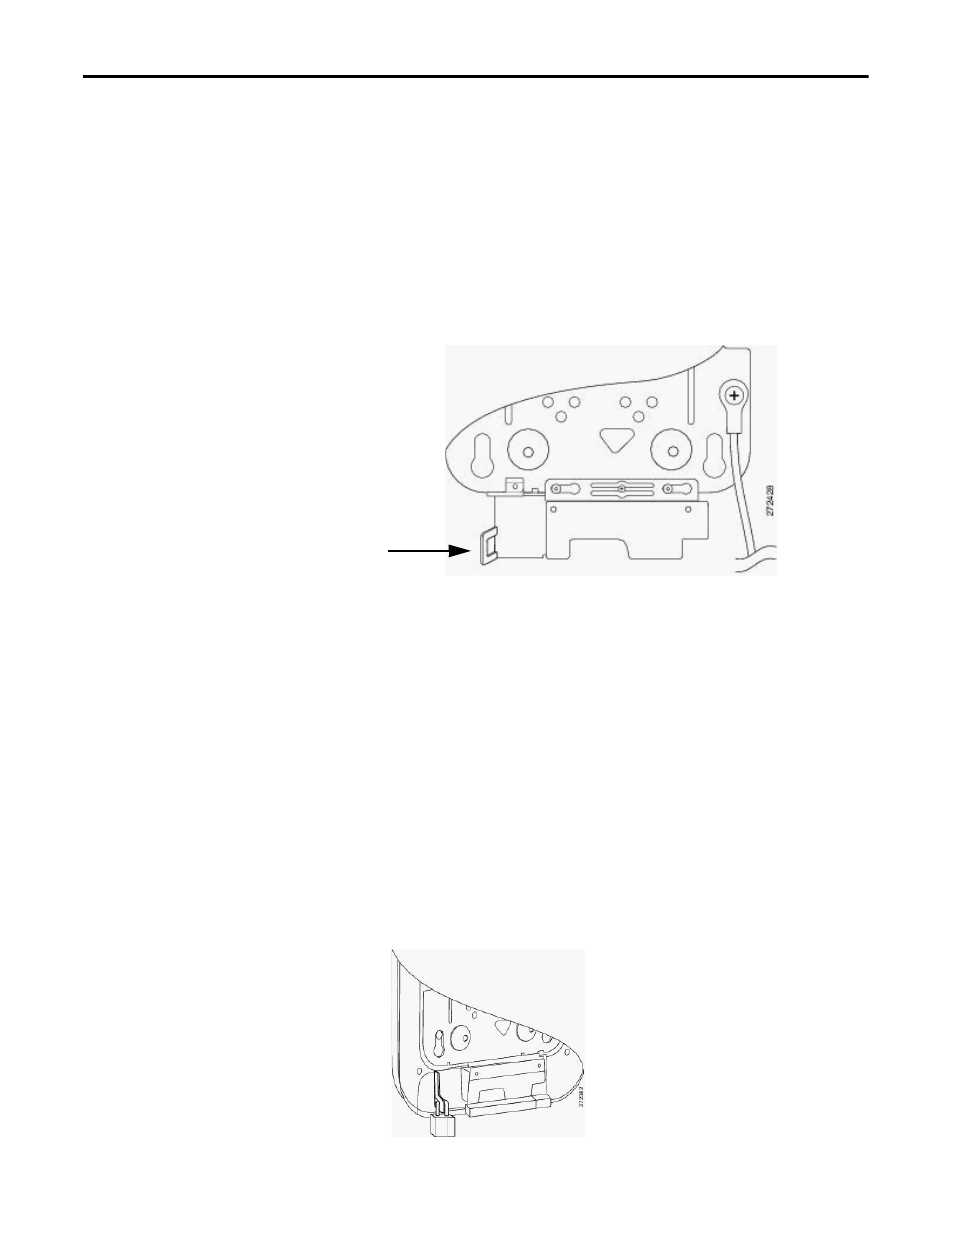
Securing the Access Point to the Mounting Plate
Use the security hasp on the adapter cable access cover and a padlock (that you
provide) to secure your access point to the mounting plate.
Figure 11 - Security Hasp
Compatible padlocks are Master Lock models 120T or 121T. The cable access
cover on the mounting bracket covers the cable bay area (including the power
port, Ethernet port, console port, and the mode button) to prevent the
installation or removal of the cables or the activation of the mode button.
Follow these instructions to install the padlock:
1. With the access point installed on the mounting bracket, insert a padlock
into the security hasp.
2. Rotate the lock clockwise and align the bail with the lock body.
3. Grasp the lock and push it into the bail to lock the lock.
Figure 12 - Attach the Pad Lock
TIP
Note If your access point is mounted to a hard ceiling, the clearance between
the mounting bracket and the ceiling is small. Work slowly by using both
hands to position and secure the lock into the mounting bracket hasp.