Hardware setup, Rear panel, N o t e – ETC Eos v1.3 User Manual
Page 324
310
Eos Operations Manual
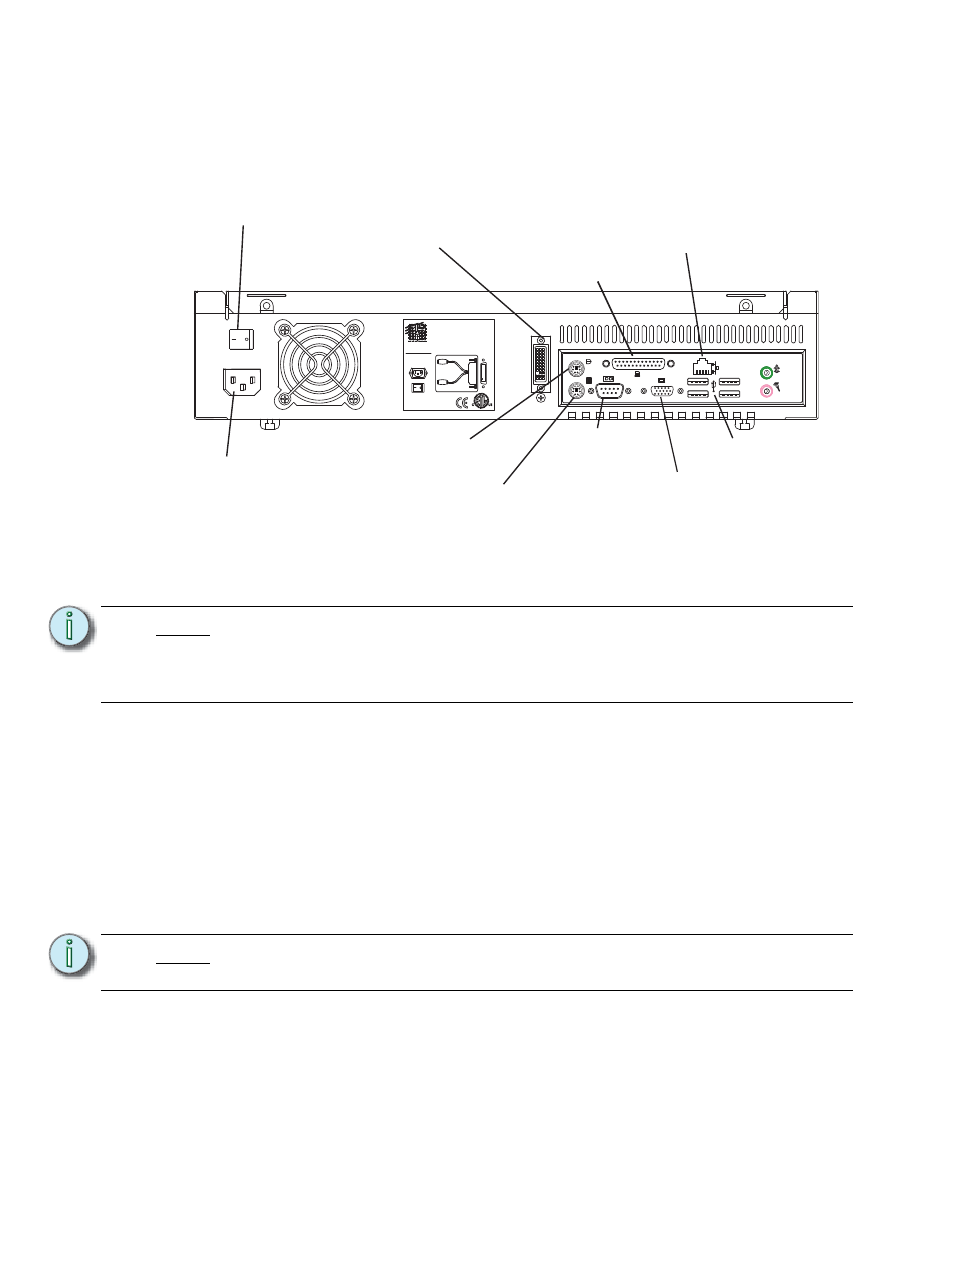
Hardware Setup
Rear Panel
Step 1:
Attach the appropriate IEC power cord to the power connector, then to an AC
receptacle.
Step 2:
Attach the dual DVI connector/Y-adapter to the DVI port.
Step 3:
Connect the USB mouse and keyboard to the USB connectors. If you wish to use a
PS2 mouse and/or keyboard (not provided), use the appropriate connectors on the
RVI.
Step 4:
Attach a network ethernet cable to the Ethernet port. All communications to the
associated control console are made over this Ethernet connection.
• Connection to the console may be made either directly using a Cat5 or better
null-modem cable or through an Ethernet hub or Ethernet switch using standard
Cat5 or better patch cables.
Step 5:
When all connections are made, activate the hard power switch on the rear panel.
Step 6:
Press the soft power switch, on the front of the unit, to power up the RVI.
N o t e :
If you have VGA monitors, attach the VGA adapters (provided) to the DVI Y-
adapter. Do not use the VGA connectors on the back of the RPU.
In Eos, the minimum screen resolution must be at least 1280x1024 with 32bit
color.
N o t e :
If the unit does not power up, check the hard power switch on the rear panel, to
ensure it is switched on.
AC Input
Net3 RVI
100-240 VAC
50/60 Hz 2A
Electronic Theatre Controls, Inc.
Middleton, WI Made in USA
Dual DVI Display
1
2
BTX - L OP IOSHLDR
Hard Power
Switch
AC Power
IEC connector
Dual DVI
Display
Mouse
Keyboard
USB
x4
Not Used
Not Used
Ethernet
RS-232