Previewing a document before printing it – Apple Pages '09 User Manual
Page 254
If you want to set a custom paper size, choose Manage Custom Sizes from the pop-up
menu. Otherwise, go to step 7.
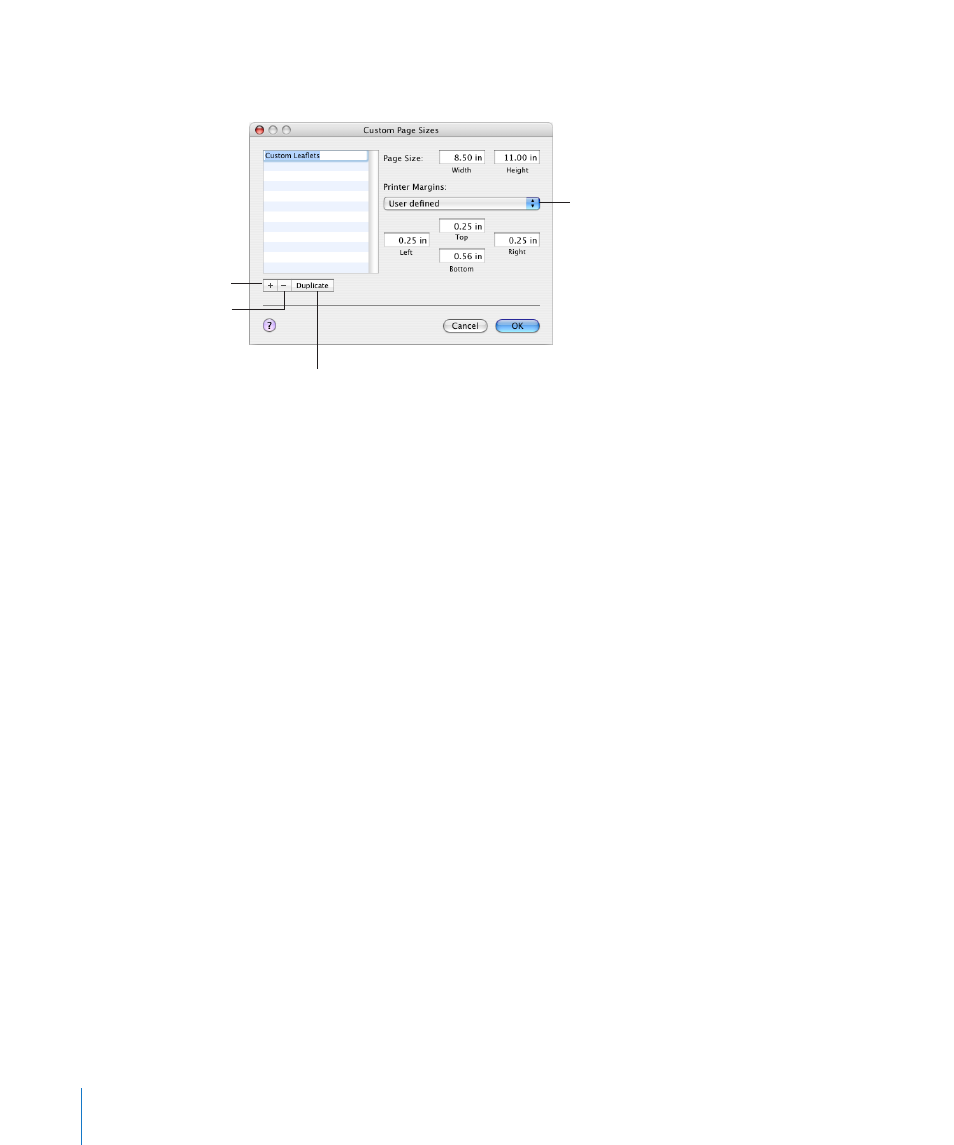
Choose a printer to set
its default page margins.
Create a new custom
paper size.
Duplicate a selected paper size.
Delete a selected
paper size.
4
Click the Add (+) button, and then enter values in the Page Size fields.
Either choose your printer’s default margins from the pop-up menu, or enter your own
values for margins in the Left, Right, Top, and Bottom fields.
If you want to change the custom size’s name, double-click the name in the list and
enter a new name.
5
Click OK.
6
Choose the new paper size you named from the Paper Size pop-up menu, and then
click OK.
7
Select an orientation option using one of the buttons at the bottom of the Page
Setup dialog.
8
To make an image larger or smaller to fill more or less of the paper, type a percentage
value into the Scale field, and then click OK.
A value less than 100% makes the image smaller; a value greater than 100% makes the
image larger.
Previewing a Document Before Printing It
To make sure everything is laid out the way you expect, it’s a good idea to preview a
document onscreen before you print it.
To preview a document for printing using Mac OS X 10.4:
1
Choose File > Print, and then click the Preview button in the Print dialog.
Preview shows what individual document pages will look like when printed. It doesn’t
show the effects of some layout options, such as borders.
2
Select SoftProof at the bottom-left corner of the Preview window to take your printer’s
capabilities into account.
254
Chapter 12
Printing, Sharing, and Exporting Your Document to Other Formats