Hoa keypad remote installation, 2 mechanical installation – Yaskawa Z1000U User Manual
Page 46
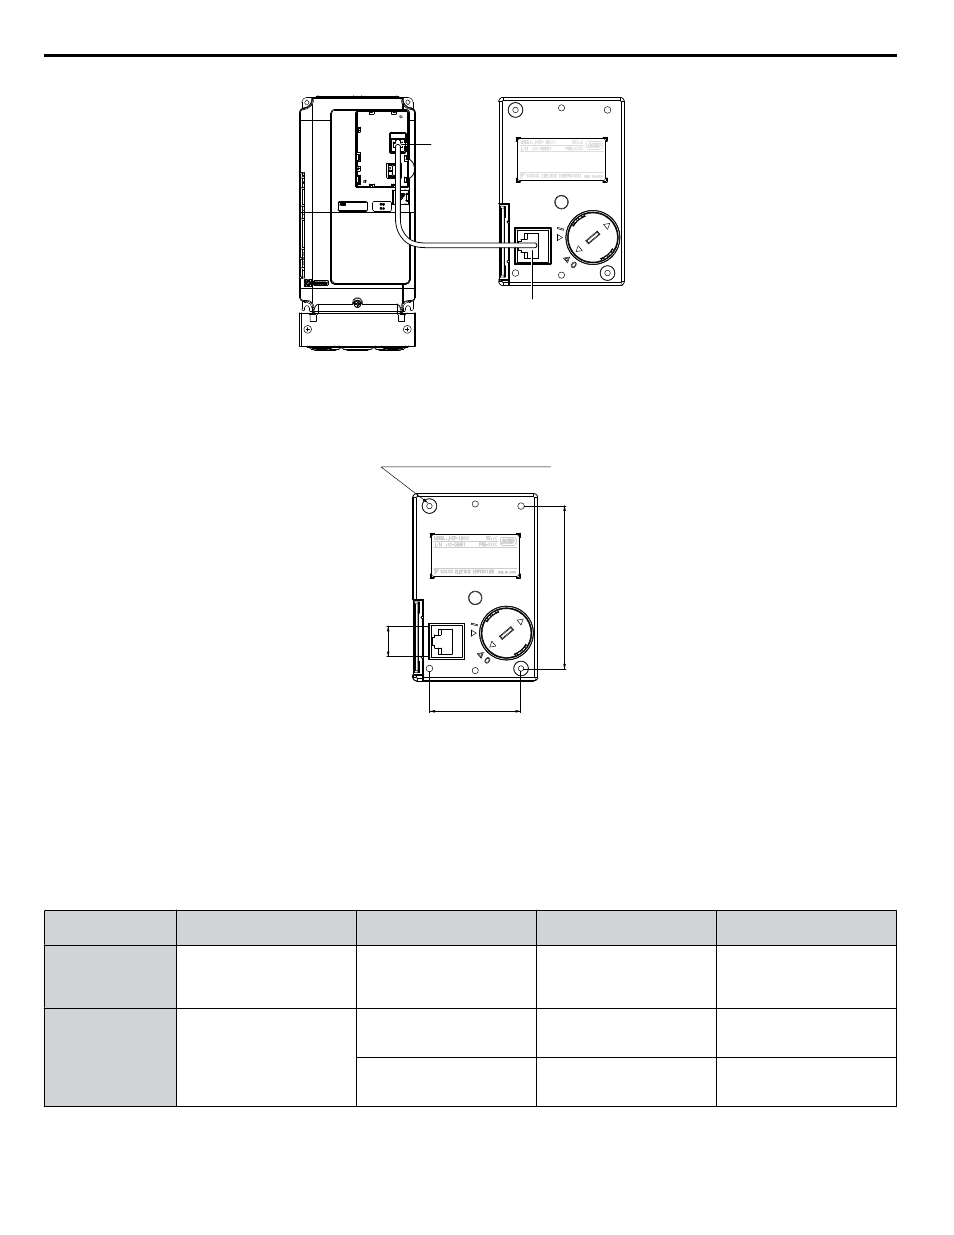
HOA Keypad
Communication Cable Connector
Drive
Comm Port
Figure 2.8 Communication Cable Connection
n
HOA Keypad Remote Installation
HOA Keypad Dimensions
Unit: mm (in)
Installation Holes (2-M3 Screws, Depth 5)
78 (3.07)
15 (0.59)
44 (1.73)
Figure 2.9 HOA Keypad Dimensions
Installation Types and Required Materials
The HOA keypad mounts to an enclosure two different ways:
• External/face-mount installs the HOA keypad outside the enclosure panel
• Internal/flush-mount installs the HOA keypad inside the enclosure panel
Table 2.2 HOA Keypad Installation Methods and Required Tools
Installation
Method
Description
Installation
Support Sets
Model
Required Tools
External/
Face-Mount
Simplified installation with the
HOA keypad is mounted on the
outside of the panel with two
screws.
–
–
Phillips screwdriver
(#1)
Internal/
Flush-Mount
Encloses the HOA keypad in
the panel. The front of the HOA
keypad is flush with the outside
of the panel.
Installation Support Set A
(for mounting with screws
through holes in the panel)
EZZ020642A
Phillips screwdriver
(#1, #2)
Installation Support Set B
(for use with threaded studs
that are fixed to the panel)
EZZ020642B
Phillips screwdriver (#1)
Wrench (7 mm)
NOTICE: Prevent foreign matter such as metal shavings or wire clippings from falling into the drive during installation and project
construction. Failure to comply could result in damage to the drive. Place a temporary cover over the top of the drive during installation.
Remove the temporary cover before drive start-up, as the cover will reduce ventilation and cause the drive to overheat.
2.2 Mechanical Installation
46
YASKAWA ELECTRIC TOEP C710636 10B Z1000U HVAC MATRIX Drive User Manual