Apple Soundtrack Pro 2 User Manual
Page 45
Chapter 2
The Soundtrack Pro Interface
45
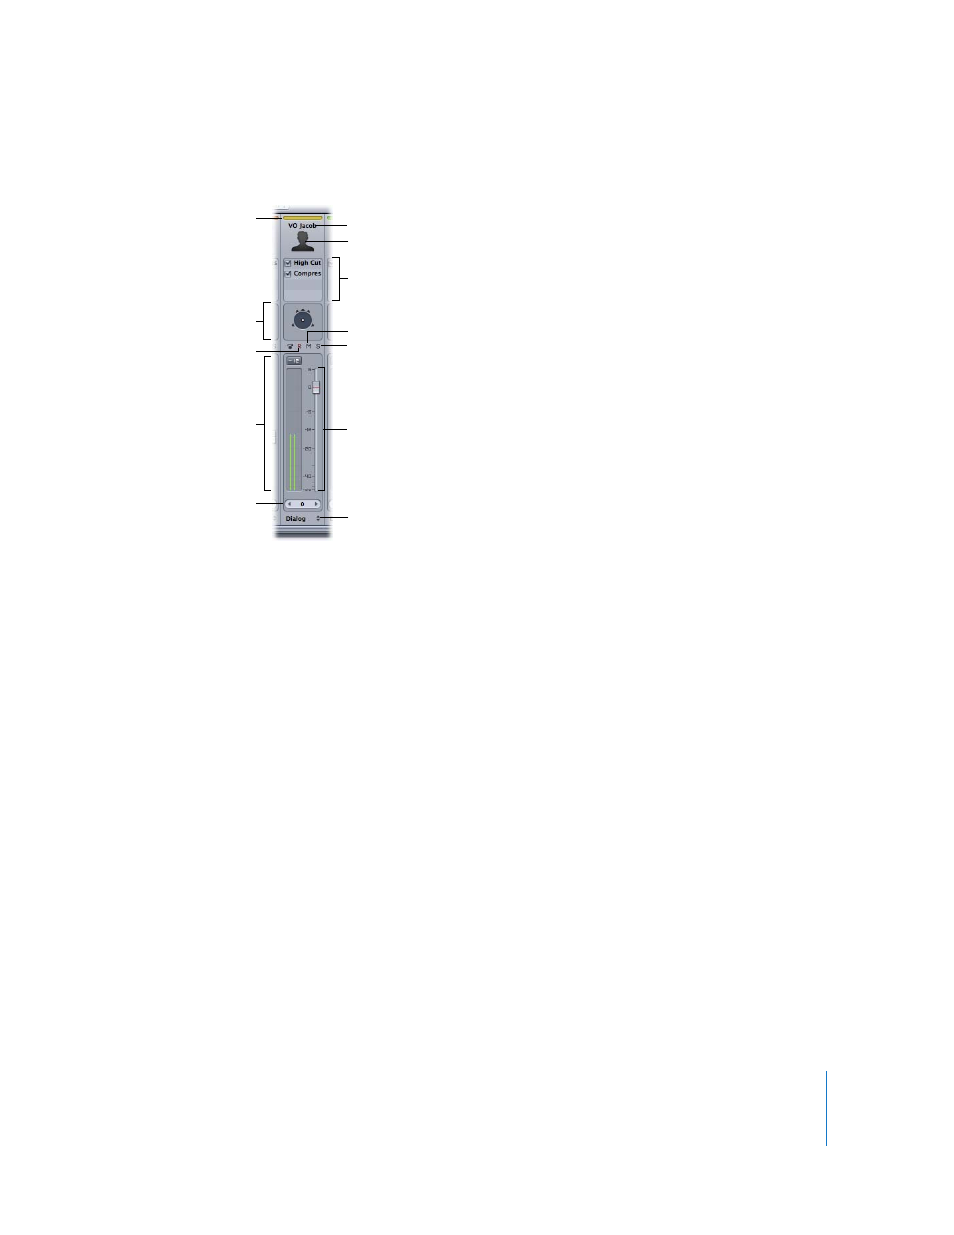
Each channel strip includes the following controls:
 Color label: Indicates the track color, which is applied to any clips on the track (unless
you choose to override the color for individual clips).
 Name field: You can type a new name for the channel strip.
 Icon: Icons let you visually distinguish channel strips in the Mixer. Double-click an
icon to change it.
 Effects slots: Show the effects and sends for the channel strip, and let you add effects
and sends.
 Panning controls: Set the pan position of a track or bus. In surround mode, drag
anywhere inside the black circle to position the puck. In stereo mode, drag the pan
slider left or right or change the value in the value slider. You can automate pan
changes by setting the appropriate automation mode for the project. These appear
in track and bus channel strips only, not in submix channel strips.
 Volume fader and value slider: Set the channel strip’s volume level by dragging the
fader or changing the value in the value slider. You can automate volume changes by
dragging the slider with the project set to the appropriate automation mode.
 Level meters with peak indicator: Show the volume level of the channel strip in real
time as the project plays. The peak indicator shows the highest level played and
changes color to indicate that clipping has occurred.
 Arm for Recording button: Click to enable the track for recording. When you click a
track’s Arm for Recording button, the Recording tab appears, showing the track’s
current recording settings. The button appears in track channel strips only, not in bus
or submix channel strips.
Icon
Volume fader
Effects slots
Solo button
Panning controls
Level meters and
peak indicator
Color label
Arm for Recording button
Name
Submix pop-up menu
Mute button
Volume value slider