Working with markers, Types of markers, Inserting markers – Apple Soundtrack Pro 2 User Manual
Page 183
Chapter 5
Working in the Timeline
183
Working with Markers
Markers have a variety of uses in the Timeline and the File Editor. For example, you can
use markers to:
 Mark the start and end points of major sections in your project
 Indicate places you want to come back to and work on later
 Mark points where you want to synchronize the audio with the picture in a video
 Indicate where particular sounds begin and end in an audio file
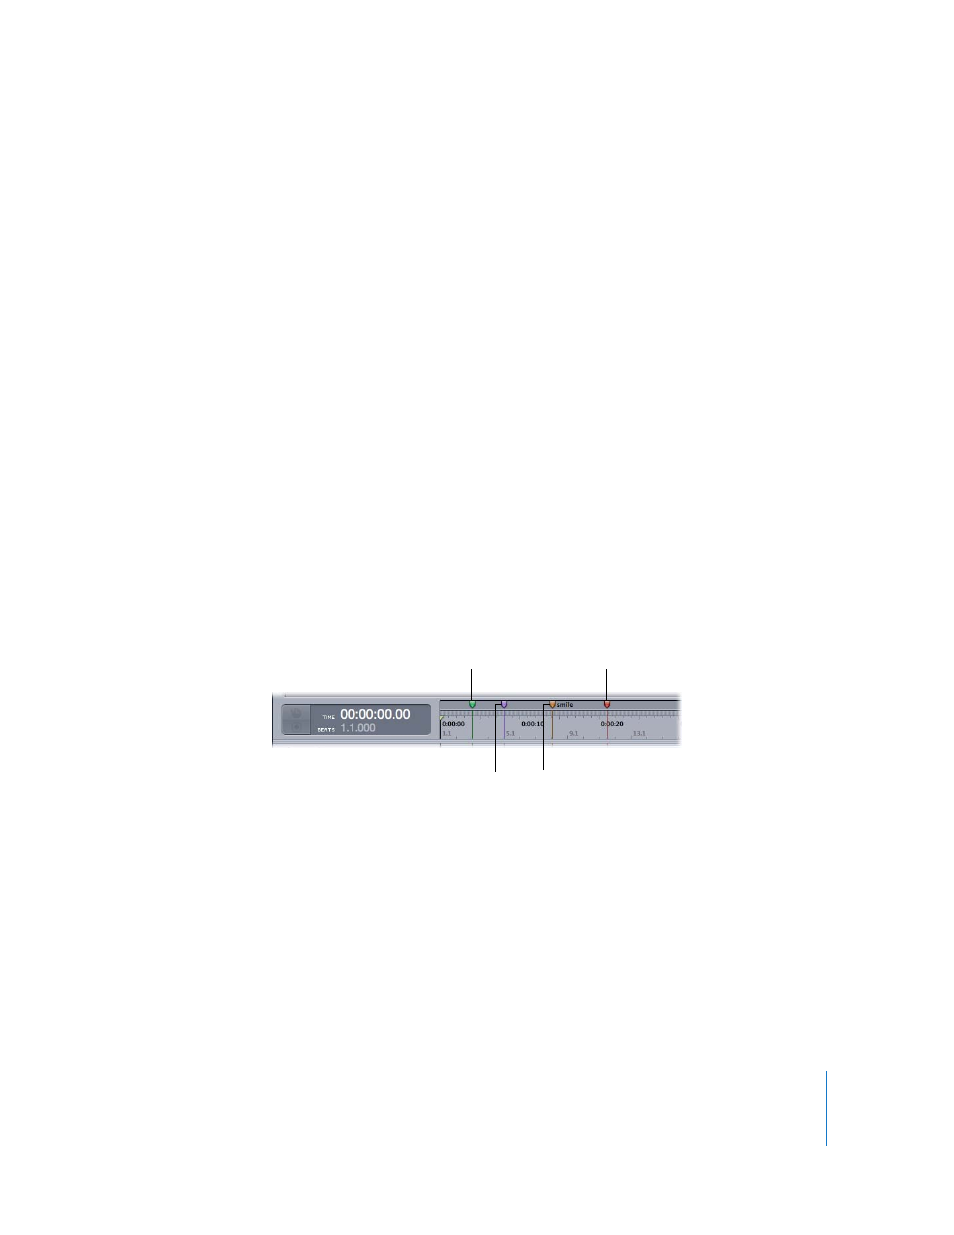
Markers extend vertically through the Timeline, like the playhead. Each marker has a
handle in the area above the Time ruler, letting you position the marker precisely in
the Timeline.
Types of Markers
Soundtrack Pro displays Final Cut Pro scoring markers, and lets you add your own
markers to a project. You can add two kinds of markers: time markers and beat
markers. The two types can be distinguished by their handles: Time markers have
green handles, and beat markers have purple handles. Final Cut Pro scoring markers
have orange handles. By default, time and beat markers can only occupy a single frame
of time, but their duration can be extended to any length.
This section discusses how to work with time markers and beat markers in a project.
For information about working with Final Cut Pro scoring markers, see “
Inserting Markers
You can insert a beat marker or time marker at any point in the Timeline.
To insert a time marker:
m
Set the playhead to the point where you want to add the marker, then choose
Project > Insert Time Marker (or press the M key).
To insert a beat marker:
m
Set the playhead to the point where you want to add the marker, then choose
Project > Insert Beat Marker (or press Option-B).
End-of-project marker
(red)
Time marker
(green)
Final Cut Pro scoring
marker (orange)
Beat marker
(purple)