6 click save, Changing the log mode for an external interface, How to update the external interface log mode – Grass Valley NV9000-SE v.3.0 User Manual
Page 446: N in figure 14-19, External interfaces
426
Rev 3.0 • 25 Mar 10
14. External Interfaces
Updating External Interface Information
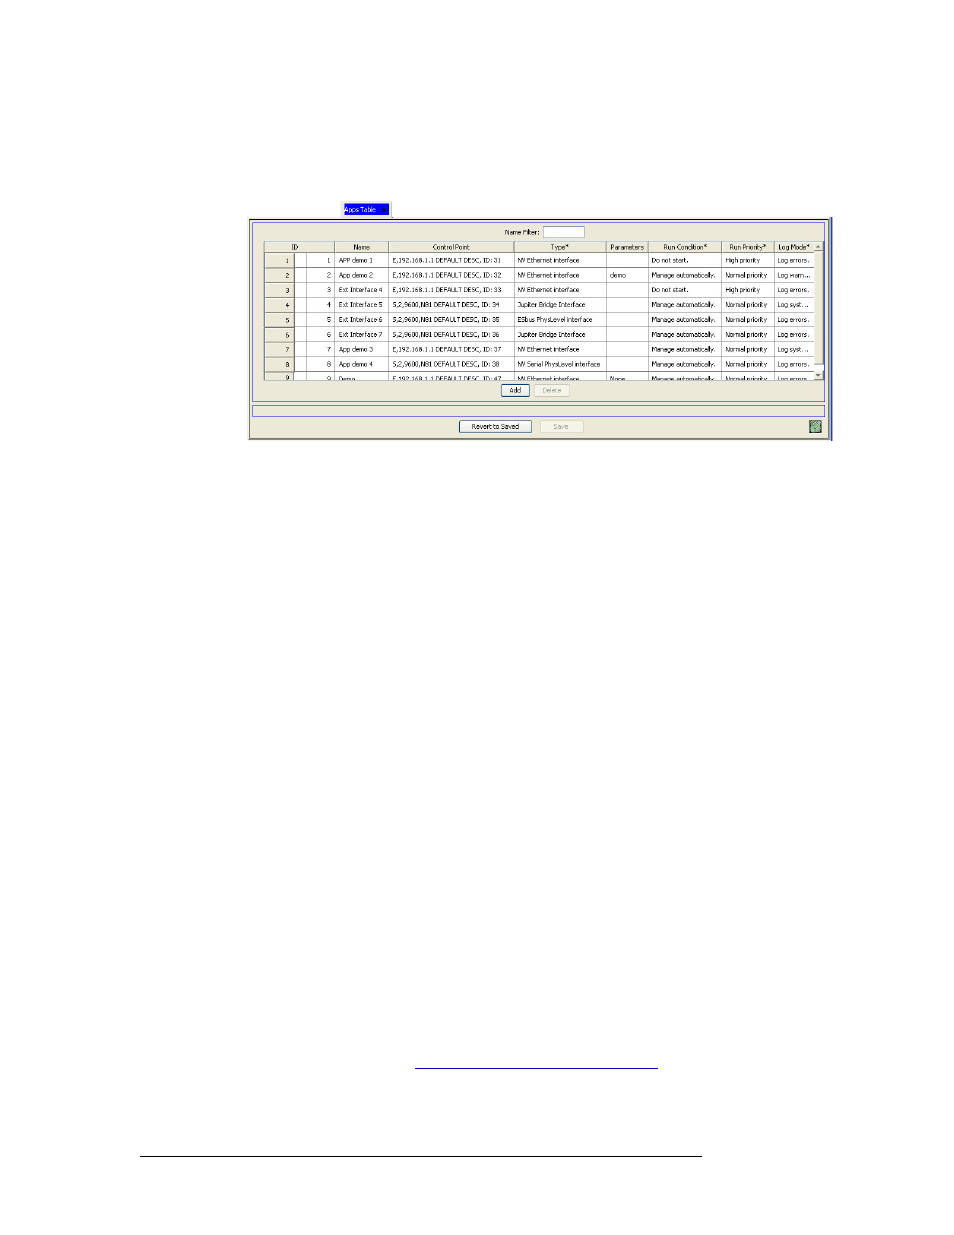
To narrow the list of external interfaces that display, enter the first characters of an external
interface name in the ‘Name Filter’ field. The list is automatically reduced to display only
external interfaces matching that character string.
Figure 14-19. Apps Table
3 Locate the row listing the external device being updated.
4 In the ‘Run Condition’ column, click in the field to activate it and select a run condition from
the drop down list:
• Manage automatically
—
External application starts at boot up.
• Do no start
—
External application does not start at boot up.
5 In the ‘Run Priority’ column, click in the field to activate it and select a run priority from the
drop down list:
• Normal priority
—
Priority is normal. The system controller executes request in order
received.
• High priority
—
External application takes priority over other applications. The system
controller executes requests from “high priority” applications before executing requests
from “normal priority” applications.
6 Click
Save
.
Or
To revert to the previously saved configuration, click
Revert to Saved
.
7 Click
X
on the window title tab to close the table.
Changing the Log Mode for an External Interface
The NV9000 server application maintains extensive logs of all system processes. These logs are
used throughout the system for troubleshooting purposes. A variety of logging “levels” can be set
as desired. Logs are located in the
NVISION\envy\userlocal
folder on the server’s C:\ or D:\ drive.
The log mode associated with an external interface can be updated at any time using the ‘Apps’
table accessed through the ‘Views’ pane.
How to Update the External Interface Log Mode
1 Launch NV9000-SE. (See
Launching and Exiting the Application
2 From the Navigation area, select the ‘Views’ pane and then ‘Apps’. The ‘Apps’ table appears,
as shown in Figure 14-20.