Mechanical steering unit / ontrac2 – Ag Leader GeoSteer Operation Manual User Manual
Page 74
Auto Calibrate
60
GeoSteer System
Once the Valve calibration process has completed, the Save Calibration screen will appear. Press the Green Check button to
accept and save calibration. Press the Red X button to discard all changes.
Note: If the Red X is pressed, the calibration will have to be restarted from the beginning.
Mechanical Steering Unit / OnTrac2+
This vehicle type uses a mechanical device attached to the steering wheel to control the direction the vehicle steers. Almost any
vehicle can have this type of installation. The GeoSteer must detect the minimum current that is required to start turning the
steering wheel as the final step of the calibration process. There are two steps to finish the calibration.
• OnTrac2 Minimum Output Right – This step determines the minimum current required to start turning the steering
wheel to the right.
• OnTrac2 Minimum Output Left – This step determines the minimum current required to start turning the steering wheel
to the left.
The next step of the calibration process should have started automatically from the Common Calibration Steps.
Note: Verify that the engine RPM is at the working speed while this part of the calibration is taking place.
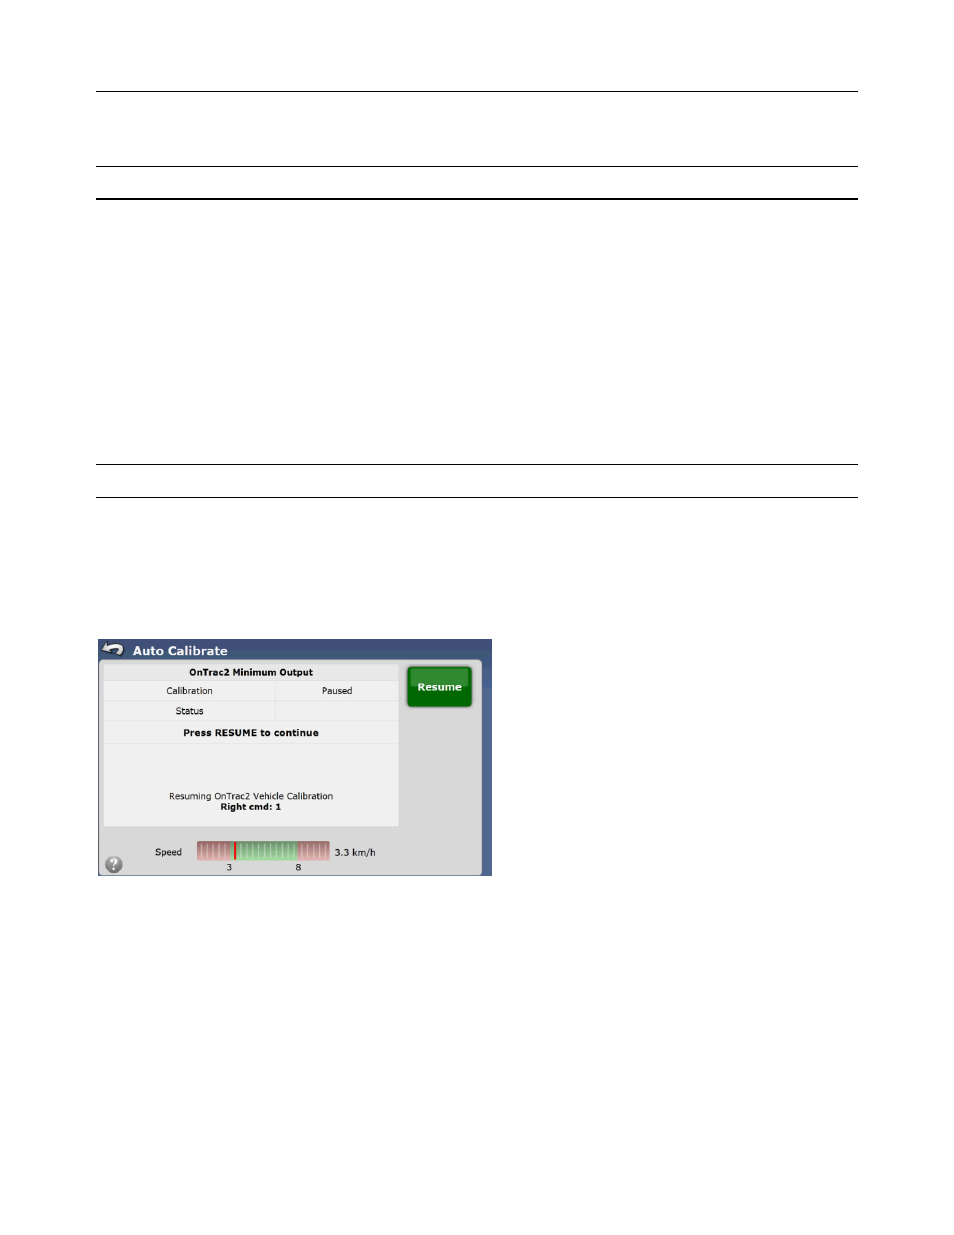
OnTrac2 Minimum Output Right
The first part of the test measures the minimum current required to start turning the steering wheel to the right. To start the
calibration step, start driving the vehicle in a straight line between 2.0 and 5.0 mph (3.2 and 8.0 k/h). Press Resume button to
begin the calibration process.
Figure 2-60 OnTrac2 Minimum Output Right Start
The calibration screen will begin to count up.