1 the trunk edit screen, Figure 191 network > interface > trunk, Table 87 network > interface > trunk – ZyXEL Communications 200 Series User Manual
Page 273
Chapter 11 Trunks
ZyWALL USG 100/200 Series User’s Guide
273
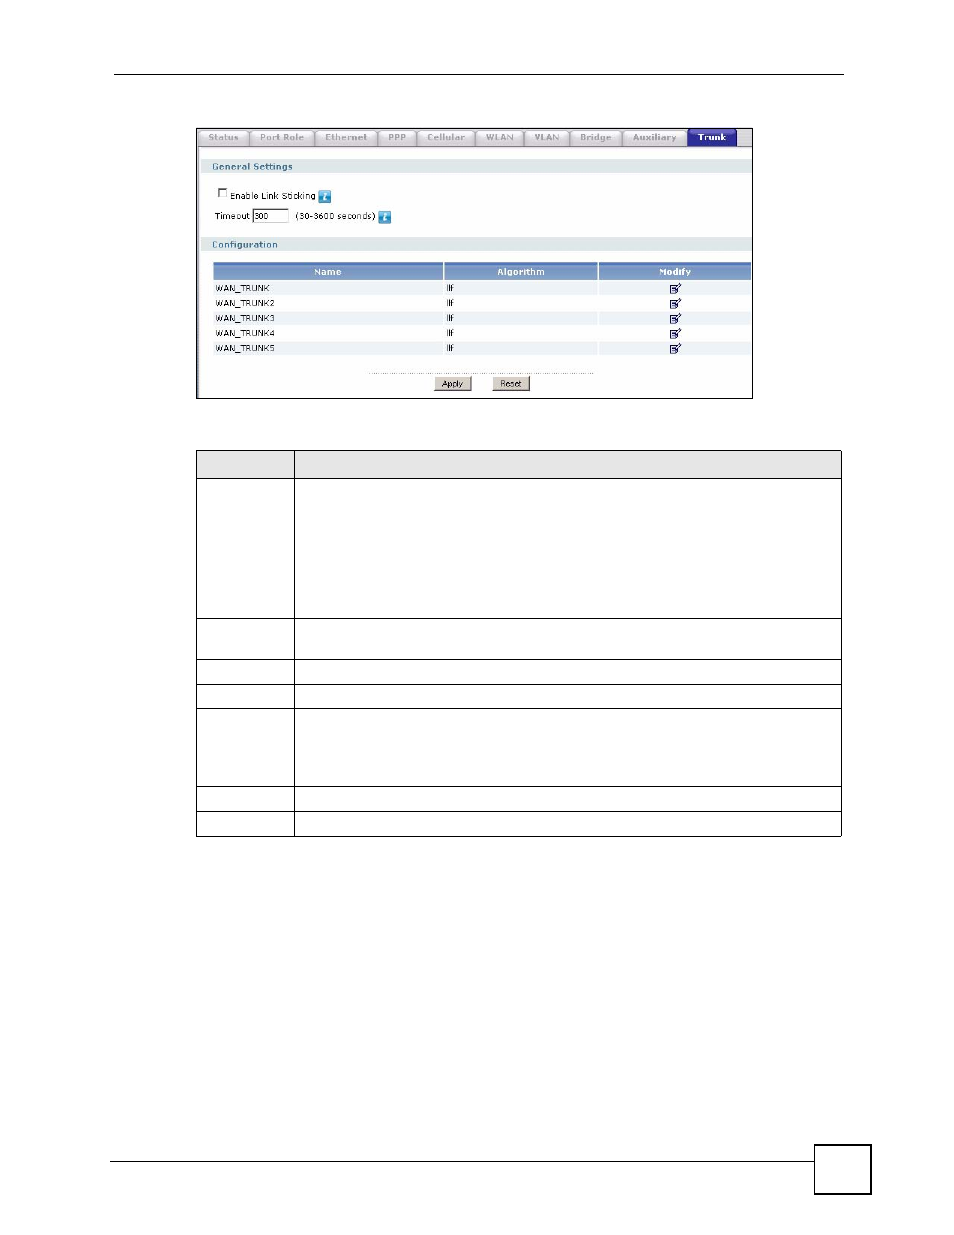
Figure 191 Network > Interface > Trunk
The following table describes the items in this screen.
11.2.1 The Trunk Edit Screen
Click Network > Interface > Trunk and then the Edit icon to open the Trunk Edit screen.
Table 87 Network > Interface > Trunk
LABEL
DESCRIPTION
Enable Link
Sticking
Select this option to have the ZyWALL send all of each local computer’s traffic through
one WAN interface for the number of seconds that you specify.
This is useful when a redirect server forwards a local user’s request for a file and
informs the file server that a particular WAN IP address is requesting the file. If the
user’s subsequent sessions came from a different WAN IP address, the file server
would deny the request. See
Link Sticking on page 270
for an example.
This setting applies when you use load balancing and have multiple WAN interfaces
set to active mode.
Timeout
Specify for how long the ZyWALL is to send all of each local computer’s traffic through
one WAN interface.
Name
This field displays the label that you specified to identify the trunk.
Algorithm
This field displays the load balancing method that the trunk is set to use.
Modify
This column lets you create, edit and remove trunks.
To edit a trunk, click the Edit icon next to it. The Trunk Members screen appears.
To remove a trunk, click the Remove icon next to it. The ZyWALL confirms you want to
remove it before doing so.
Apply
Click this button to save your changes to the ZyWALL.
Reset
Click this button to return the screen to its last-saved settings.