Rockwell Automation 57C650 AutoMax Programming Executive Version 3.8 User Manual
Page 132
8Ć4
AutoMax Programming Executive Version 3.x
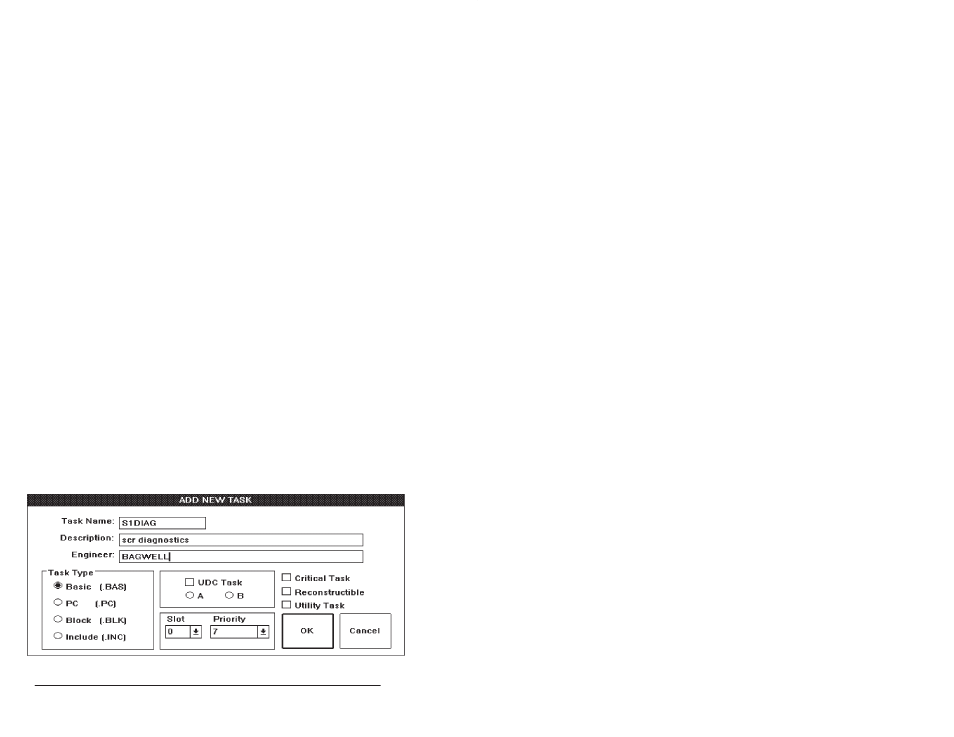
Slot Ć The slot number in the rack that contains the
AutoMax Processor that will run the task (0Ć4) or the slot
number in the rack that contains the UDC module that will
run the task (0Ć9 or 0Ć15, depending on the size of the
rack). (R) Tasks that use Ethernet functions must be run
on the leftĆmost Processor in the rack. Refer to JĆ3675 for
information about the Ethernet functions.
Priority Ć 4Ć11. This determines the priority with which the
task will run in the AutoMax Processor. The lower the
number, the higher the priority. See appendix C for more
information on task priority. (R) This parameter is not
available for UDC tasks.
Check boxes Ć Select all that apply. Note that the Critical
Task and Utility Task designations are mutually exclusive.
Critical Task Ć specifies whether the task is critical to the
system, i.e., whether it can be stopped independently (no
check) or only via a STOP/ALL command from the Online
menu (check). A critical task cannot be loaded into the
Processor or UDC until all tasks currently in RUN status
are stopped.
Reconstructible Ć will cause the compiler to generate an
object file that supports full reconstruction when the task is
compiled. If this option is not selected, tasks cannot be
saved back to the personal computer from the Processor
or UDC. If this option is selected, !" comments will not be
stripped from the file as it is compiled, and the object file
created will be larger than it would have been if this option
had not been used. The object file containing full
reconstruction data (an ASCII image of the original file) is
written to the application disk when the task is compiled
with this option selected. This option is not available for
PC tasks.
Utility Task Ć a task which is not specified in the rack
configuration object file loaded onto the Processor
module(s), but is intended to run in the rack. Utility tasks
are usually used for testing purposes and not for actual
applications.
Step 2.
Select OK to add the task name to the list on the screen
and add the task to the database, Cancel to return to the
Task Manager window without adding the task.
Figure 8.2 Ć Add New Task