2 adding a remote i/o network – Rockwell Automation 57C650 AutoMax Programming Executive Version 3.8 User Manual
Page 104
6Ć6
AutoMax Programming Executive Version 3.x
6.2
Adding a Remote I/O Network
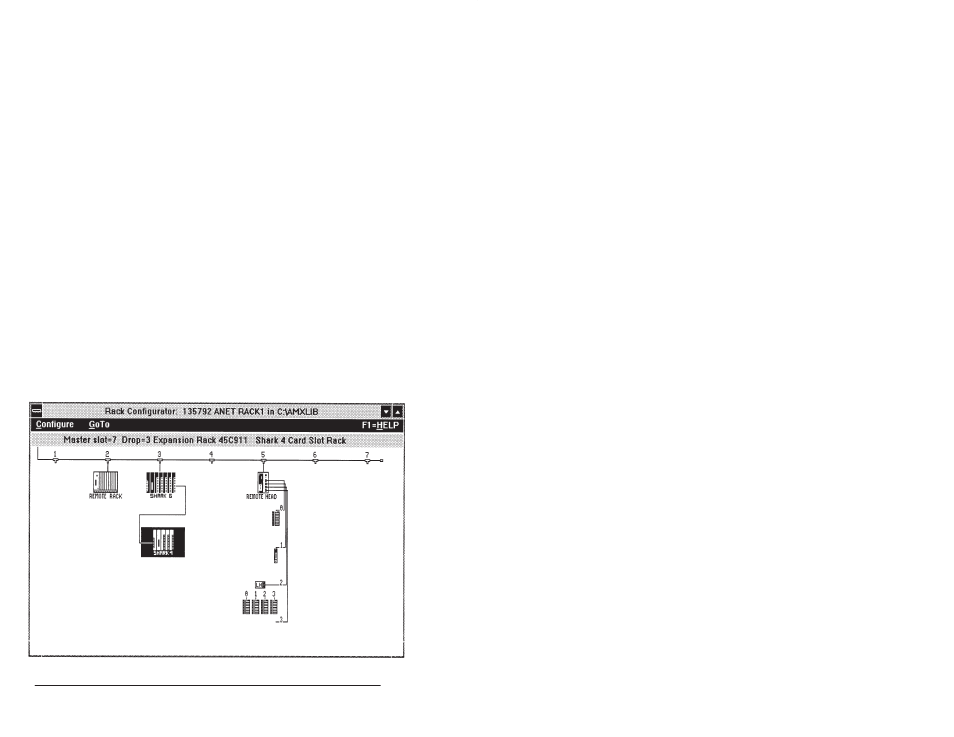
The following procedure enables you to add a remote I/O network for
a Remote I/O Interface module (M/N 57C416). Remote racks
(AutoMax or Shark), Remote I/O Heads, Local I/O Heads, Analog
Rails, and I/O Rail modules are all configured using this procedure.
Step 1.
Select the Remote I/O Interface module to which you want
to add a remote I/O network.
Step 2.
Select Zoom In from the GoTo menu. The remote I/O
network diagram will be displayed.
Step 3.
Select the drop on which to add a remote rack or Head.
Step 4.
Select Add from the Configure menu. A dialog box with
the available choices will be displayed.
Step 5.
Select a remote rack (AutoMax or Shark) or Remote I/O
Head. If you select a Shark rack, you must also select a
power supply (115/230VAC or 24VDC) for the rack.
Step 6.
Select one of the following:
Add Next if you want to add the rack or Head and then
add another rack or Head on the next available drop. If
you added a Remote Head in step 5, you will go to the first
available port where you can configure the Head (see
6.2.2).
Skip slot if you want to leave this slot empty and move to
the next available slot.
OK to add the rack or Head.
Cancel to return to the remote I/O network diagram
without adding the rack or Head.
Step 7.
When you are done, select Zoom Out from the GoTo
menu to return to the master rack.
Figure 6.4 Ć Remote I/O Network Diagram