Attachment tilt cylinder removal, Attachment tilt cylinder installation – Lull 944E-42 Service Manual User Manual
Page 98
Boom
3.50
Model 644E-42/944E-42
Rev. 6/04
3.6.5
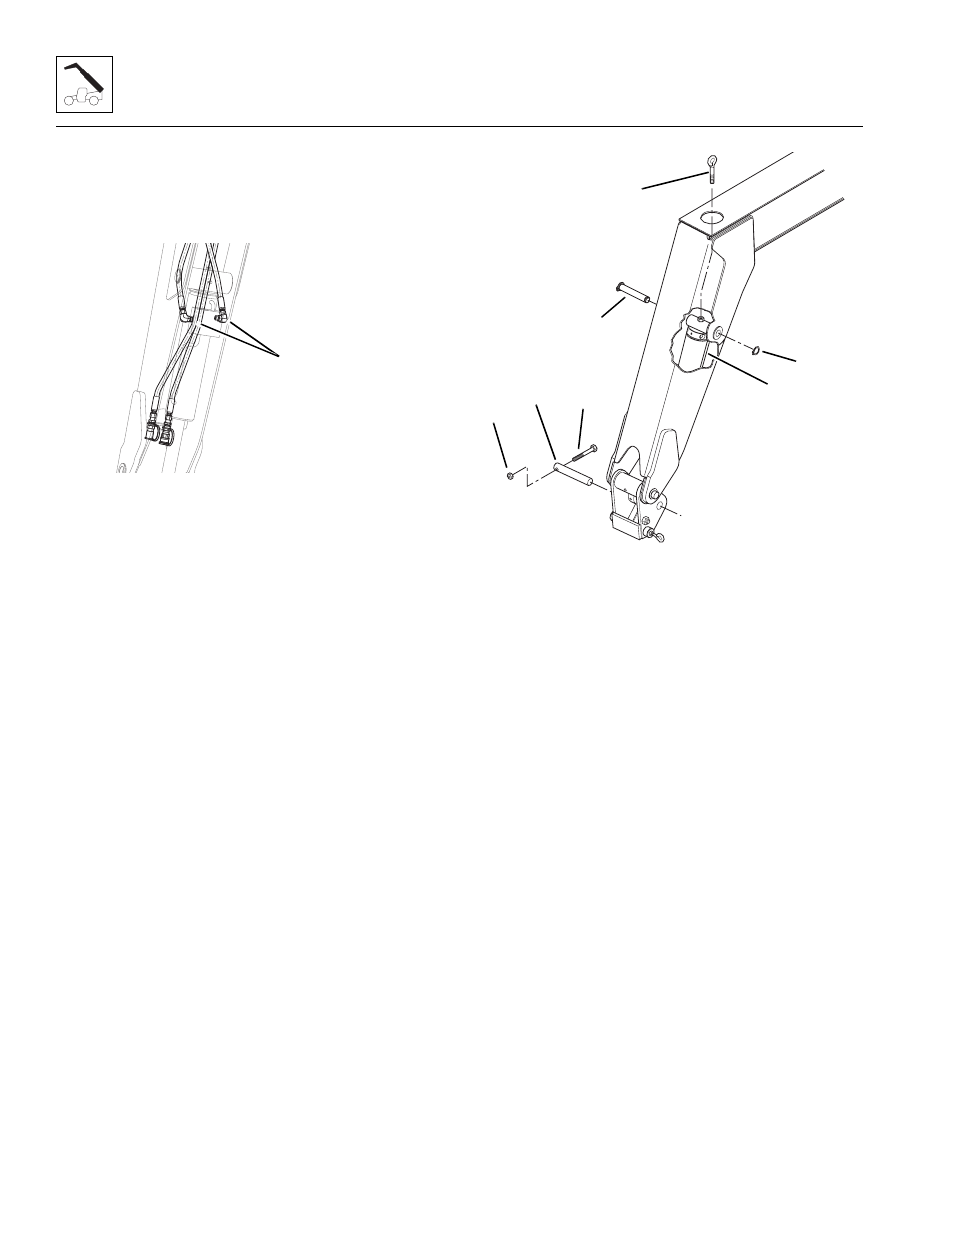
Attachment Tilt Cylinder Removal
1. Remove hydraulic hoses (1) from the attachment tilt
cylinder. Cap and label hoses and ports on
attachment tilt cylinder.
2. Remove quick attach. (Refer to Section 3.6.3, “Quick
3. Install a 1/2”-13 lifting eye bolt (2) to the nut on the
attachment tilt cylinder (3). Attach suitable overhead
lifting device and sling to the lifting eye.
4. Remove the retaining ring (4) from the upper
attachment pin (5), and remove the pin.
5. Remove one capscrew (6) and elastic locknut (8)
from the lower attachment pin (7), and remove the
pin.
6. Lower the attachment tilt cylinder (3) gently to the
ground.
7. Remove all fittings from the attachment tilt cylinder.
3.6.6
Attachment Tilt Cylinder Installation
1. Install a lifting eye bolt (2) to the nut on the
attachment tilt cylinder (3). Attach suitable overhead
lifting device and sling to the lifting eye.
2. Coat the upper cylinder mount pin (5) with anti-seize
compound. Install the upper attachment pin (5) and
secure with retaining ring (4).
Note: ALWAYS replace elastic locknuts with new elastic
locknuts to help ensure proper fastening.
3. Coat the lower cylinder mount pin (7) with anti-seize
compound. Install the lower attachment pin (7), one
capscrew (6) and a new elastic locknut (8). Torque
the capscrew to 37 - 67 lb-ft (50 - 90 Nm).
4. Replace fittings and hydraulic hoses (1) on the
attachment tilt cylinder according to their previously
marked positions.
MU0270
1
MU4870
2
3
4
5
6
7
8