Section 8.14.6, “extend/retract cylinder, Section 8.14.6, “extend/retract cylinder.”), Extend/retract cylinder – Lull 944E-42 Service Manual User Manual
Page 473: Warning
8.221
Model 644E-42/944E-42
Rev. 6/04
Hydraulic System
4. Use new oiled o-rings and reattach and secure the
hydraulic hoses to the slave cylinder fittings.
5. Start and run the engine at approximately one-third
to one-half throttle for about one minute without
moving the vehicle or operating any hydraulic
functions.
6. Inspect for leaks and check the level of the hydraulic
fluid in the reservoir. Shut the engine OFF. Add
hydraulic fluid if required.
7. Conduct a pressure check of the attachment tilt/
slave cylinder hydraulic circuit and bleed the circuit
as outlined in the procedure that follows.
8. Wipe up any hydraulic fluid spillage in, on, near and
around the vehicle, work area and tools.
g. Slave Cylinder Pressure Checking and Circuit
Bleeding
1. Attach a 5000 psi (345 bar) gauge to the main
control valve to test the attachment tilt and slave
cylinder hydraulic system circuit pressure. The unit is
equipped with test fittings from the factory. Refer to
Section 8.7, “Hydraulic System Testing.”
2. With no accessory installed on the quick attach, start
with the lift/lower and attachment tilt cylinders fully
retracted.
3. Fully extend the attachment tilt cylinder. Monitor
pressure while fully raising the lift/lower cylinder.
4. Fully retract the attachment tilt cylinder. Monitor
pressure while fully retracting the lift/lower cylinder.
5. Repeat Steps 3 thru 4 five times.
8.14.6
Extend/Retract Cylinder
The extend/retract cylinder (22) is located within the inner
boom.
a. Extend/Retract Cylinder Removal
Procedures for removing the extend/retract cylinder
appear in Section 3.3.1, “Inner Boom Replacement.”
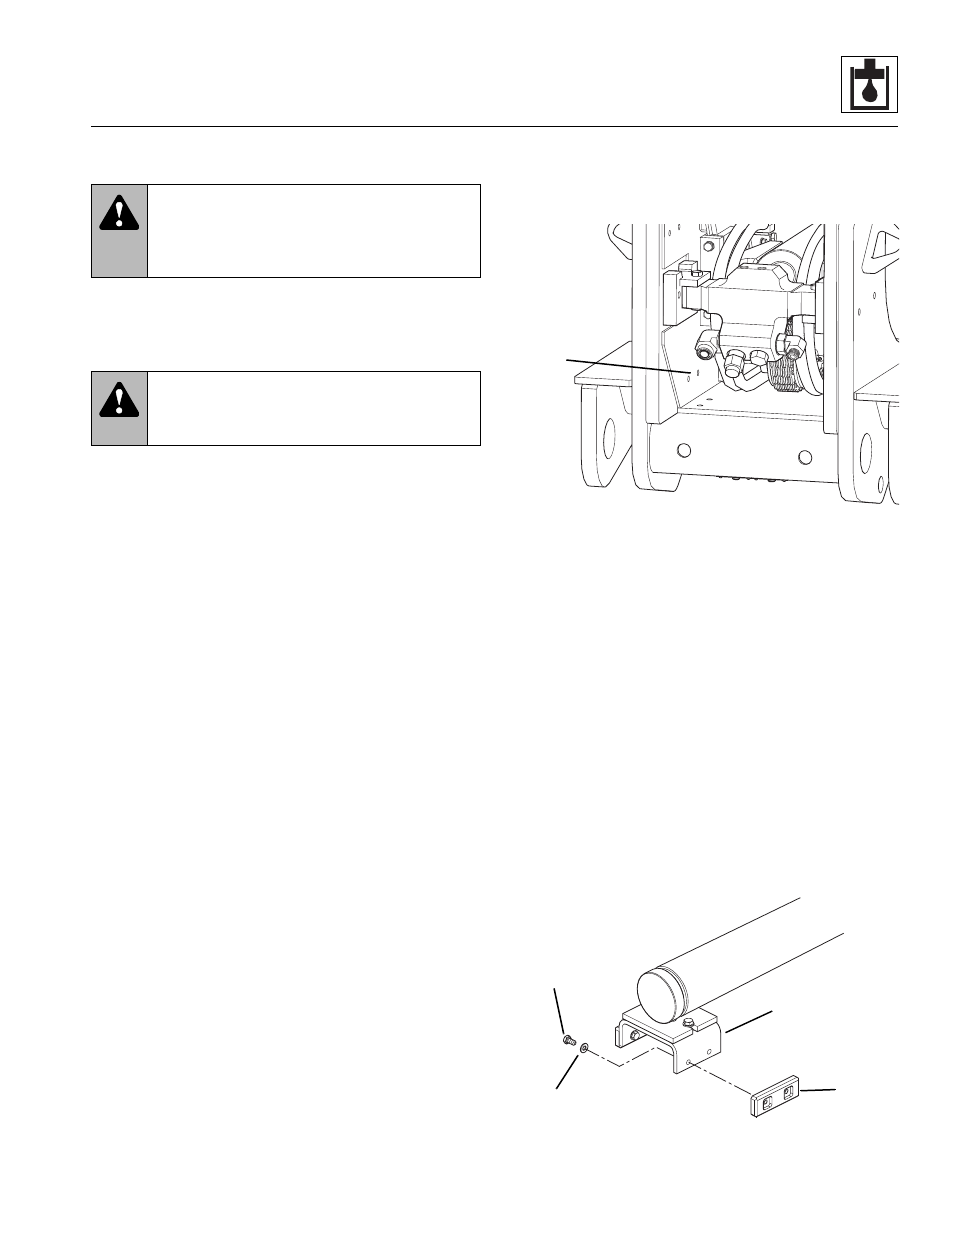
b. Extend Cylinder Wear Pad Inspection and
Replacement
After cylinder is removed, inspect the two wear pads (23)
mounted to the end of the cylinder. If the pads are worn
down to the wear pad indicator (angled cut) the pads
must be replaced.
Install the new pads onto the mount plate (24), and
secure in place with the capscrews (25) and washers
(26). Apply Loctite 242® (blue) to the threads of the
capscrews and install the capscrews. Torque the
capscrews to 31 lb-ft (42 Nm).
WARNING:
Avoid prolonged engine
operation in closed areas with inadequate
ventilation. Failure to properly ventilate exhaust
fumes can result in death or serious injury.
WARNING:
Escaping hydraulic fluid
under pressure can penetrate the skin, causing
death or serious injury.
MU0230
22
MU4480
23
24
25
26