Hydraulic cylinders, 14 hydraulic cylinders, General cylinder disassembly instructions – Lull 944E-42 Service Manual User Manual
Page 464: General cylinder cleaning instructions, General cylinder assembly instructions, Warning
Hydraulic System
8.212
Model 644E-42/944E-42
Rev. 6/04
8.14
HYDRAULIC CYLINDERS
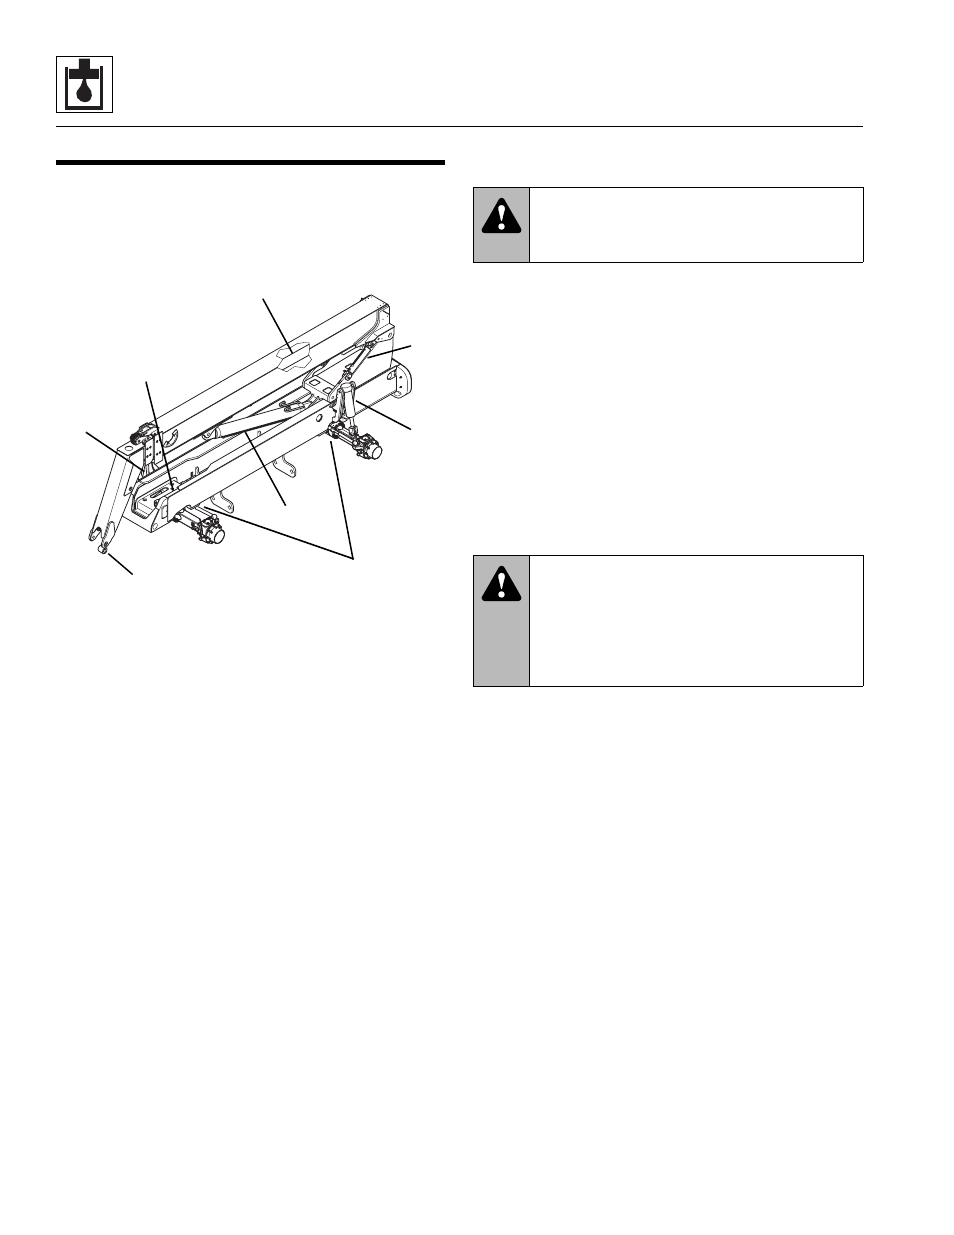
This section covers servicing the attachment tilt (1),
slave (2), extend/retract (3), lift/lower (4), frame sway (5),
stabilizer (6), steering (7) and transfer carriage (8)
cylinders on the vehicle.
There are many factors involved with the proper
disassembly, cleaning, inspection, repair and reassembly
of hydraulic cylinders; therefore, only qualified
professionals with proper training, supervision, tools and
equipment should rebuild the cylinders used on this
vehicle.
For example, special pin spanner wrenches of the correct
size are needed to disassemble the cylinders. Also, the
lift/lower cylinder rod locknut must be torqued to
2200-2600 lb-ft (2983-3525 Nm); this requires a special
torque wrench and/or torque multiplier. If the proper
knowledge and equipment are not available, the cylinders
must be sent out for rebuilding by a competent
professional at a company that specializes in rebuilding
agricultural and commercial heavy-equipment hydraulic
cylinders.
Rebuild cylinders only in a clean, well-lighted area where
all components can be carefully and thoroughly
inspected. If leaving a cylinder dismantled for any length
of time longer than the immediate rebuilding period, and
especially in high-humidity environments, coat the metal
parts with a suitable preservative and place them in
protective storage.
Refer to the specific instructions for removal, rebuilding
and installation of each cylinder.
8.14.1
General Cylinder Disassembly
Instructions
IMPORTANT: Avoid the use of excessive heat, which
will damage parts and make them unusable.
Some cylinder parts are sealed with a special organic
sealant and locking compound. Before attempting to
disassemble these parts, remove any accessible seals
from the area of the bonded parts. Wipe off any hydraulic
oil, then heat the part(s) uniformly to break the bond. A
temperature of 300-400° F (149-204° C) will destroy the
bond. Avoid overheating, or the parts may become
distorted or damaged. Apply sufficient torque for removal
while the parts are still hot. The sealant often leaves a
white, powdery residue on threads and other parts, which
must be removed by brushing with a soft brass wire brush
prior to reassembly.
DO NOT attempt to salvage cylinder seals, sealing rings
or o-rings. ALWAYS use a new, complete seal kit when
rebuilding hydraulic components. Consult the parts
catalog for ordering information.
Note: An additional o-ring may be included at the base
of the cylinder rod. This additional o-ring may be
discarded, as it served only in a temporarily protective
role.
8.14.2
General Cylinder Cleaning Instructions
Clean all reusable metal parts thoroughly after
disassembly and prior to inspection. Use an approved
solvent such as trichlorethylene.
8.14.3
General Cylinder Assembly Instructions
1. Before reassembly, ensure that parts are clean and
free from foreign matter. Use an approved solvent for
cleaning, such as trichlorethylene.
2. Use the proper tools for specific installation tasks.
Clean tools are required for installation.
3. Protect the finish on the rod at all times. Damage to
the rod can cause premature seal failure.
MU3680
1
2
3
4
5
6
7
8
WARNING:
To help prevent severe
burns, proceed with caution when applying
heat to parts.
WARNING:
Significant pressure may be
trapped inside the cylinder. Exercise caution when
removing a counterbalance valve or a
pilot-operated check valve from a cylinder.
Escaping hydraulic fluid under pressure can
penetrate the skin, causing death or serious injury.