Lull 944E-42 Service Manual User Manual
Page 676
Electrical System
9.166
Model 644E-42/944E-42
Rev. 6/04
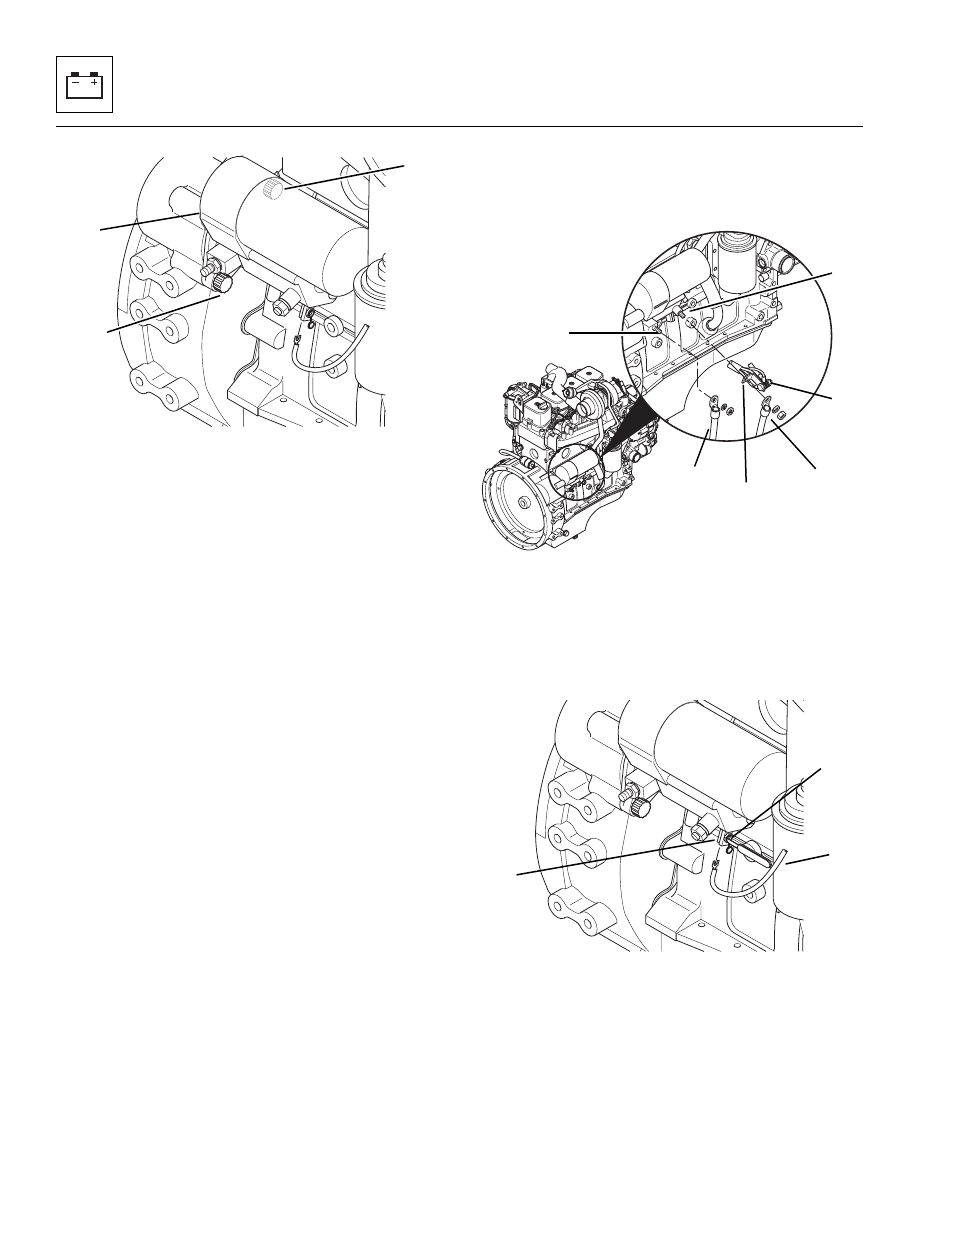
8. Loosen, but DO NOT remove, the two
fasteners (1 and 2) securing the starter (3) to the
flywheel housing. Support the starter securely, as it
is relatively heavy and will fall if not supported.
9. Remove the fasteners (1 and 2) securing the starter
to the engine.
10. Remove the starter (3) from the vehicle.
d. Starter Cleaning and Drying
1. While the starter is out, wipe away any grease or dirt
that has accumulated around the starter mounting
opening.
2. If reinstalling the starter, clean the exterior of the
starter with an approved solvent. DO NOT submerse
the starter or allow the solvent to contact the starter
bushings.
3. Dry the starter with a clean, lint-free cloth.
e. Starter Periodic Maintenance
A starter requires no routine maintenance beyond the
occasional inspection of the electrical connections, which
must be clean and tight. The starter is not serviceable;
replace a defective starter with a new unit.
f.
Starter Installation
1. Position the starter (3) in its mounting opening on
the flywheel housing. Secure the starter with two
fasteners (1 and 2). Torque fasteners to 32 lb-ft
(43 Nm).
2. Secure the negative (-) battery cable (4) to the
starter ground stud (5). Torque mounting hardware
to 40-45 lb-ft (54-61 Nm).
3. Connect the positive (+) battery cable (6) and starter
positive buss bar (7), with the wires (8) still
connected, at the positive starter stud (9). Torque
mounting hardware to 40-45 lb-ft (54-61 Nm).
4. Insert the fork terminal of the blue wire (10) into the
protective cover (11) on the starter solenoid
terminal. Use a small phillips screwdriver to tighten
the screw (12) securely.
5. Snap the tethered cap back in place over the screw
in the protective cover.
6. If the vehicle has dual batteries, connect both
negative battery cables (13 and 14) to both
batteries.
Connect the lower negative battery cable (13) to the
negative (-) terminal on the lower battery (15). Swing
the upper battery box (16) in and make sure that the
lip (17) on the upper battery box slides below the
knob (18). Secure in place with the knob (18).
MU6590
1
2
3
MU6560
9
6
7
8
5
4
10
12
11
MU6580