Transmission replacement, Transmission removal – Lull 944E-42 Service Manual User Manual
Page 182
Transmission: ZF 4WG-92/98 TSC & Transfer Case: ZF TB92-I4
6.6
Model 644E-42/944E-42
Rev. 6/04
6.7
TRANSMISSION REPLACEMENT
Note: Contact your local Lull distributor or the JLG
Service Department at (877) 554-5438 or
(717) 485-6657, if internal transmission repair is required
during the warranty period.
IMPORTANT: To help ensure safety and optimum
performance, replace the transmission if it is damaged.
Refer to the appropriate parts manual for ordering
information.
Cleanliness is of extreme importance. Before attempting
to remove the transmission, thoroughly clean the exterior
of the transmission to help prevent dirt from entering
during the replacement process. Avoid spraying water or
cleaning solution onto or near the transmission shift
solenoids and other electrical components.
6.7.1
Transmission Removal
1. Park the vehicle on a firm, level surface. Level the
vehicle, ground the attachment, place the travel
select lever in the (N), NEUTRAL DETENT position,
engage the parking brake switch and shut the
engine OFF.
2. Place an Accident Prevention Tag on both the
ignition key switch and steering wheel, stating that
the vehicle should not be operated. Refer to Section
1.5, “Accident Prevention Tag Usage.” Unlock and
open the engine compartment cover. Allow the
engine, transmission and hydraulic fluid to cool.
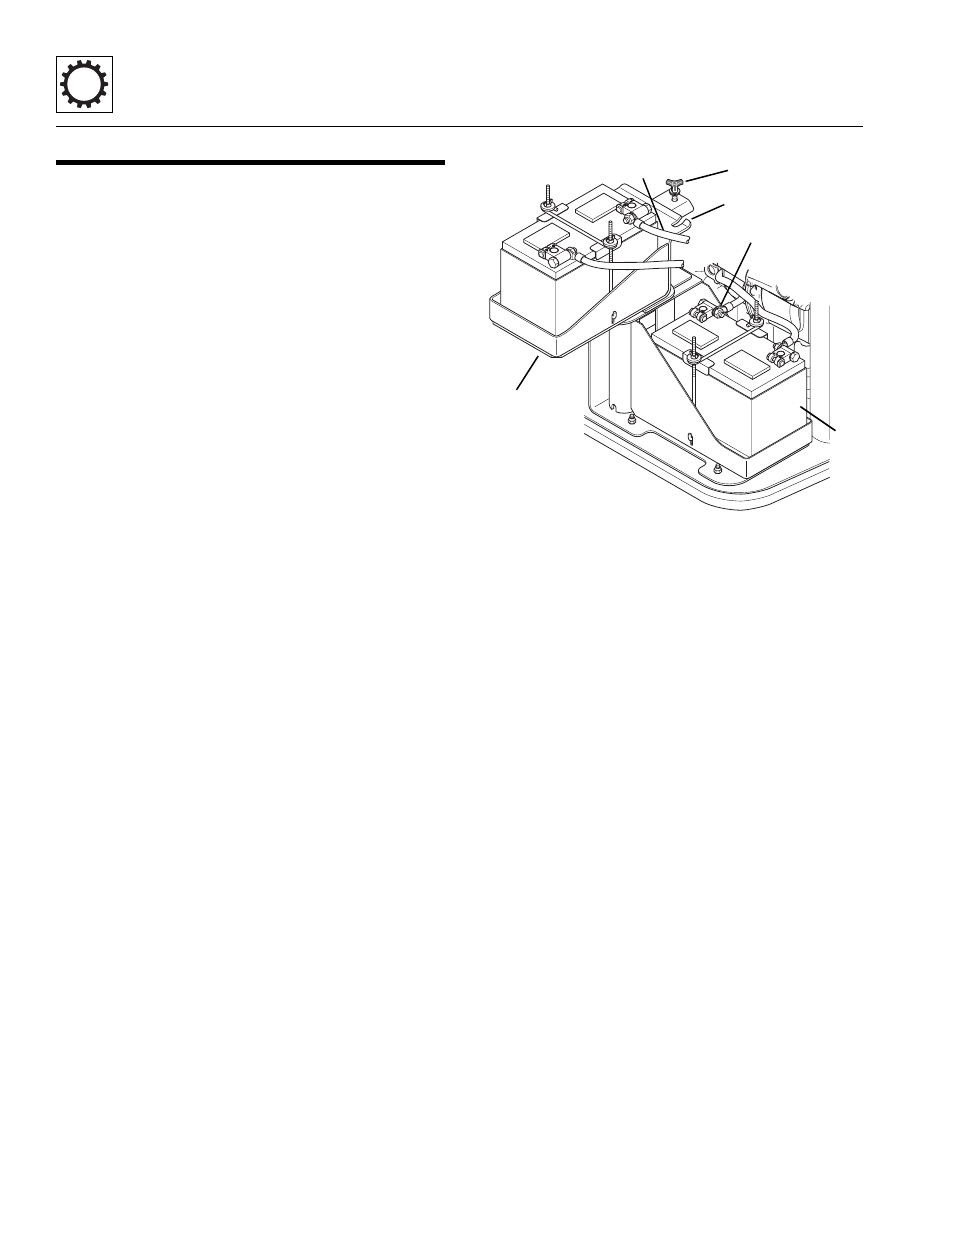
3. If the vehicle has dual batteries, disconnect both
negative battery cables (1 and 2) from both
batteries.
To access the lower battery (3), loosen the knob (4)
far enough so that the lip (5) on the upper battery box
clears the knob. Lift up the upper battery box (6) and
swing it out, so that the box clears the hydraulic tank
support bracket, to gain access to the lower negative
battery cable (1). Disconnect the lower negative
battery cable.
4. Remove the engine hood from the engine pod. Refer
to Section 4.8.2, a. “Engine Hood Removal.”
5. Remove the air cleaner assembly from the engine
turbocharger and the engine pod firewall.
a. Loosen the clamp (7) securing the air intake
hose to the turbocharger, but do not remove the
clamp.
b. Disconnect the wire from the air intake sensor
(8).
c. Remove the upper hex bolt (9) holding the air
cleaner canister to the firewall.
d. Loosen the lower hex bolt holding the air cleaner
canister to the firewall.
e. Remove the air cleaner canister, with air intake
hose, from the vehicle. Save for reassembly.
MU0650
1
2
3
4
5
6