Front upstop wear pad replacement, Rear roller gap check, Section 11.3.10, “rear – Lull 944E-42 Service Manual User Manual
Page 818: Roller gap check
Transfer Carriage
11.16
Model 644E-42/944E-42
Rev. 6/04
11.3.9
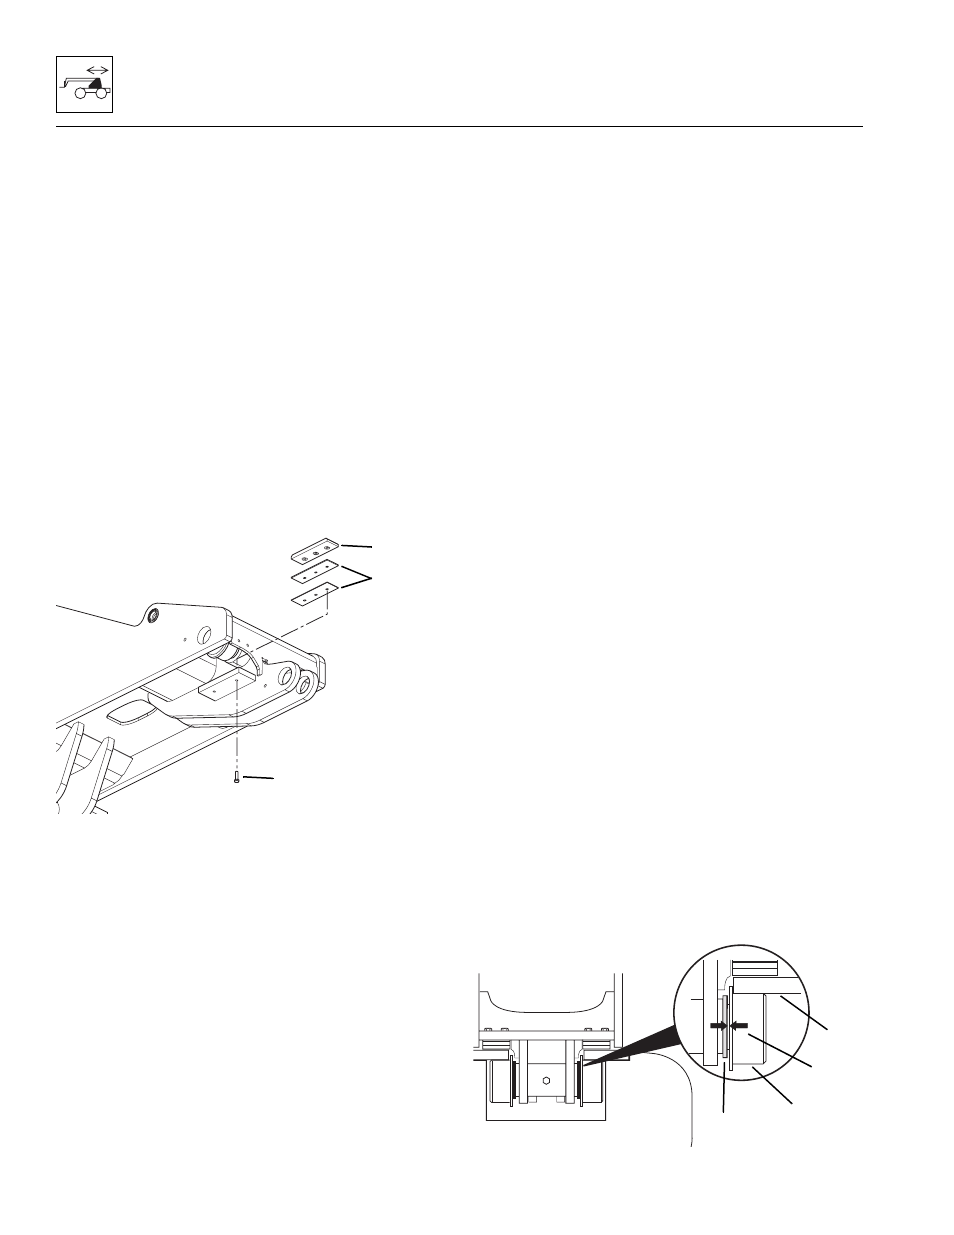
Front Upstop Wear Pad Replacement
Note: The attachment should remain attached to the
quick attach for this procedure.
1. Park the vehicle on level ground. Place the travel
select lever in the (N) NEUTRAL DETENT position,
engage the parking brake switch and raise the boom
to a horizontal (level) position.
2. Leave the transfer carriage completely retracted.
3. Fully extend the boom. The attachment must remain
slightly off the ground. Turn the vehicle OFF.
4. Remove the two capscrews (1) holding each wear
pad (3) to the plate under the rail at the front of the
transfer carriage.
5. Coat the capscrews (1) with Loctite
®
242 (blue). Place
the new wear pads with original shims (2) in place
and secure with the two capscrews (1). Torque the
capscrews to, 21 - 38 lb-ft (29 - 52 Nm).
11.3.10
Rear Roller Gap Check
Note: The attachment should remain attached to the
quick attach for these checks.
1. Park the vehicle on level ground. Place the travel
select lever in the (N) NEUTRAL DETENT position,
engage the parking brake switch and raise the boom
to a horizontal (level) position.
2. Fully retract the boom and fully retract the transfer
carriage. Shut the vehicle OFF.
3. This procedure will require the gap check to be
made in three separate locations. Transfer carriage
all the way retracted, transfer carriage all the way
forward and the transfer carriage moved forward
about halfway.
4. With the transfer carriage all the way retracted, use a
rawhide hammer to tap the rollers (4) against the
rails (5). Check the gap (6) between the roller and
the existing shims (7) with a feeler gauge. Check
both rear rollers and record the gap on each side.
5. Start the engine and move the transfer carriage all
the way forward. Shut the vehicle OFF. Use a
rawhide hammer to tap the rollers against the rails
and again check the gap (6) between the roller and
the existing shims of each roller with the transfer
carriage in this position. Record the gap of each
roller.
6. Start the engine and move the transfer carriage
about halfway back. Shut the vehicle OFF. Use a
rawhide hammer to tap the rollers against the rails
and once again check the gap (6) between the roller
and the existing shims of each roller with the transfer
carriage in this position. Record the gap of each
roller.
7. Find the location that had the smallest gap. This is
the position that the roller gap will be adjusted to, if
necessary. The maximum total gap of both sides
should not exceed 0.08" (2 mm).
8. If the total gap is larger than 0.08" (2 mm), the rollers
need to be shimmed.
MU1800
1
2
3
OU0970
4
5
6
7