Modify patterns – Adobe Illustrator CS3 User Manual
Page 198
ILLUSTRATOR CS3
User Guide
192
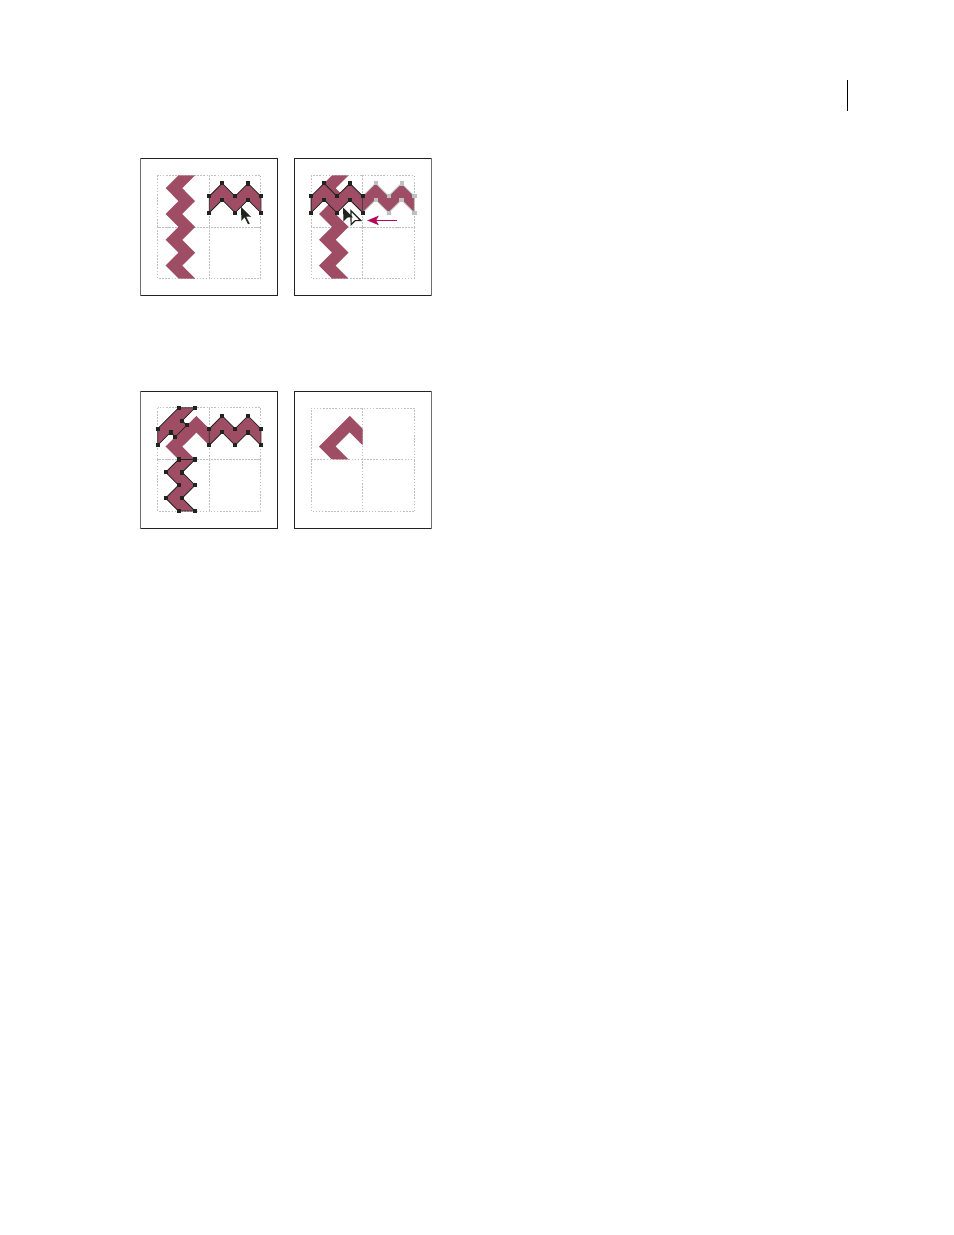
Copy (left) and move upper right tile over corner tile (right).
9
Edit the corner tile so that its artwork lines up vertically and horizontally with the tiles next to it. Select and delete
any portions of the tile that you do not want in the corner, and edit the remaining art to create the final outer corner tile.
Deleting unnecessary elements (left) produces a final outer corner tile (right).
10
Select all of the tile parts including the bounding box.
11
Save the new pattern as a swatch.
12
Double-click the new pattern swatch to bring up the Swatch Options dialog box, name the tile as a variation of
the original (for example, use the suffix “outer”), and click
OK.
See also
“Create or modify brushes” on page 169
Modify patterns
1
Make sure that nothing is selected in your artwork.
2
In the Swatches panel, select the pattern swatch you want to modify.
3
Drag the pattern swatch onto your artboard, and edit the pattern tile on the artboard.
4
Select the pattern tile, and Alt-drag (Windows) or Option-drag (Mac OS) the modified pattern on top of the old
pattern swatch in the Swatches panel.
The pattern is replaced in the Swatches panel and is updated in the current file.
See also