Adobe Illustrator CS3 User Manual
Page 182
ILLUSTRATOR CS3
User Guide
176
Creating an opacity mask
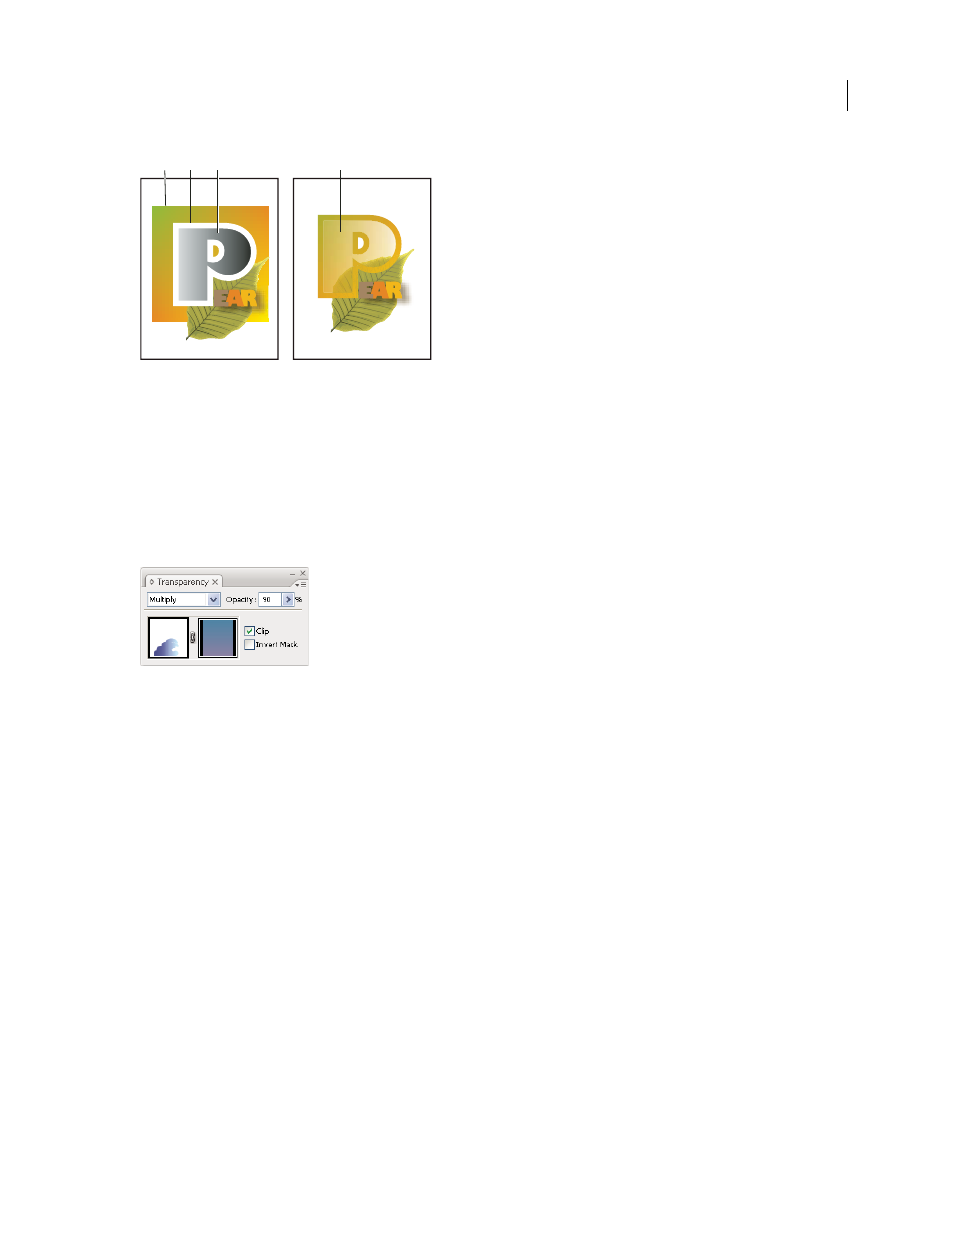
A. Underlying objects B. Opacity mask artwork C. Masking object filled with black-to-white gradient D. C moved over the area of B and
masking B
When you create the opacity mask, a thumbnail of the masking object appears in the Transparency panel to the right
of the thumbnail of the masked artwork. (If these thumbnails aren’t visible, choose Show Thumbnails from the panel
menu.) By default, the masked artwork and the masking object are linked (as shown by a link between the thumb-
nails in the panel). When you move the masked artwork, the masking object moves along with it. However, when
you move a masking object, the masked artwork doesn’t move. You can unlink the mask in the Transparency panel
to lock the mask in place and move the masked artwork independently of it.
Transparency panel displays opacity mask thumbnails: left thumbnail represents the opacity mask, right thumbnail represents masking objects
You can move masks between Photoshop and Illustrator. Opacity masks in Illustrator convert to layer masks in
Photoshop, and vice versa.
Note: You cannot enter isolation mode when working in mask-editing mode, or vice versa.
For a video on working with opacity masks, see
.
See also
“Printing and saving transparent artwork” on page 417
“Targeting items for appearance attributes” on page 347
Create an opacity mask
1
Select a single object or group, or target a layer in the Layers panel.
2
Double-click directly to the right of the thumbnail in the Transparency panel.
3
If the thumbnail isn’t visible, choose Show Thumbnails from the panel menu. An empty mask is created and
Illustrator automatically enters mask-editing mode.
4
Use the drawing tools to draw a mask shape.
5
Click the masked artwork’s thumbnail (left thumbnail) in the Transparency panel to exit mask-editing mode.
A
B
C
D